Saturday, 12 May 2018

Full Thrust: The Pirate's Lament

Introduction

One of the other members of the local games club (Helensburgh Alternative Hobby Association, HAHA) has recently purchased quite a large fleet of starship models from Brigade Models.  Indeed, I think that several club members may have dipped their toes into these waters recently.  Could it have anything to do with the games of Full Thrust that I have hosted there on Thursday evenings?  Maybe.


A Royal Navy cruiser squadron: heavy cruiser Conquest (?) in the background and light cruisers Crusader and Cutlass in the foreground.
Anyway, J. was keen to try out his Royal Navy and so I set up an Escalating Engagement game.  I've played this scenario once before (it's described here) and that encounter ended up being a very uneven fight.  Would it play out any differently this time?  Read on to find out...


The Forces

  • Royal Navy: a mixed force of cruisers with a few destroyers and other escorts, using the stats for GZG's New Anglian Confederation fleet.  In other words, decent shields, a fair number of beam batteries and some torpedoes.  Also 1,000 years of tradition to uphold...
  • Orion Pirates: An eclectic mixture of light and medium ships with quite a variety of weapon types: regular beams, needle beams, salvo missiles - and a pair of light carriers.
    I suspect that this group thought they were chasing a merchant convoy, rather than engaging in a stand-up fight with a regular navy.  Pirates aren't really about taking risks!

The Game


The thing about the Escalating Engagement scenario is that you cannot be sure which forces will arrive, or where they will appear.  The exit from warp/FTL is particularly hazardous; we were playing the optional rule that a roll of '6' could result in a very bad exit, way off the intended target.

So, here's what happened on turn one:
  • A Royal Navy cruiser squadron dropped out of FTL in a commendably neat formation.  Their navigators were obviously on the ball as there was very little drift between the ships.
  • The pirates were a bit more sloppy!  One of their corvettes was on target, but a light cruiser almost missed the table (and therefore would have been ruled to be lost, broken down, recalled or otherwise absent for the rest of the game).
    Worse (much worse!), the escort carrier Vengeance overshot the entry point dramatically and [a] took minor damage for hitting debris from a nearby asteroid field and [b] was now right in front of the surprised-but-delighted trio of enemy cruisers.


On turn 2, more ships warped in.
  • A Royal Navy strike cruiser and her consort arrived a bit ahead of the previous squadron, nice and tight.
  • For the Orion pirates, their second carrier misjumped and ended up in another sector (about 30" off the table!).  Her small escort ships did arrive pretty much at the intended point, though.


As the RN cruiser squadron turned towards her, the Vengeance was doomed - and she knew it.  There was no way that the light carrier could escape from 3 cruisers at almost point blank range!  Still, I wasn't going to give up without a fight: she started by taking evasive manoeuvres, though this had limited effect.


She launched her fighters; one pirate squadron attacked each of the RN light cruisers.  This was something of a disaster, as the first CL shot down 5 of the 6 attackers with a series of d6 rolls of '6'.  The surviving fighters caused only minimal damage.


Finally (and somewhat in desperation!), the Orions revealed that there was a traitor somewhere in the Royal Navy fleet.  There was only a very small chance that this would gain anything immediately useful; the gamble didn't pay off.


Finally, the RN cruisers took their shot.  With 3 cruisers firing at close range, the Orion carrier didn't have a hope and was blown apart.


On turn 3, there were more arrivals:
  • A very welcome Orion heavy cruiser and her escorts popped out, somewhat apart from the other pirate ships.
  • For the RN, a destroyer and frigate warped in, well out of harm's way [whew!  At least it wasn't their battleship!]
This gave each side 7 ships, with no more reinforcements to come.  However, the Royal Navy had heavier vessels on average and arguably they were in tighter formations and better positions.

Before these forces could get to grips properly, there were a couple more events:


An Orion light cruiser was buffeted by space turbulence and knocked off course.  Fortunately, she just missed the nearby asteroid field, though not by as wide a margin as had been intended.


...whilst on the other side of the table, a huge comet appeared [I was hoping that it would appear on the other table edge - in the middle of the RN fleet - and cause some chaos there, but it wasn't to be].


With no possibility of turning to flee at such a short engagement range, the Orion fleet had just one hope.  If they could cripple or destroy the RN's lead strike cruiser before their other ships came into short range then the odds would be a bit more even.  Failing that, they'd have to run through the Royal Navy's fleet to escape out of the other side.


At very short range, the Orion fleet did indeed inflict heavy damage to the RN strike cruiser and her accompanying destroyer, though not enough to destroy either ship.  The destroyer crew did abandon ship after a crippling life support hit, mind.

It wasn't enough: the Royal Navy ships also handed out a lot of hurt to the pirates.  Two torpedoes from the strike cruiser hit the Etna and scored 11 for damage (on 2d6); this left the Orion heavy cruiser reeling and out of control, with most of her weapons and other systems knocked out.  The Orion destroyer was also handled very roughly, leaving her barely spaceworthy.

The pirate fighters continued to harass what looked like the easier targets within the RN fleet, but found their numbers being slowly whittled down by flak for little gain.


As the pirate ships accelerated hard to try and escape, their last fighters made a desperate attack on the RN cruiser squadron.  In this they were aided by yet another Orion agent on the enemy ships, who tried to sabotage the point defence systems.  It was all for naught, though: the cruiser's security teams prevented the sabotage and the fighters achieved very little apart from losing even more of their number.


In the end, only the Orion light cruiser Manticore escaped, though she was somewhat damaged after charging through the RN fleet.  All the other pirates had either been destroyed already (some of them quite spectacularly, due to Warp Core failures), or were totally gutted & defenceless and were about to be destroyed.  It was a black day for that particular nest of villains!

Conclusion

Losses were very unequal in this game:
  • Orion pirates: all ships bar two (the CL Manticore and the second light carrier which never made it on to the table) were destroyed.
  • Royal Navy: no ships were destroyed, although a destroyer was abandoned and some of the lighter ships had quite severe damage.  From memory, their heavy cruiser didn't even take a hit.
At first glance, this suggests that the fight was very unequal.  Overall, that is probably true; the Orions were really hurt by the loss of both their carriers (albeit for two very different reasons).  However I felt that they did have a chance - a slim chance, but nevertheless a real one - of cutting apart one separated group of RN ships before they could be reinforced.  Or perhaps I'm just dreaming and there was never any realistic prospect of this happening...

Tuesday, 8 May 2018

Salad Box Science Base

Introduction


Usually, I take a packed lunch into work.  Occasionally, however, I buy something at a nearby supermarket instead.  This is especially common during school holidays, when the kids don't need a packed lunch themselves and there seems little point in getting out bread and fillings for just me.

Why am I telling you this?  Well, some of the supermarket pre-packed meals come in interesting-shaped containers...


The Basic Salad Box Building

If you clean the packaging, cut off the lid and turn the box upside down then it looks a little bit like a science fiction prefab building.  At least, that's what I thought when I first did this.


Here's what I did next:
  • Fix the box to a square of thin MDF, to act as a sturdy base for the model.
  • Add some doors and windows.  Mine came from Laser Cut Card, a South African outfit who make some very suitable sci-fi fittings.  I imagine that other companies make such things as well, though.
  • Fix some textured plasticard to the roof.  This is intended to serve two purposes: (a) add a bit of detail to a large, flat surface by mimicking solar panels  and (b) cover up the recycling marks that the manufacturer had embossed on the bottom of the box.
  • Glue some sand around the edge of the base; this helps to cover the joint between the box and the MDF.
Note that this was the first salad box I converted.  There are 2 things wrong with it which I corrected on subsequent builds:
  1. I tore the original labelling off by hand, but this left some residue and fragments of paper.  For later boxes, I followed this up by using "Sticky Stuff Remover" to clean the plastic completely [yes, this is a real product.  Look in your local hardware or automotive store, or possibly in a large supermarket].
  2. I used far too much glue when attaching the solar panel and this has softened & warped the plastic.  It's quite obvious on this model, especially in the painted photos later on.  For later builds I was much more careful to use just enough glue and no more!

A more complex Building


I didn't want all the buildings in my science colony to be identical, though equally they all had to have elements of similarity [as if they're all based on a small number of prefabricated parts].  For the command centre, I decided to add a tower from another piece of similar packaging.


Obviously, cutting the salad box to fit around this tower wasn't particularly easy!  There was a gap of up to 3mm in places between the two parts, so I glued some lengths of balsa strip along the inside of the joint.  Even these weren't all in quite the right place, though!


Finally, with a couple of applications of filler, a reasonably stable seal was made and the model could be decorate with doors, windows and solar panels.


Painting the Base


The recipe for this is quite simple:

  1. Firstly, undercoat in white!  I wanted very much to go for a Star Trek "Federation" look, so mostly white with royal blue trimmings seemed appropriate.  By spraying white over the entire building, I saved a lot of work.
  2. Paint the door and window frames in a neutral colour.  I chose a mid-grey which happens to have a hint of green in it.
  3. Highlight the edges of the doors and window frames in pale grey.
  4. Paint the solar panels in dark blue.
  5. Wash the solar panels with bright gold.
  6. Paint the windows (including the porthole on the door).  I chose to make them highly reflective and show the surrounding planet, though this could have been done differently to hint at what is inside.
    I'm not going to elaborate on painting windows since there are some very good tutorials on other websites, but I will say this: it didn't take very long at all.  Indeed, it probably took me longer to paint the window frames than the windows themselves.  Believe me or not...
  7. I added some home-made decals on either side of the door, to identify the building.  On the left is a "Star Trek style" door label, with both a number and a 3-letter identifier ("SCI", "MED", "REC", "HAB"...).  On the right is a Federation logo, though I think this particular one comes from the Halo universe rather than Star Trek.  Hey, I'm not fussy about mixing genres a bit!


Conclusion


As you can see below, I've now got several of these buildings.  It's probably enough for a simple outpost/colony on some remote planet or moon, though making more would be trivially easy.


If anything, I should perhaps have some other scatter terrain to flesh out the base.  Hmm, what about a launch pad, water collection device, communications rig, garage or the like?  Anyone know any good packaging for these?

Wednesday, 2 May 2018

Recently Finished...

Introduction

I know how much my readers like eye candy, so here's a selection of models that I've completed fairly recently.  There's nothing particularly common to them, other than they're all 28mm figures.

Congo


First up is Uguah, the fictional witch doctor who comes with the "Mungo Mah Lobeh" expansion book for "Congo".  He's a seemingly cruel old man but a powerful sorcerer; he provides the main opposition for Mary Kingsley, the explorer upon whose exploits the campaign is based.

Despite his near-naked state, the model is covered with details.  I just wish that they were more visible, as his hunched pose hides much of the work, including the grotesque face that he is pulling!


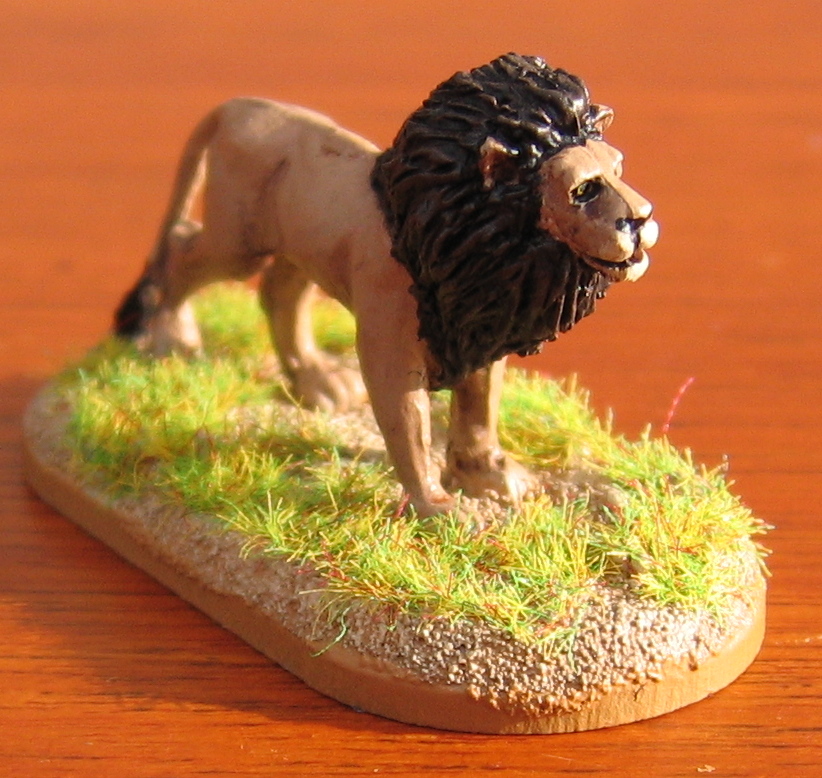
Next up is a fairly generic lion, also from North Star.  I can never seem to find my existing lion miniature when I need him, so having an extra should help.


Finally (in this section), I have some dugout canoes.  These, like so many of my models, were undercoated many moons ago but only completed recently.  I've added some scratch-built paddles and some baskets (one empty, one containing fish) as I felt the canoes were a bit bare without this.


Dreadball


Here are two more star players for my Dreadball teams:
  • The Excavator is a ForgeFather or Brokkr mining robot.  Apparently there's nothing in the rules that says they cannot bring it on to the pitch!
  • A'Teo Adysi is an Yndij: a primitive species of hunter from some remote planet.  It seems that his strength and lightning reflexes make him a very good player.

Neanderthals


In our first game of Paleo Diet, all of the hunters were armed with spears.  That's all very well, but perhaps a bit dull.  To fix this, I bought some Lucid Eye Neanderthals to add to the tribe.  Mind you, they're from a different manufacturer and are painted in a different style from my existing Neanderthals so I don't yet know if they'll fit in very well.

One model had a club, so that was fine.  The other two both had spears, though.  I converted one of them into a fire-wielder by cutting down the spear and adding some flame from green stuff.  He's got a flint knife as well, so he'll be all right...


Viridians

I recently stumbled across a Facebook group called Void 1.1 Nexus (not sure if membership is required to see anything much), which is full of enthusiasts for this old game.  They're running a painting competition just now to encourage people to complete old (or new) figures that may be lying around.

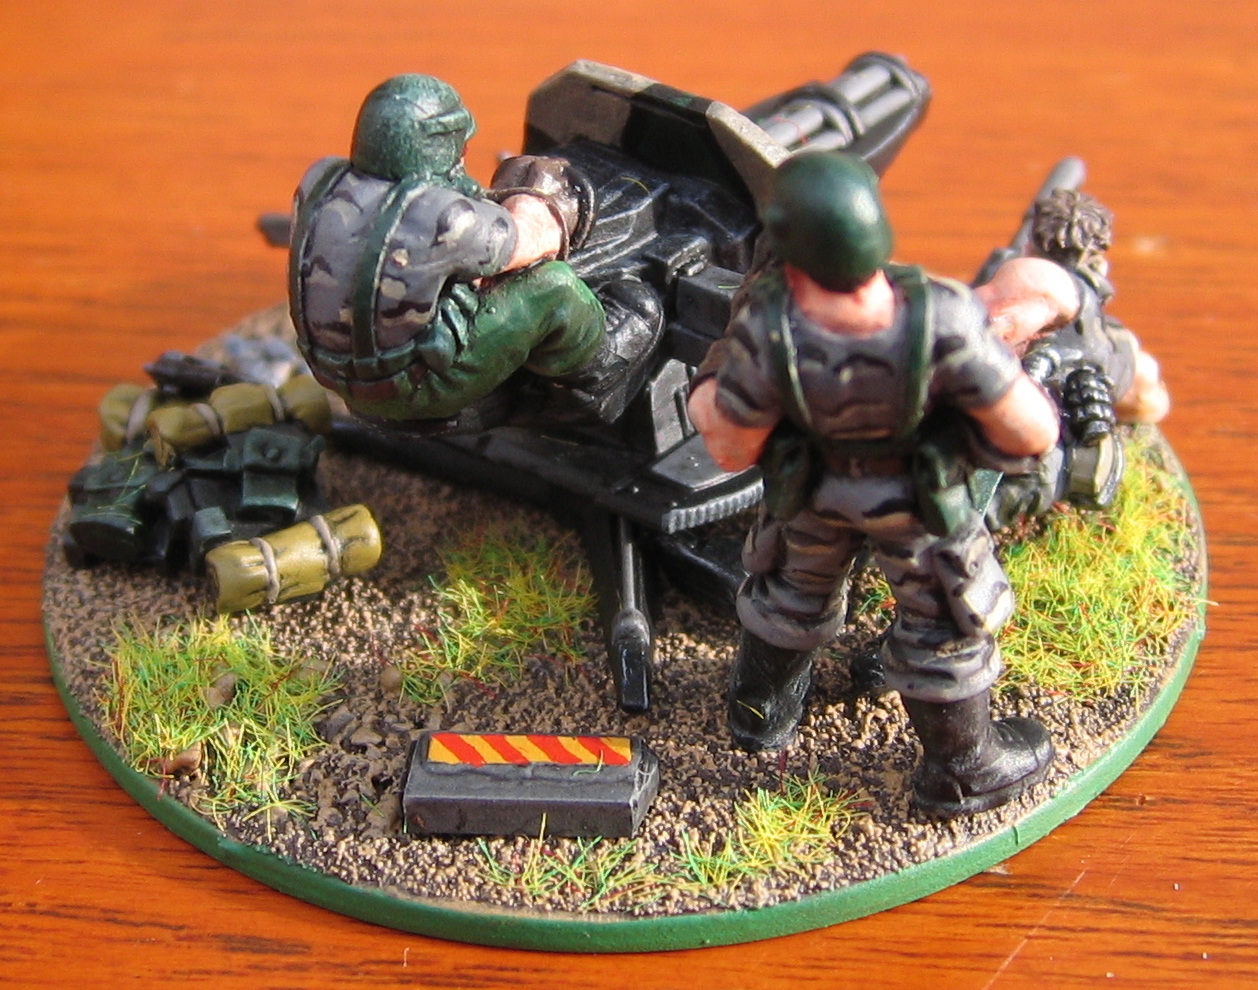
Well, I have a very large number of Void 1.1 miniatures lying around, mostly still in packets.  I thought I'd get some out and paint them, without necessarily entering the competition.  Here is the first batch to be finished (and yes, I was persuaded to enter them in the competition after all):


Viridian chain gun on a ground mount


Viridian Commando squad


Conclusion

Well, it's another fairly mixed collection of painted figures; I hope you like them!  Not much more to be said, really...

Monday, 30 April 2018

Batrep: The Magnificent Six

Introduction

Some years ago, I ran a game of The Rules with No Name that was vaguely reminiscent of the film "The Magnificent Seven".  If you're interested then the outcome can be seen here.  Last week I decided to do something very similar at the Helensburgh games club.  This is what happened:

The Scenario


The game setup was very similar to the previous version, but not quite identical, as follows:

Forces

We had 3 players, [plus me, running the bad guys], so each player controlled 2 Americanos.  There was a 7th Americano figure; this was held in reserve to replace the first hero to be lost [there's always one who gallops in to help his friends after the battle has started, having initially said that he wanted nothing to do with the fight!].

All of the 7 attackers were either Legend or Shootist class ["level 4" or "level 3", for anyone who doesn't know The Rules with No Name]; the banditos were all either Gunman or Citizen ["level 2" or "level 1"].

Morale

I decided to keep things simple and not use Nerve tests:
  • The Americanos would continue to fight as long as they were alive.
  • Citizen-class bandito would be put out of action by a single wound of any type.
  • A Gunman-class bandito would be out of action after 2 wounds - assuming that the first hit wasn't fatal.

To give the Americanos even more of an edge, I included a Bystander card in the event deck.  My initial thought had been that this would give a turn to whoever had been the longest without one [i.e the character whose activation card was not drawn for the longest period].  However, after just a couple of turns this was obviously not working well; it was very hard to work out who should get the action.  Instead we changed it so that the players could choose between them which of the Americanos should get the action from the Bystander card; this worked much better.

Bandito Reinforcements

There were 6 buildings in the town:
  • A bandit would appear from a random building at the start of every turn - unless the indicated building had been "cleared".  If the building had been cleared then no bandito would appear that turn.
  • To clear a building, an Americano needed to spend 2 actions at the front door without being involved in a fight.

Victory

Obviously, when [if!] all the 6 buildings had been cleared then no more bandits could appear and the game would end.  Victory would then be determined thus:
  • If more bandits escaped off the board than there were Americanos still alive then the bandits would win.  In this case, the banditos could raise another gang and continue their life of crime.
  • If fewer bandits escaped than the number of surviving Americanos then the Americanos win.  The heroes could hunt down any escaped banditos and bring them to justice, or perhaps to an unmarked grave.
  • If the numbers were equal then it would be a draw.  Nobody wins...
Simple, really.


The Game


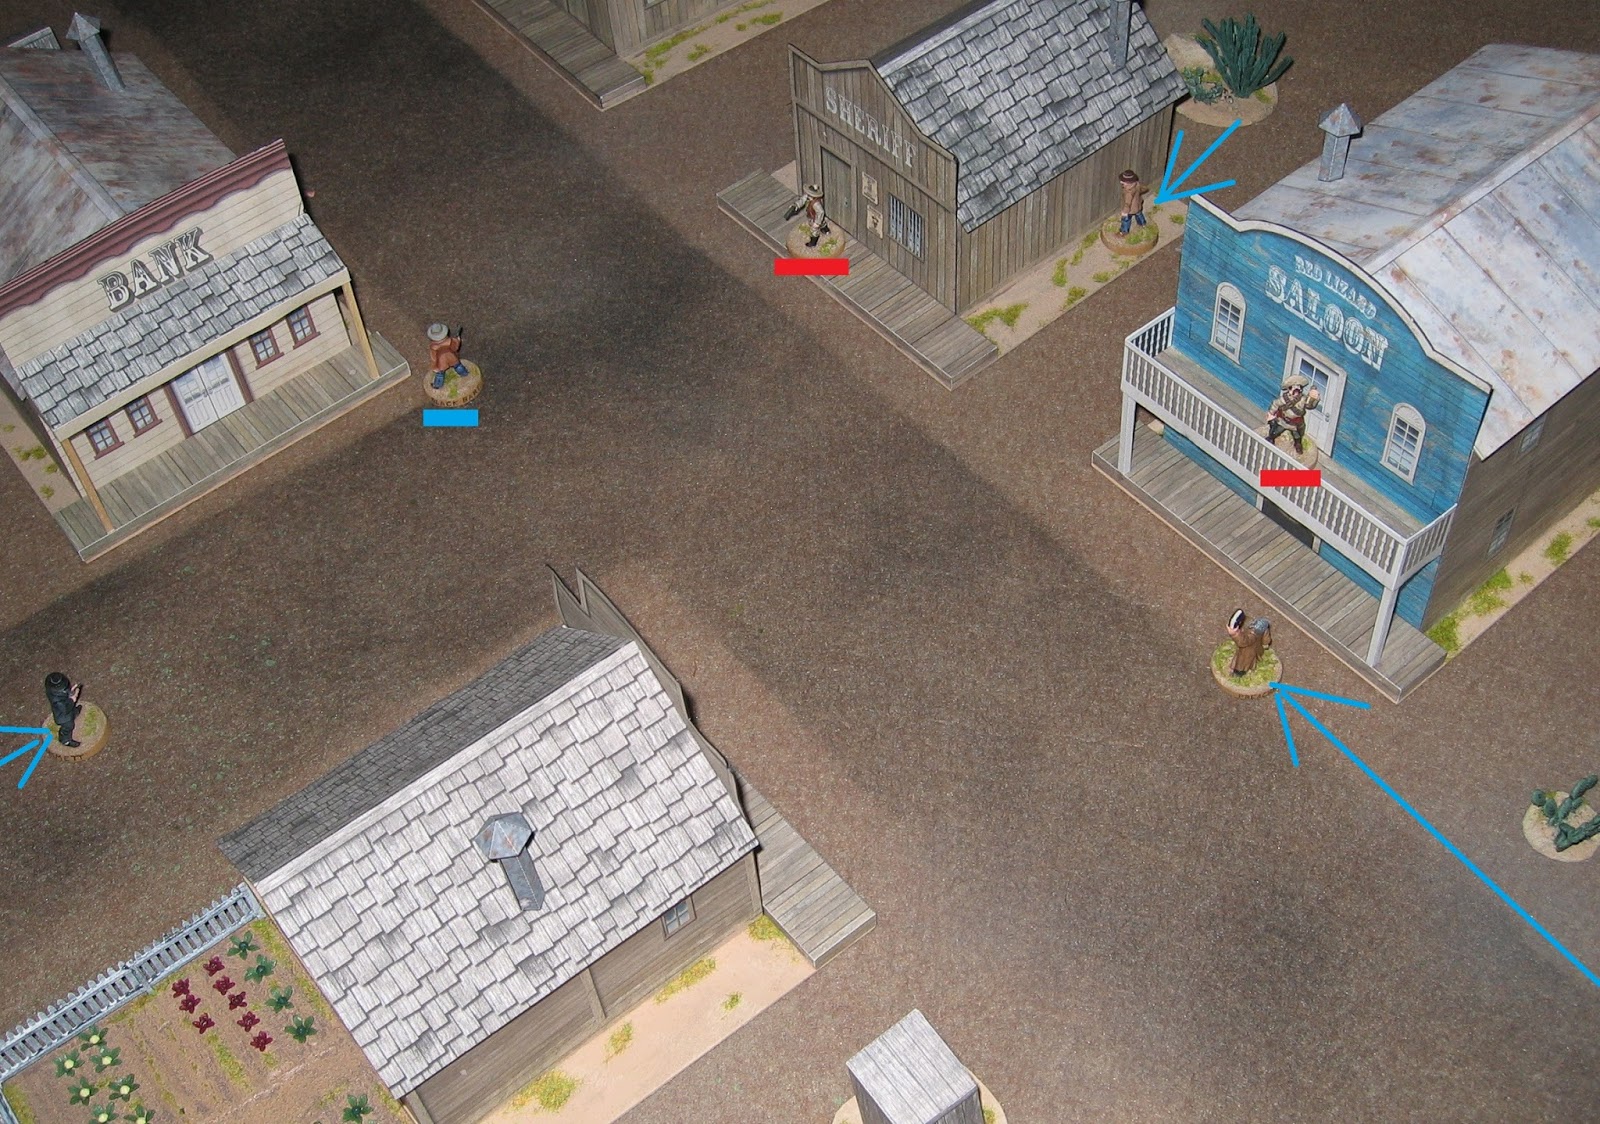
First blood went to Black Bart.  He saw a bandito trying to take cover and ran up the main street after him before shooting him down.


This stirred things up a bit; banditos started to appear from windows and doors all over the town.


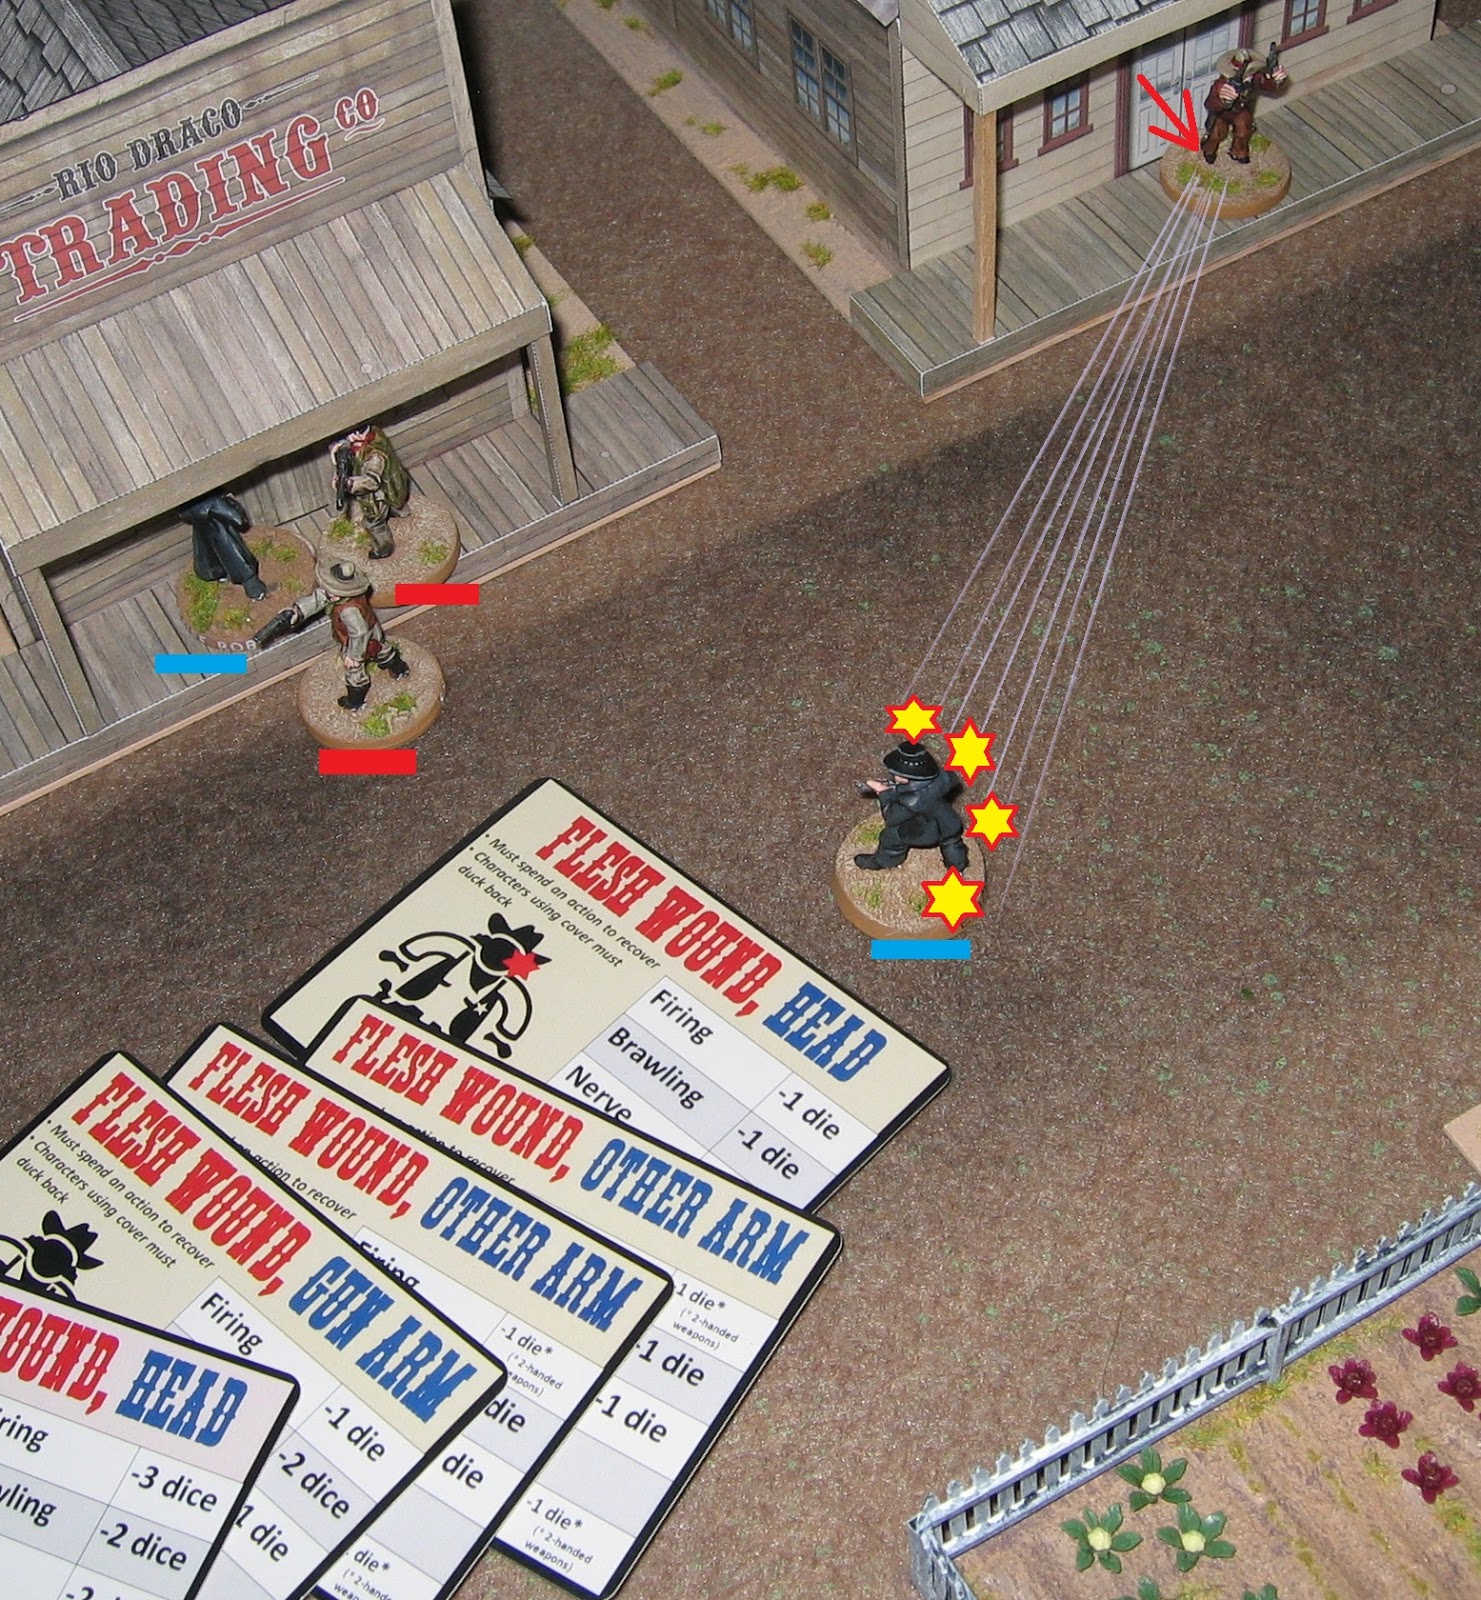
Too much happened too quickly for some of the characters.  A Mexican rifleman appeared out of a doorway behind Emmett, took aim and shot him in the back.  Emmett collapsed in the middle of the street with a serious head wound.


In the centre of the town, Blondie and Black Bart traded shots with a pair of banditos who had appeared from the sheriff's office.  Blondie got his man, but Black Bart was shot dead by his opponent!


At about the same time, a couple of banditos appeared out of the saloon.  Preacher Adams didn't seem to notice them as he strode up the street, but the bad guys saw him.  One pistol shot was all that was needed to fell the Americano, badly wounded and unconscious.


Blondie got revenge on the man with the rifle, but another bandito appeared immediately from the sheriff's office.  This new bad guy was singularly inept: he tried to shoot the hero but jammed his gun spectacularly.  For several turns thereafter, he tried to fix it while the Americano took deliberate shots at him; all of which missed.  I guess that Blondie was laughing too hard to shoot straight!


About this time, a lot of brawling started to take place.  First up was Jesse; the big man had approached the Dry Goods store to try to clear it when a bandit appeared from the inside.  Now here's the thing: Jesse is a hand-to-hand specialist.  It only took a single attack to leave the Mexican sprawled in the dirt, unconscious.


Sheriff Roberts was also trying to clear a building.  He unloaded his shotgun rather messily into one bandito and charged into melee with another.  Neither could get the upper hand for some while.  Even when a second bandit joined in, the best they could do was knock Roberts down, once.  Eventually, the Americano triumphed and knocked out both adversaries, but this took much of the rest of the game.


Remember Emmett?  He had been shot very early in the game, but finally came around and staggered to his feet.  Unfortunately, this was just as Two-Gun Rafael came out of a nearby building.  The bandito blazed away and amazingly rolled two '6's and two '1's for each gun.  He ran out of ammunition, but scored four hits on the poor Americano to add to the existing head wound.  We all held our breath as the damage was resolved; amazingly Emmett was still standing (though he was swaying a bit from blood loss and couldn't really use either arm).


So, this was the situation towards the end of the game:
  • Sheriff Roberts was wrestling with 2 banditos, whom he eventually defeated.
  • Jesse put paid to Two-Gun Rafael and then cleared the bank.
  • Blondie held the middle of the town.  Having put a number of banditos out of action near the sheriff's office, he shot one of the gunmen on the saloon balcony.  It was decreed that this casualty did the classic "fall off a high place whilst clutching a chest wound" dive to the street below.
  • Preacher Adams was still unconscious; he had lain there for most of the game.
  • Deputy Rex had been pinned down behind an outhouse by the gunmen on the saloon balcony for most of the game.
  • Emmett staggered from one building to another, checking that they were clear of bandits.  He was so badly hurt that he couldn't do much else, but still wanted to be useful...


Just as Emmett reached the gun shop, two fresh banditos appeared from within.  They must have been scared by the bloodied, corpse-like appearance of the Americano as they failed to hit him in several rounds of melee.  Eventually, Sheriff Roberts came to assist and beat up the bad guys, thus allowing Emmett to clear yet another building.


Meanwhile, Blondie still hadn't cleared the sheriff's office.  As he was about to attempt it, yet another pair of banditos came out of the door [what is this - a clown car?  Just how many bad guys are in there?].
  • Blondie was shot by one opponent but used his Hard as Nails skill to ignore the hit; he then killed his attacker.
  • Jesse attacked the other Mexican, but astonishingly the bandito felled the big guy and gave him a nasty wound.  However, seeing the [finally!] recovered Preacher Adams running up the road screaming about hellfire and damnation, this last bandito took to his heels and ran for it.


The bandit had almost made it out of the town when the Preacher came thundering after him, intending that not even one enemy should escape.


Adams must still have been suffering from his earlier wound, though.  In a brief scuffle, Cesar swung his rifle as a club and split the Americano's skull open, before heading off into the desert.

At this point, we called the game.  All the buildings had been cleared and although there were several unconscious banditos lying about the town, we were certainly not going to play on just in case any of them ever woke up (and were promptly executed?).


Conclusion

The Americanos won quite handsomely, by the victory conditions laid out before.  Five of the seven were still alive, whereas only one bandito escaped.  But they weren't unscathed:
  • Sheriff Roberts: unhurt
  • Deputy Rex: lightly injured (?)
  • Emmett: very badly injured indeed: hit multiple times on the head and both arms.
  • Preacher Adams: dead.
  • Black Bart: dead.
  • Blondie: shot, but not bothered by the wound.
  • Jesse: badly injured.
Depending on your view of Old West battlefield medicine (i.e. whether you think that the badly-injured characters would survive!), the Americanos lost between 2 and 4 of the original seven.

Note that I didn't document every bandit death in this account; that would just have been tedious.  Also note that bandit figures were recycled, so it's not necessarily the same guy in all the pictures.

Putting all the extreme violence aside, it was a fun game, enjoyed (I think) by all the participants!

Monday, 23 April 2018

Full Thrust: The End of the World

Introduction

Star-rimed space whale,
Cosmic nomad, absolute alien,
Devourer of planets, eternal wanderer, 
Beware!  The Kraken approaches!


I created a scenario for Full Thrust some time ago in which an uneasy alliance of starships attempted to destroy or divert a space monster that was intent on destroying a rich planet: http://colgar6.blogspot.com/2013/01/full-thrust-its-life-but-not-as-we-know.html .  Astonishingly, this was over 5 years ago and I haven't reprised it since - until now!


The Scenario

In short, 2 factions are rivals for influence at the neutral planet of Trondacolmakus.  The Magister of Trondacolmakus has made it clear that he will not be happy if either force should attack the other.  Peaceful negotiations are well advanced when an urgent message is received from a scout: a space monster is approaching and making directly for the planet.  Its intentions are unknown, but if it tries to siphon off the atmosphere, lay eggs on the surface or take a bath in the oceans then it would be a disaster for the planet's population.


The Magister begs the visiting navies to drive the monster away.  Together they have more than enough firepower to defeat it - but clearly the side with the most surviving forces will have an advantage in the continuing diplomacy.  Can the Ferengi and the Federation cooperate well enough to defeat the monster?  Or will narrow self-interest cause either side to hold back and give the monster its chance to ravage the planet?  Read on...


The Battle


The Kraken advanced steadily, only to be stung by early long-range phaser fire from a Ferengi vessel.  Infuriated, the monster launched a huge plasma bolt at the gap between two asteroid fields, hoping to catch 4 assorted cruisers in the huge explosion.

Sadly (for the Kraken, at least), only the Federation escort cruiser Phoebe was caught in the blast; the other targets were moving slower than anticipated.  Phoebe's shields did sterling service and saved the ship from total destruction; instead she was just badly damaged.


A smaller, but still potent, plasma bolt was fired from the monster's side at the Ferengi ships which were attempting a wide flanking move.  The opposing player was having none of that; he dissipated the threat with a handy Torpedo Malfunction event card.


The Kraken plodded on, swatting the occasional frigate without even really noticing them.  It reloaded its prow plasma and spat out a bolt at the collected cruisers in front of it at very short range.


This time, there was no mistake in its aim; all 4 of the enemy ships would be hit.  "All power to the shields!  Brace for impact!" roared the captain of the Ferengi battlecruiser Krayton [courtesy of a "Reinforced Shields" event card.  Honestly, the Ferengi player seemed to have all the good cards this game!].


It helped, but the shock wave from the class-6 plasma bolt was immense.  Endeavour disintegrated under the force, both Krayton and Danube were heavily damaged, while the already-hurt Phoebe only survived through a superb piece of damage control [a "Legendary Engineer" event card caused the warp core to be damped down instead of going supercritical and exploding].


The Kraken had a clear run between the asteroids now.  One of the cruisers in front of it was so heavily damaged as to be combat ineffective and the other two were facing the wrong way; they would have to turn laboriously before they could pursue the beast.

There were a pair of Ferengi warships (a light cruiser and a destroyer?) and several smaller ships hovering around in the distance, but these would need to move quite quickly if they were to engage the creature.


Of course, nothing is ever a certainty.  As the Kraken passed the Ferengi battlecruiser, a few weapons from the latter were able to bear.  A short volley hit the Kraken right up the backside and caused it to shudder with pain. [In game terms, the shell armour was penetrated and the damage caused triggered a threshold check.  This damaged the creature's "engines" and therefore reduced its available thrust]

A swift calculation revealed that with its reduced thrust, the Kraken was travelling too fast to be able to slow down before it hit the planet.  If its roll for damage control failed to repair its engine then it would have to turn slightly and skim past the planet at too high a speed to enter orbit - and therefore it would be unable to complete its mission.

The game therefore turned on this single roll.  Fortunately for the Kraken [not so much for the humanoids], it was able to repair the damage, or at least to overcome the pain and use the damaged system normally.


Now that it could decelerate as originally intended, the Kraken performed a 6" microjump straight forward [via a "Picard Manoeuvre" event card.  Hah - the Ferengi weren't the only ones to hold some interesting cards!].  This opened up the distance between the monster and its pursuers nicely, which was especially important now that it had its back to them [and therefore couldn't bring any of its weapons to bear].


The event cards were coming thick and fast now [indeed, I don't think I've ever seen a game of Full Thrust where so many cards were used!].  Firstly, the Kraken played an "Organian Peace Treaty".  A bunch of super-beings from another dimension turned out to be whale-lovers; they forbade anyone to fire at the injured animal.


This respite allowed the Kraken time in which to position itself near the planet's upper atmosphere ready for spawning.  The Organians soon lost interest in protecting the space beast, but before the monster could do anything else the Federation played a "Static Warp Bubble" on it, thus causing it to be time-stopped for a complete turn.


Initiative on the last turn was critical!  If either the Federation or the Ferengi beat the Kraken then they still had ships which could hurt it badly [especially as the Kraken was a mere 2 damage points off a further threshold check].  On the other hand, if the Kraken won then all it had to do was to "fire" on the planet to win the game.

This time, the monster won.  It spawned in the upper atmosphere and the thousands of eggs caused havoc on Trondacolmakus.  Large areas of the planet were rendered uninhabitable, whilst many others required a constant border watch to prevent infestation from the new badlands.  The resources needed to protect the population dragged the economy down to poverty levels unimaginable to the previously wealthy citizens and neither Ferengi nor Federation were particularly interested in trade deals with the inhabitants any more!


Conclusion

Sometimes you kill the monster and sometimes the monster gets you!  This was a very close-run game, where early losses didn't matter too much because the defenders could just bring in more ships.  Mind you, it wasn't really a place for corvettes or frigates; such small vessels had virtually no chance against such a huge attacker.

Had the monster been defeated then the Ferengi would probably have won, as they looked to have the larger of the remaining fleets.  But the monster wasn't defeated...