Wednesday, 11 September 2013

Plastic Apocalypse Survivors - Women

Plastic Apocalypse Survivors - The Women

A few months ago, I showed some of my builds from Wargames Factory's kit "Apocalypse Survivors: The Men".  Since then, they've released a matching set of female survivor entitled, amazingly enough, "Apocalypse Survivors: The Women".  It was my birthday recently so I treated myself to some of these newer models.  At least, I ordered the box - the family intercepted the delivery, wrapped the kit and handed it back to me on the big day.

This isn't intended to be a full review of "The Women", but here are a few quick notes:
  • There are enough parts to make 30 figures, consisting of 3 identical sprues of figures (each with 10 bodies, a choice of arms and a wide variety of heads) and 1 extra sprue of weapons and equipment.
  • The bodies are coded with letters on the sprue near them, from 'A' to 'J'.  Arms (& occasionally heads) are also coded and need to be fitted to the corresponding body.  This is partly so that sleeves match the rest of the clothing and partly so that the animation of the finished model looks good.  There was at least 1 mistake in the codes on the sprues in "The Men", so careful planning is a good idea.
[Edit: for a comprehensive review of "The Women", see here: http://thecolorblindmodelpainter.blogspot.co.uk/2013/09/review-of-wargames-factory-apocalyptic.html ]

Little Lucy and Big Bertha

Most of the women in this kit are healthy, slim adults, probably between 20 and 40 years of age.  I find that slightly disappointing as it doesn't reflect real-world demographics particularly well.  However, it's arguable that the older or younger or less fit individuals haven't survived whatever apocalypse has struck.  Or, more likely, Wargames Factory are pandering to a male audience who just like "babes".

Thankfully, 2 of the figures in the kit buck this trend.  Firstly there is the obligatory child; a decent model wielding a very big pistol.  The second woman can only be described as "plump" or worse, though I wouldn't say it to her face as she seems to know what to do with her rocket launcher.

Note that these 2 models have a restricted choice of heads because of their body shapes and sizes.

Sporty Types

The golf club is fairly common in zombie apocalypse figures.  It's well executed, though I do wonder about how it will survive the rigours of tabletop game, since the scale width of the club makes it very thin.  The tennis racket is nicely different, though possibly of little value to a survivor.  Still, I like to think that some of my models represent "Day 1" survivors who are just encountering the apocalypse and are still equipped with whatever they had at the time.  They can't all be heavily armed veterans!

Mixed Gunslingers

3 more women, this time ones who have acquired some significant firearms.  I don't really have a strong feeling about these: the sculpts and moulding are good, but heavily-armed gun babes just aren't my thing.

Shotguns and Pipe Bombs

On the left is a model where I suspect that the labelled arms do not match the correspondingly-labelled body.  I say this because the shoulders just don't seem right - a high right shoulder like that should probably have a raised arm to match, perhaps striking with a knife or machete.  It's possible that I made a mistake in reading the labels for these parts, but it just shows that care and planning are needed with these models.

I've nothing much to say about the middle figure, except that (to a British eye) a shotgun is a much more likely firearm for a civilian than anything automatic.

Lastly, on the right, we have my favourite model from this bunch.  She's dressed in baggy, casual clothes that look much more practical for the apocalypse than all the mini-skirts and tight trousers.  In her hand is a pipe bomb; I've fitted a satchel containing several more to her hip.  I just love the attitude that this model has: she looks completely unafraid of whatever situation is facing her!

Accessories

Note that a few parts have been removed from this frame already.
I have mixed feelings (mostly positive, mind) about the extra "accessory" frame included in this kit.
  • Wargames Factory are highly commended for putting any extras in the box at all, let alone such a full frame.  Brilliant!
  • The sprue is full of weapons.  There are at least 20 assault rifles of various types, 4 RPGs, 4 chainsaws, 10 shotguns as well as some backpacks, pouches and so on.  Possibly too many automatic weapons?
  • But: the frame doesn't have any mundane items (handbags, rolling pins, attache cases, sports bags, binoculars, cycle helmets...).
  • I really miss not having some arms with empty hands.  If you want to give any of these spare weapons to a figure, or if you just want an unarmed woman for a change then you'll need to carve away an existing weapon.

Conclusion

An excellent set, cheap and well sculpted & moulded - if you want heavily armed female survivors.  There are typically enough arm/weapon variations to make 20 different variant models, though I suspect that some more obvious repetition will creep in for models 21 through 30.  With a little conversion and some thoughtful use of colour schemes and of the many different heads, it would be possible to make all 30 models quite distinct, or indeed to disarm some or all of them.


Sunday, 8 September 2013

Full Thrust: Encounter at Felixis V

Introduction

The Klingon 14th Battle Squadron has been dispatched to the Kzinti border, where there are rumours that a hostile task force is trying to break through the frontier.  Both fleets have spread out their ships so they can search wider volumes of space.  Near the 5th planet in the uninhabited Felixis system, contact is made between the lead elements of the hostile squadrons.  Reinforcements are summoned immediately, but they'll take some time to arrive.  Which side will build up their forces quickly enough to overwhelm their enemies?

The Scenario

For this game, I decided to take the "escalating engagement" scenario from Battlefleet Gothic and adapt it for Full Thrust.  So, here's how it goes:
  • Each side chooses ships to a set number of points value.  Their fleet is then split into 4 separate groups.  Each group must have at least 1 ship in it, but the groups do not have to be of equal value (note that there is a risk in having highly asymmetric groups).
  • For deployment purposes only, the board is split into 1/3rds lengthwise.  The central 1/3 is neutral.  Each player places 4 "contact markers" in their own 1/3 of the board.
  • To start the game and at the beginning of each of turns 2 and 3, one group from each fleet arrives.  Note that only 3 of the 4 groups in the fleet will arrive by this means.  The 4th group is lost, delayed, recalled, breaks down or otherwise fails to appear.  I told you that there was a risk to making your groups widely different in capabilities!
  • The side which has lost the initiative resolves their arriving group first, followed by the initiative side.
  • To resolve an arrival, choose a group and a contact marker, neither of which have been tested before in this round and roll a dice.  On a score of 5 or 6, the group arrives at that point, following all the usual rules for FTL exit in the proximity of other objects.  On any other roll, the player must try a different group and contact marker pairing, until either he/she is successful or all groups/contact markers have been tested.  If the latter occurs then start again [ultimately, a 5 or 6 will be rolled and a group will be brought into the game].
  • Contact markers may be moved up to 12" after orders are written but before ships are moved, so long as they stay in their 1/3 of the table.  This is to prevent an unscrupulous opponent from parking frigates on all available entry points and causing your battleship to have a potentially catastrophic warp accident on arrival!

The Game

We played this scenario using my Klingon and Kzinti fleets, to a value of 1000 NPV.

Klingon 14th battle Squadron

  1. Relentless (Battlecruiser, 358 NPV)
  2. Ragnarok (Heavy Cruiser, 285 NPV)
  3. Valhalla (Heavy Cruiser, 285 NPV)
  4. Victory (Frigate, 74 NPV)

Kzinti "Far Reach" Carrier Group

  1. Shadowcat (Carrier/Battlecruiser, 580 NPV)
  2. Claw (Light Cruiser, 181 NPV)
  3. Leopard and Panther (Destroyers, 2 x 81 NPV)
  4. Tiger (Destroyer, 81 NPV)
As can be seen from the above, 3 of the 4 Klingon groups were somewhat above the average points value for a group (250 NPV), whereas the Kzinti had 3 weak groups and 1 very powerful one.

Initial Moves

I (as Klingon commander) chose to test for the Relentless first and was immediately successful - the battlecruiser was placed on the table first.  Then the Kzinti player (my son) diced for each of his groups in turn, finally getting a success for his last choice - the destroyer Tiger.  This looked like a very uneven match-up, but perhaps the Tiger could play hide-and-seek around the gas giant until help arrived?  At least the 2 ships were initially out of range...

As the Relentless accelerated towards the small Kzinti ship, reinforcements started to arrive.  For the Klingons, the cruiser Valhalla warped in, while the Kzinti gained another 2 destroyers.

Despite the best efforts of the smaller ships to scatter, the 2 large Klingon vessels tore them apart.  Only the Leopard survived the initial volley, though this was something of a mixed blessing as she took a bridge critical hit and was heading straight for the planet of Felixis V!

Look Out!


Just before we determined the 3rd and final groups of reinforcements to arrive, the Kzinti played a Mines event card.  He rolled a '4' for the number of such weapons left over from a previous war and gleefully deployed them around my 2 remaining possible entry points.

The Klingon cruiser Ragnarok duly arrived.  Fortunately for me, she scattered 4" away (backwards!) from her FTL exit point (mines have an activation range of 3" in Full Thrust).  Unfortunately, she was now heading straight at the mines.  The captain immediately ordered a full deceleration and spent the next few turns pivoting on the spot until she could move away slowly from the threat.  Ragnarok played no useful part in the remainder of the game.


Predictably, on the Kzinti side their last reinforcement was the light cruiser Claw.  Despite being heavily outnumbered (1 CL vs 1 BC and 2 CA), she attacked the Klingon battlecruiser, launching missile salvos as fast as she could!  The Klingon captain was somewhat taken aback by this and ordered that all weapons which were capable should fire on the missiles.  Consequently, return fire at the bold Kzinti ship was light and she took little damage.  Indeed, on this turn one of the missiles breached the defences and the Relentless actually received more hits than she gave out!

As the Kzinti destroyer Leopard finally ploughed into the planet, the Claw and the Relentless circled each other.  The smaller Kzinti ship was firing missiles for all she was worth and would soon empty her magazines - but what else could she do?  If she let the Klingon battlecruiser get a clean shot at her then the light cruiser wouldn't stand a chance at this range!

Even as she launched her final volley of missiles (all of which missed or were shot down), the Claw received massive damage from the enemy flagship.  The Klingons, impressed by the way she had fought, held their fire while the Kzinti crew abandoned ship.  However, before the Klingons could board the crippled Claw and claim her as a prize, her damaged warp core blew up!

Conclusion

Sometimes, life just isn't fair!  For the Kzintis, their weakest ship arrived first and their strongest one didn't arrive at all.  For the Klingons, it was exactly the other way round.

What could the Kzinti have done differently?  Perhaps a more balanced fleet composition would have helped, though it's worth pointing out that if the gamble had paid off and the Shadowcat had arrived first then the outcome might have been quite different.  Alternatively, each Kzinti ship that arrived and saw that it was hopelessly outclassed should have attempted to go straight back to warp.  This might not have been successful in all cases, but at least some of their ships might have escaped!

Thursday, 5 September 2013

The Workbench: Mixed Allsorts

Introduction

I've been making slow progress with my model-making projects recently.  At least it seems very slow, though maybe that's because I am dividing my attention so many different ways.  Each separate task doesn't advance by much, but maybe the total output is reasonable.  Anyway, here are some things I've been working on over the last month or so.

Apocalypse Survivors

These figures are both from Wargames Factory.  I think they're very well proportioned and sculpted plastics.  Only time will tell if they are robust enough to take handling...

A slightly unfortunate angle here for the guy on the left.  Before anyone else says it, he looks like he's taking a leak.  While shooting someone.  It's really not like this - just look at the front view!

Prison Zombie

I've painted this Studio Miniatures plastic zombie up as a prisoner.

It's hardly an original idea, but these "smock" bodies from the kit work well for such a costume.  I wish Imy hand was steadier when it comes to lettering, though!

Barbarians

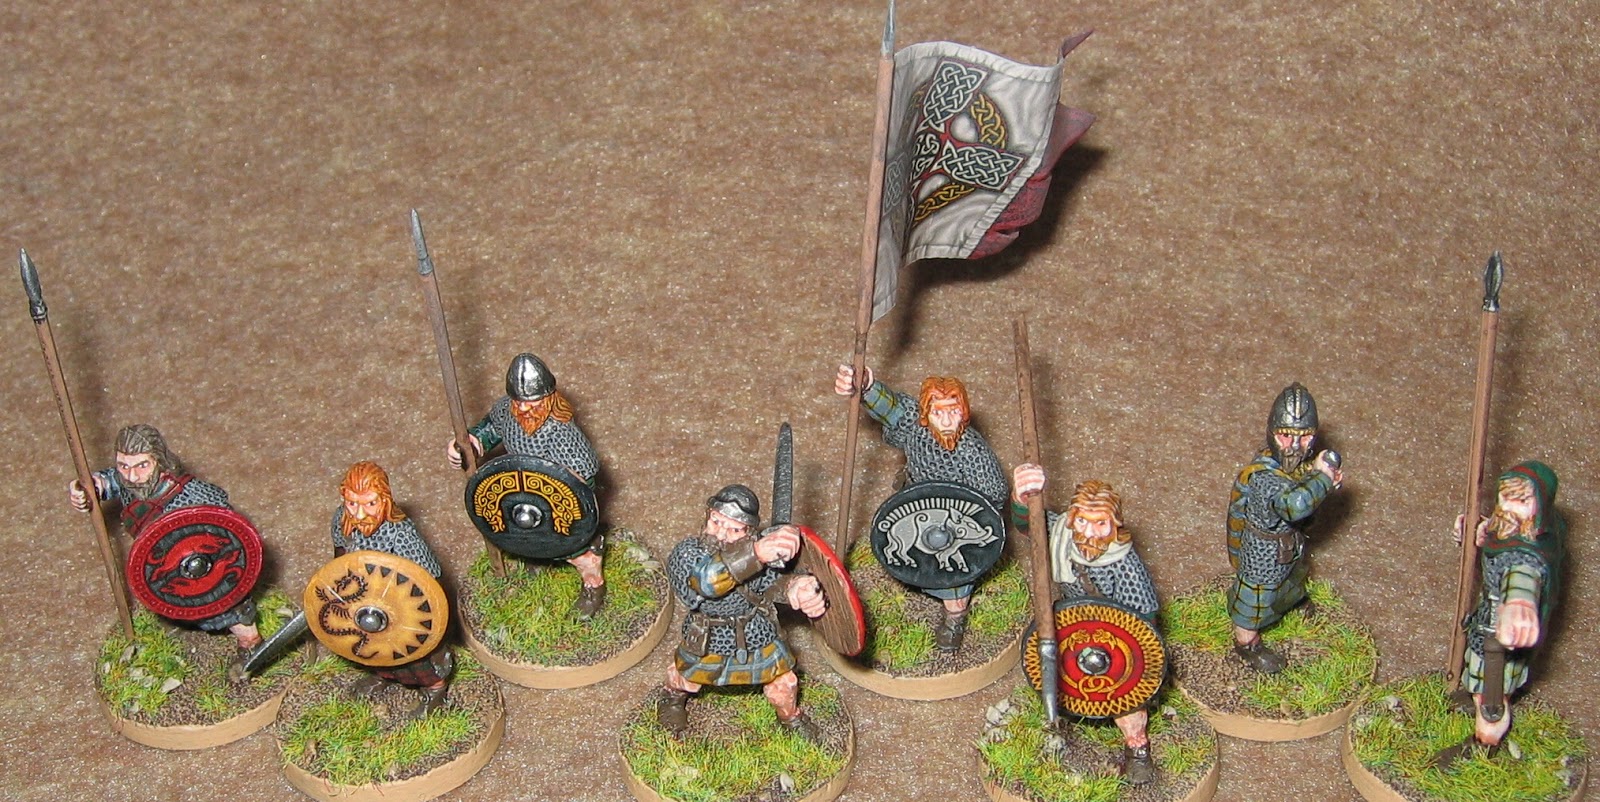
I don't normally show part-completed pieces, but today I'm making an exception.  These are some of my part-painted 28mm barbarian army for "Hordes of the Things".  There's still a long way to go with them and I'm hoping that merely displaying them here will give me enough momentum to carry on painting.  This lot have their bodies and clothing mostly finished, but weapons, hair, shields and bases still need work.  I might add some war paint as well.
Wicked Witch of the West

Here's another part-completed model.  In this case, it would be fairer to say that it's only part-started, perhaps.  It will be the magician general for my "Wicked Witch of the West" Hordes of the Things army (from the Wizard of Oz, of course).  As well as the witch herself, I plan to have flights of crows decorating the stand, since in the book she sent such birds to attack Dorothy's group.  Rather than just having a flat base, I intended the crows to be flying over a tree stump - it'll give them a bit more height and add some useful texture.  The yellow lump of filler on the base is my first attempt at sculpting a stump, though note that I haven't done any roots or stuff like that yet.  I'm not very happy with my sculpting so far...

Space Battleship Yamato

Lastly, here's the finished second ship from my plastic "Space Battleship Yamato" kits.  This is obviously a small craft and I'll probably use it in 5150: Fighter Command as a civilian vessel - a space yacht or a fast courier would seem appropriate.  To be honest, I don't much like the design of this vessel and I really wish I'd modified it by cutting the "wing" into 2 halves and repositioning it - but instead I built it straight "out of the box".  Ah, well.

Finally

That's all, folks.  See you next time!

Saturday, 31 August 2013

The Saga of Lief Gunnarson

Introduction

I'm on something of a roll with SAGA at the moment, I think.  Not only have I completed my Viking and Scots starter warbands, but I've started to build my Revell longship as well (more on that some other time).  Indeed, recently we played our first actual game of SAGA.  Here's how it went...

Clash of Warlords

For our beginning game of Saga, we decided to play the first scenario in the book: "Clash of Warlords".  Roughly speaking, this is a straightforward "last man standing" game.  Killing the enemy's chieftain without losing your own will give instant victory.

So, the forces were as follows:

Vikings

 From left to right:
  • 4 berserkers
  • 4 hearthguard (front)
  • Leif Gunnarson, the warlord (front)
  • 4 warriors (back)
  • 12 warriors

Scots

 Front row, left to right:
  • 4 hearthguard
  • Macbheatha, the warlord
  • 4 hearthguard
Back row, left to right:
  • 6 warriors
  • 4 warriors
  • 6 warriors

The Game

Opening Moves

Not really knowing what to do, both my Vikings and the front line of my son's Scots advanced straight towards each other.  No doubt many threats and insults were exchanged at this point!

The first contact occurred when the end unit of Scots warriors (pale-rimmed bases) charged the Viking berserkers (dark-rimmed bases).  Neither of us really knew what to expect...

 ...but the vicious conflict left only a single man standing!  This was something of a disappointment for the Vikings; I'd really hoped that the berserkers would wipe out their enemies without all dying in the process.

The Fight on the Hill

Next it was the turn of the 12 Viking warriors on the hill.  They charged a 4-man group of thanes, hoping to punch their way through to the Scots warlord.

Vikings charge down the hill into a confused melee
Despite being heavily outnumbered, the Scots Thanes held firm and drove the Vikings back with 3 casualties.  This was not going as I (Leif) had hoped at all!

Scots warriors from the far end of their line then counterattacked.  Initially they were driven off...

...but the survivors regrouped and attacked again immediately.  The fatigued Viking warriors fell back, leaving some of their number dead behind them.

Finally, 4 of the Scots thanes charged up the hill and decimated the fleeing band of Vikings, killing another 3 of their number.  In one turn, my unit of warriors lost 11 of its 12 figures, in return for 5 Scots soer-chele.  This was not good!

In revenge, I took great pleasure in using the power of Loki to eliminate the remnants of the 2 groups of Scots warriors who had engaged so far.  However, while this would deny my opponent some Saga dice, such units wouldn't otherwise have had any significant effect on the course of the battle.

Kill the Warlord!

So far, each side had lost 11 or 12 warriors, but I had also lost 4 berserkers.  I was outnumbered and any moment the weight of the Scots army would swallow me up.  However, I had a plan.

I loaded up the battleboard with as many offensive capabilities as I could muster.  This wasn't as much as I'd have liked, but it would have to do - the Scots had exhausted their own dice in their last turn.


Firstly, Leif Gunnarson used his Determination, We Obey and Side by Side abilities to gather his hirdmen and charge the Scots thanes on the hill.  These were all cut down, though annoyingly they killed one of the Vikings in return.

This left the way open to attack the Scots warlord himself.  Even though they were tired after their previous combat, Sigurd, Thorfinn and Guthrum charged down the hill into the flank of the Scots line and attacked Macbheatha himself!  Sadly, I didn't have enough Saga dice dedicated to movement to permit Leif to join in as well.

It would seem that Macbheatha had been working out recently; he easily dispatched the 3 Vikings on his own (perhaps assisted by Bran, the dog?).  All his thanes were looking the other way, but a nearby Scots warrior leaped in front of a Viking spear that would otherwise have slipped past the warlord's guard.  So, 3 hirdmen down in return for 1 soer-chele.  This was becoming embarrassing!

Leif Gunnerson now stood almost alone on the hill - just a single bondi warrior was nearby.  With a cry of triumph and a fresh set of Saga dice on his battleboard, the Scots warlord now gathered his remaining thanes and charged the Viking captain.  So, let's see: I roll 5 attack dice (standard warlord profile), while the Scots roll 5 (warlord) + 8 (thanes) + how many?! (for battleboard abilities).  It would have taken a miracle for Leif to survive.

Alas, miracles were in short supply for the Vikings this evening.  Leif didn't even manage to take any of these foes to Valhalla with him.  Just as well that he helped to kill some thanes earlier in the game, then...

Conclusion

I'm sure that our inexperience with the rules (indeed, with Dark Age warfare in general) shows in many ways in this report.  Also, the terrain was just decorative - it had no effect on play - and the scenario was basic.  But...this was a really fun game and something we'll certainly play again.  I think there's a very promising future for SAGA, if not for Leif Gunnarson!

Wednesday, 28 August 2013

SAGA: Macbheatha's Scots Warband

Introduction

2 weeks ago, I showed my starter Viking warband and bemoaned how long it was taking me to paint up their opposition.  Well, I was so inspired by the positive responses that I have not only finished the starter Scots force who will face the Vikings, but I've also played my first game of Saga!  You'll have to wait a little for the game report though; this article will be used to introduce my second warband.

The Warlord

 Macbheatha is the leader of my Scots force.  He's accompanied by his faithful hound "Bran".  Unusually, he has scale armour instead of chainmail.

 Note that the Scots in my collection can be distinguished from my Vikings in several ways:
  1. The Vikings wear trousers, whilst the Scots have bare legs.
  2. Each force has a different colour of rim on their bases.  For the Vikings I used the same dark brown as for undercoating the bases, while the rim of the Scots bases are the same pale brown as the dirt's top highlight.
  3. Some of the Scots clothing is more highly patterned, whereas that of the Vikings tends to be a single block of colour.

Hearthguard

This warband has 8 thanes in it.  Unlike the Vikings they're all just "vanilla" hearthguard, though usefully  they all count as spearmen for the purposes of the Saga battleboard.

I've used decals from Little Big Men for both the shields and the flags on all my figures.  Saga didn't originally have rules for standard bearers, but I'm sure they've been published as an update somewhere.  At least I have the option of using these rules if I desire.

Warriors

Most of my Scots warriors have spears.  These are rather longer than those preferred by many Dark Age fighters, but they hint at the "pike"-armed schiltrons of later centuries.

I'm well aware that the modern notion of tartan is only a couple of centuries old (and highly contrived, at that).  However, it suits the narrative for these guys to wear patterned cloth, though whether the patterns would have been this form in the Dark Ages is anyone's guess.  Anyway, what I've painted isn't technically tartan (there aren't enough different colours), so there!

Like the thanes, my soer-chele (warriors) have a banner.  They also have a horn blower, though I'm not aware of any special rules in Saga for such equipment.  As far as I'm concerned, he's just a regular warrior - but slightly louder than average, I suppose.

Initially, I tried to paint tartan (sorry, patterned cloth!) on some of the cloaks as well as the tunics.  I soon found that the non-rectangular shape of most of these made the results come out very strangely, so they were quickly covered up with solid colours.  It's a pity, but I just couldn't do it to my satisfaction.

Conclusion

Once I finally got round to it, I've enjoyed painting these models.  Now my mind is full of plans for expansion: a small unit of cavalry and some skirmishers, perhaps?  What about one of the heroes of the age?  Or a bard?  I really fancy getting a group of monks as well, especially some armed brothers who've just had enough of the Vikings!  So many things I could do - and that's even before having played with them!

Sunday, 25 August 2013

"Not-Star Trek" Ferengi Fleet

Introduction

Amongst the major races in Star Trek, the Ferengi probably have the least known military capabilities.  Indeed, there are almost no canonical named spaceships and only 2 classes of vessel have been commonly mentioned in the shows, as far as I know.  One of these is a cruiser and the other is a tiny shuttlecraft, so there's not much data there from which to work out what the Ferengi's military capability!

D'Kora class marauder
2-seat Ferengi shuttle

Design Philosophy

I'm going to have to extrapolate a very long way from the limited amount of canonical data for this fleet.  Firstly, I will assume that they do indeed have a fleet, if only so they can protect their trade interests robustly.  So, let's see:
  • The Ferengi are clever (cunning?) and ruthless merchants.  Everyone in their society is always looking for a way to improve their wealth, so there's the first element of my philosophy: all ships will have at least some cargo space.  Either this is designed in from the start, or else the captain of each vessel has sacrificed some other system in order to make room for his trade goods.
  • In The Next Generation, a Ferengi cruiser is described as a near match in capabilities for the Federation ship Enterprise.  I imagine that, through trade or espionage, they have complete access to any of the common technologies present in the Star Trek universe.  This includes phasers (beam weapons), disruptors and shields (screens), but not the more exotic stuff such as cloaking devices, plasma torpedoes or fighters.

The Ships

I don't know of any manufacturer who produces a range of Ferengi ships!  It's possible to find the D'Kora marauder from some sources, though these tend to be toy manufacturers rather than games companies.

For my Ferengi fleet, I've used Quellaris Federation ships from Kallistra's "Space Dreadnought 3000" range.  These have a vaguely "Ferengi" look to them, though note that I've cut off the oversized "cannon" protrusions from the nose and/or wings.  They will do fine for my purposes, though this might not suit a purist.

If you are interested, I've made my Ferengi SSDs available to download.  The file is in OpenOffice Draw format (.odg).


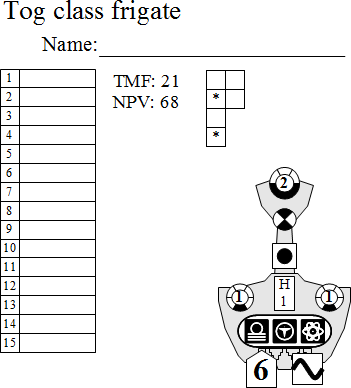
Manufacturer's DesignationPictureFull Thrust SSD
Q1 Quellaris Patrol Ship
Q2 Quellaris Destroyer

Q3 Quellaris Cruiser

Q4 Quellaris Battlecruiser

Q5 Quellaris Dreadnought

Q6 Quellaris Super Dreadnought

Games with Ferengi

To be true to Star Trek, Ferengi shouldn't be interested in concepts such as honour or self-sacrifice.  They can and will fight ruthlessly to protect their interests, but their values are most definitely not the same as those of other races such as the Klingons or Federation.  I feel that this is best handled by the use of appropriate victory conditions in a scenario, rather than by race-specific special rules.  In other words, it's really up to you how to use a fleet such as this in your games!