Introduction
It's been a very long time since I've played Black Powder. It might even be as much as 2.5 years ago - that's when I last reported on such a battle: Grochow, 1809. But despite all this, we haven't forgotten about the game and how much we enjoyed it. Indeed, last Christmas I got the "Clash of Eagles" supplement. Although this officially covers the 1812 invasion of Russia, it does have a wealth of stuff that is suitable for my 1809-ish Austrians, French, Confederation of the Rhine &c.
The Scenario

So, armed with this new inspiration it was time for a game. We pitted my relatively small French & Allies force against Steve's much larger Russian army. We couldn't really put these numbers head-to-head; the Russians would have a considerable advantage in numbers. Instead, I took a scenario from the "Blunders on the Danube" Piquet supplement and adapted it.
The Battle of Ebelsberg

In the original battle of Ebelsberg in 1809, a large French army tried to catch a smaller Austrian group as it retreated towards the single bridge over the large & impassable river Traun and into the town of Ebelsberg. There's a catch, though: the Austrians were waiting for one last, straggling brigade before they could retire.
Historically, most of the Austrians were extracted with a mixture of skill and luck, but the French managed to seize the bridge before the Austrians could demolish it. This led to some vicious fighting within the town on the next day. We'll be gaming the approach on the first day.
Our Version
Firstly, the forces are all shifted around to suit the armies available to us. The Russians would be attacking (instead of the French) and the French would be defending (instead of the Austrians).
French Forces (General LeBeaux):
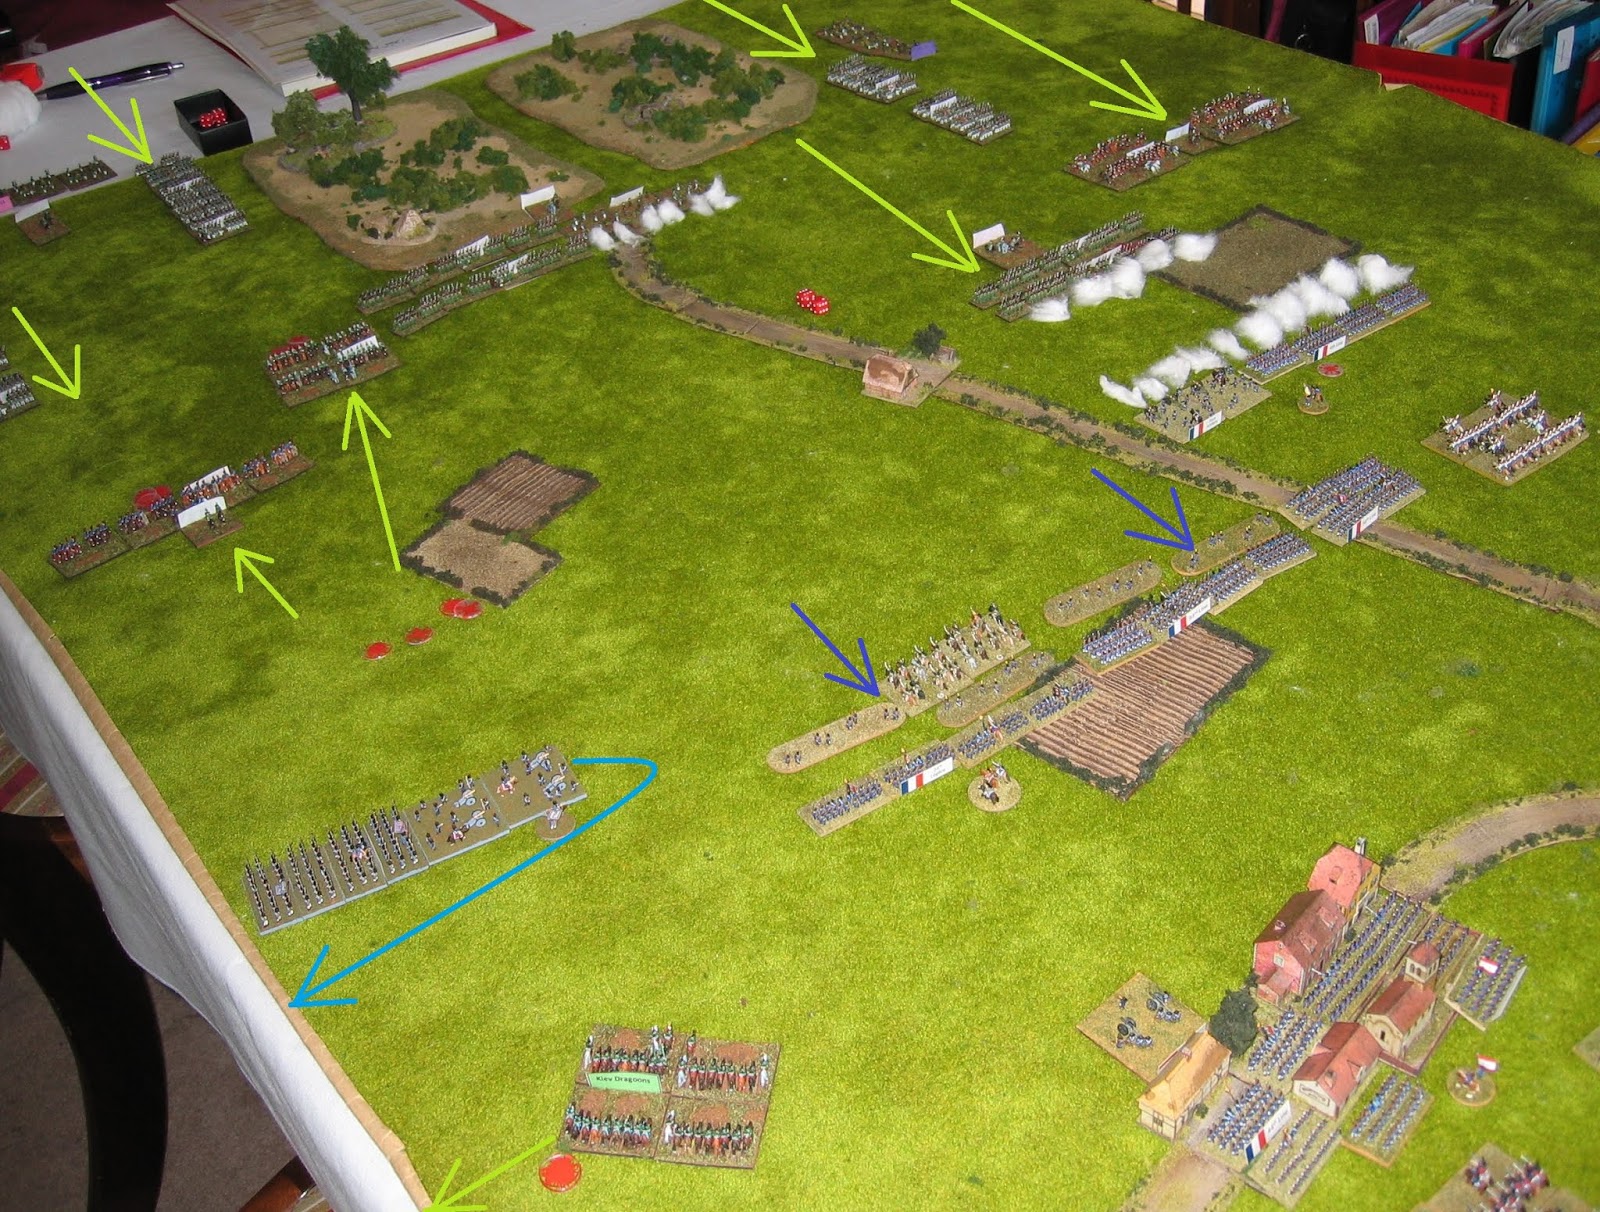
- 1 relatively strong French brigade is deployed across the road to Ebelsberg, in the middle of the table (Brigadier Gerard).
- A weak brigade of mixed units from France and Hesse-Darmstadt holds the village of Klein Munchen (Brigadier Meier).
- A weak Bavarian brigade enters from the south, starting on turn 1 (Brigadier Shultz).
Russian Forces:
- 2 small brigades of cavalry are already on the end of the table.
- An entire division of infantry (plus their artillery, of course) is approaching from the west. Their light brigade is already on table; the two line brigades will enter from the left, starting respectively on turn 1 and turn 2.
So, the Russians outnumber the allies by somewhere between 3:2 and 2:1 (I didn't bother to count). As per the Clash of Eagles supplement, they have a weak command structure and aren't good at musketry, but are stoic against casualties and well motivated to get stuck in to melee.
We decided that we'd randomise command values for officers. Each of the commanders-in-chief would have a base rating of 9 and would add the roll of a fudge die (i.e. '+', ' ' or '-'), whilst each of the brigadiers would have a command rating of 8 plus a fudge die. The result:
- The Russian C-in-C was a brilliant general with a rating of 10.
- The 2 Russian cavalry brigadiers were (from memory) a respectable 8 and 9.
- Every other commander rolled a '-', thus leading to a command value of 8 for the French C-in-C and a 7 for all the French brigadiers and all the Russian infantry leaders. It looks as if this is the dregs of the French army; either that or they are under-supplied, tired, hungry and dispirited. Ooh, err...
Our Game

On turn 1, the wayward Bavarians started to arrive. Their somewhat plodding general assumed that they were too far from the enemy to need to deploy for action, but he was wrong. A dashing Russian cavalry leader led a wild charge which saw one infantry column caught in the flank whilst still in column-of-march [for anyone who doesn't know about horse & musket warfare, this is an extraordinarily bad thing for the defenders. Indeed, for the cavalry involved in such an attack it's possibly the highlight of their entire careers].

Amazingly, the Bavarian 13th Line infantry didn't disintegrate immediately. They took enormous casualties and were driven back a long way, but they passed break test after break test and just hung on.
As more elements of the Bavarian column arrived, their own cavalry charged the approaching Russian cossacks. For a few moments, it looked as if the situation might be stabilised...

...but the Russian cavalry, having pursued the 13th Line almost to Klein Munchen, finally dispersed them.

At the same time, the Bavarian cavalry, having seen off the cossacks with some enthusiasm, encountered a fresh unit of Russian dragoons. The clash between these squadrons was brutal: the lighter Bavarian Cheveaux Leger were swept away - but the dragoons were hit hard as well. Indeed, that loss caused the demoralisation of the Russian heavy cavalry brigade; they played no further part in the game.
The damage had been done, however. The Bavarian brigade was also demoralised; it retreated off the table (and presumably found somewhere a bit quieter to huddle until they could surrender and be taken prisoner).
[In reviewing this now, I realise that the Bavarian brigade should not have broken at this point, though they were indeed perilously close. I had miscounted the number of units in the formation; they had lost 50%, excluding artillery, but not over 50%, as we require for a brigade to become demoralised. Oh, well - it probably wouldn't have made much difference in the long run anyway...]
Elsewhere, large columns of Russian infantry plodded forwards, although their commanders didn't seem to be in any great hurry. The more advanced units started to engage the nearest French, though
true to form their shooting didn't achieve much other than to make a noise and a lot of smoke.
Since there were no survivors from the Bavarian contingent and therefore no need for them to stay where they were, many of the French units started to move back towards the bridge. There was still a long way to go, mind.

The Russian advance was most active on the far right of the table. Their leading infantry came off rather worse in an exchange of volleys with the French 4th Line, but there were plenty more attackers nearby to fill the gap.
A single unit of French heavy cavalry tried to fend off a Russian hussar brigade. Both sides were wary, but in the initial clash both the French and one of the Russian squadrons were devastated.

With the French cavalry out of the running, the other Hussar squadron fell upon the flank of the exposed French infantry and sent them routing in all directions.
About this time, the Russian C-in-C all but gave up trying to get his subordinates to move their forces. Instead, he took over command of all the units that were near his position and formed them into an ad hoc task force, which then proceeded to steamroller forwards.

The French continued their retiral, hoping to put some distance between themselves and their pursuers so that they would have time to negotiate the bottleneck of the bridge. However, at least some of the Russian units kept up with them and stayed within musket range.

For a brief moment, it looked as if the bulk of the French infantry had indeed outdistanced the enemy. The leading Russian battalions were pinned in square by the threat of a lone unit of French light cavalry, whilst the intermittently-rallied Carabiniers again slowed the Russian cavalry brigade, though at some cost to themselves.

The Russian commander was wary of the garrisoned village of Klein Munchen; past experience suggested that this type of position would be tough to crack with just infantry. However, the Hesse-Darmstadt artillery was in the field outside the village. A battalion of Jaegers assaulted the small battery and overran it; despite being lashed with canister and shot they simply ignored the casualties and came on regardless [by rolling a double '6' to save hits and thus managing to avoid the need for a break test]!

So, did the French escape? For (I think) 3 turns in a row, Brigadier Gerard failed to give a coherent order to any of his units! The French C-in-C ("LeBeaux") was too busy trying to shore up the right flank to intervene, so nothing moved. Maybe a wagon was stuck on the bridge? Or perhaps there were arguments over which unit should go first, or engineers were busily trying to prepare the bridge for demolition? Whatever the reason, the delay was costly.
Russian infantry poured around the village, keeping carefully out of musket range, whilst (some of) their artillery pounded the buildings and their occupying Hessians. The only good news for the French at this point was that a blunder sent a second Russian battery retreating at full speed back to where they had just come from.

Finally, a few French units formed into column of march and hightailed it along the road and across the bridge, whilst the French cavalry tried to slow down the Russian advance. But there were simply too many attackers and the retreat had been delayed for too long; most of the remaining French units were caught in a pocket; we called the game rather than play it out to the inevitable end.
Conclusion

4 French units made it to the bridge (in column of march) and escaped; this was definitely not as many as I'd hoped. It's just as well that Brigadier Gerard was captured, else I'd have had him court-martialed and shot! I also note that not a single Russian unit was routed, though a number of them were shaken and only just survived break tests.
It sounds like a very one-sided massacre, doesn't it? The early (and incorrect!) loss of the Bavarian brigade didn't help, yet the game felt remarkably even. Right up to the very end it was possible that another 4 or 5 French units might have escaped, possibly even more. Both sides had their chances and their frustrations, so it was engaging all the way through.
The bottom line: both players enjoyed this battle immensely, it was refreshingly different from the traditional "encounter" game and the way events unfolded with surges and pauses in the action felt like a real Napoleonic battle (as we understand it). I don't think we could ask for more, really 😄.


