Introduction

The Scenario
Austrian forces are advancing in strength, trying to find a weak point in an over-stretched French corps. A division led by General Wulfe has been ordered to clear the approaches to the town of Bad Wörgl; if this succeeds then the French invasion will be in jeopardy. Hastily, a scratch group of French and Bavarian allies under General Le Beaux has been sent to intercept them. Can the allies delay the whitecoats, or will they be overrun by the superior numbers in Wulfe's division?So, here's how it works. We'll play along the length of the table - there's a road from one end to the other. Both sides will set their forces up in their marching positions, one at each end, just off the board. Because they have fewer troops, the French are permitted 3 clear moves before the Austrians arrive - this should give them time to choose a defensive position and/or shake themselves out of march columns into battle formations. Victory will be judged on how much the French can slow down the Austrians (somewhat vague, but good enough for a friendly game).
For leadership, we'll randomise the values. Each French or Bavarian leader will have a leadership of 6 + 1d4 (i.e. from 7-10), whereas the Austrians will be penalised slightly by having values of 6 + 1d3. Also, the French merit system allows them to swap leadership values between generals at the start of the game. However, each Austrian or Bavarian leader must take the roll he gets.
Order of Battle
French
- C-in-C: General Le Beaux (Leadership 7)
- French Infantry Brigade: General Bonneville (Leadership 10)
- 4th Line regiment
- 16th Line regiment
- 32nd Line regiment
- 26th Légère regiment
- 2 x battery of foot artillery
- Bavarian Infantry Brigade: General Hoffmann (Leadership 10)
- 7th Line regiment
- 13th Line regiment
- 6th Light regiment
- 1 x battery of foot artillery
- Cavalry Brigade: General Lefèvre (Leadership 8)
- 2nd Carabiniers
- 5th Hussars
- 2nd Bavarian light cavalry
- 1 x battery of horse artillery
Austrian
- C-in-C: General Wulfe (Leadership 7)
- Main Brigade: General Schwarztodt (Leadership 7)
- 1st Dragoons (heavy cavalry)
- 11th (Archduke Rainer) Line regiment
- 42nd (Erbach) Line regiment
- 32nd (Esterhazy) Line regiment
- 47th (Vogelsang) Line regiment
- 1 x battery of foot artillery
- Light Brigade: General Horta (Leadership 7)
- 3rd Hussars
- 2nd Uhlans
- 2nd Jaegers
- Reserve Brigade: Lieutenant General von Eugen (Leadership 7)
- 7th Cuirassiers
- 10th (Mitrowsky) Line regiment
- 35th (Archduke Maximillian) Line regiment
- 13th Grenze light infantry regiment
- 1 x battery of foot artillery
The Game


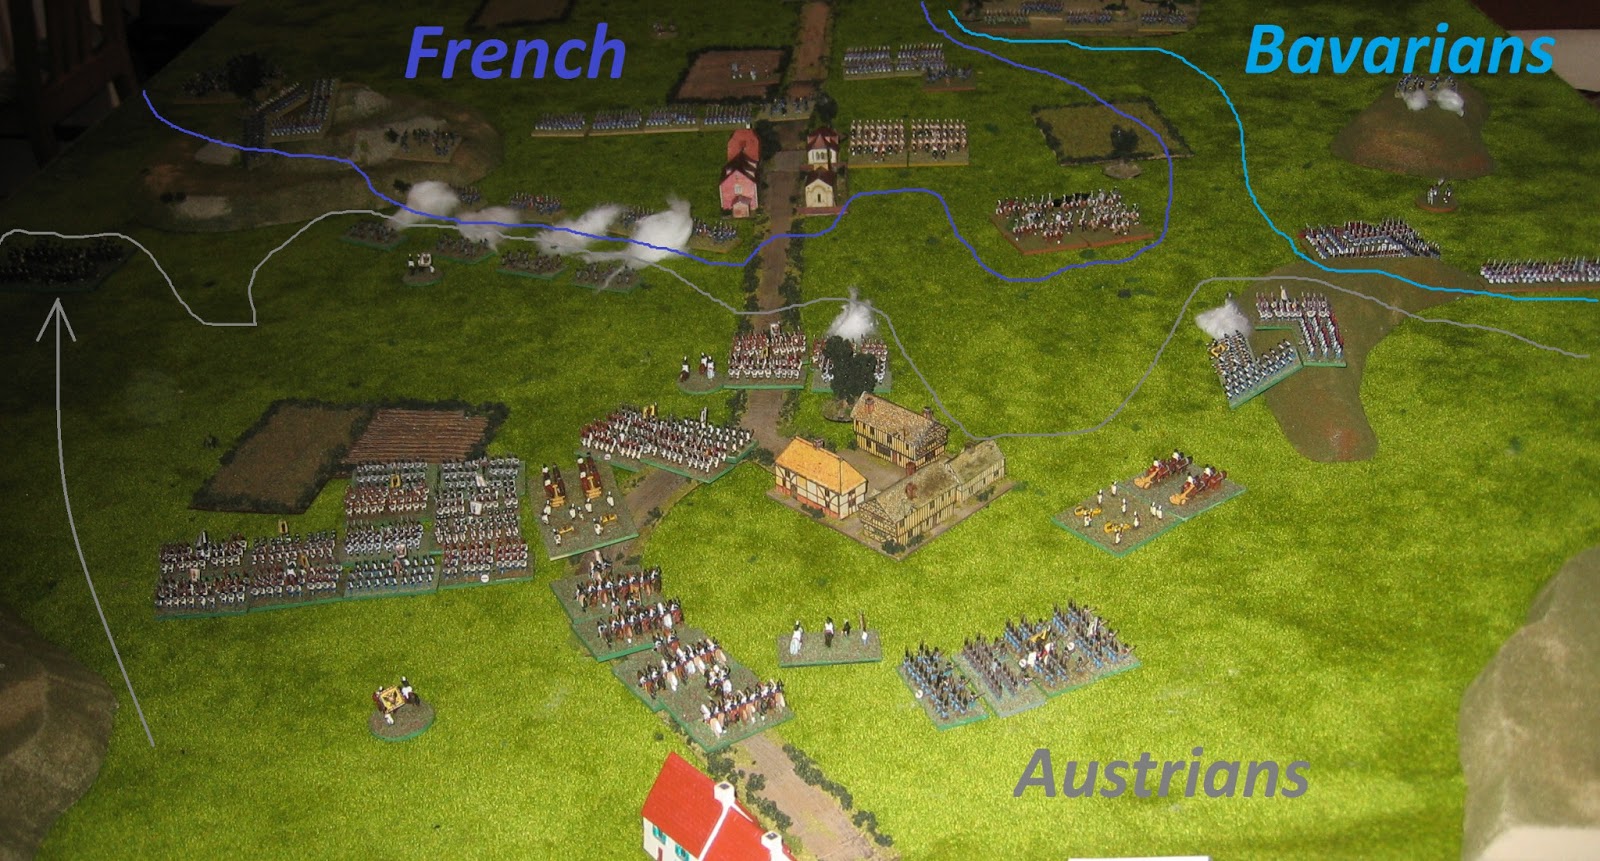


- On the right, the Bavarian infantry and their supporting artillery shot to pieces the Austrian 32nd (Esterhazy) regiment and the 3rd Hussars.
- In the centre, a single brave French line unit assaulted the leading regiment of the Austrian main brigade [the 42nd (Erbach)]. Although the Austrians destroyed the attackers, the 42nd was left reeling and shaken; they retired into the nearby hamlet and General Wulfe spent much of the remainder of the game attempting to rally them.
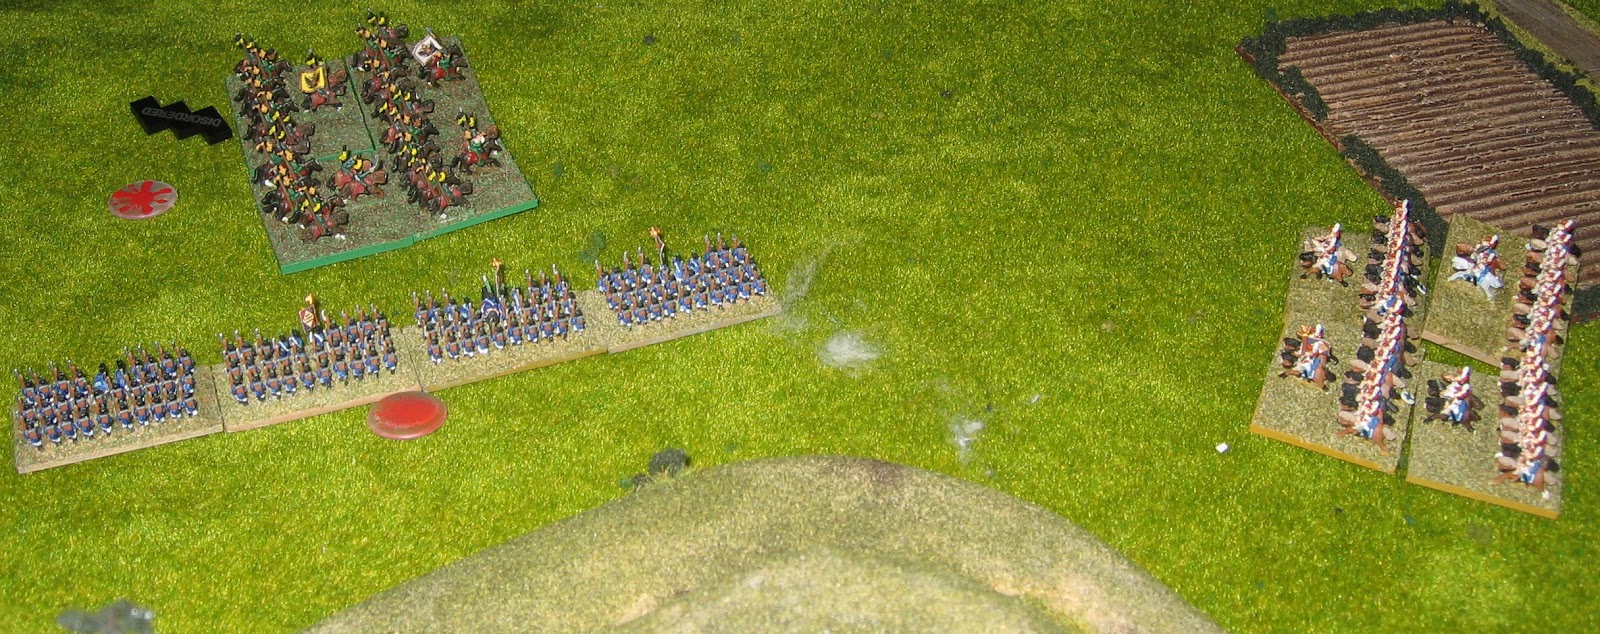
- The left flank saw the vicious struggle between the French skirmishers and the Jaegers continue. Although the advantage seesawed several times, eventually the Frenchmen drove off the Austrians, only to be routed in turn by many fresh Austrian units from the Reserve brigade.


Conclusion
We tried to set up a game here that was a bit more interesting than the traditional "line them up along the long edges and attack" scenario. In this, I think we succeeded quite well. As commander of the Austrians, I was continually frustrated by General Schwartztodt's inability to move his troops along the road - von Eugen's Reserve brigade eventually just went round them to the left. The attack was certainly blunted, as none of General Wulfe's troops got anywhere near the French baseline.For the French, the early plan had been to garrison the wood and village in the centre of the table. Had they done this, I suspect it would have been very difficult to shift them. However, there were no Austrians present when they arrived at this location; rather than sit down to wait, the French decided to continue their advance. When they eventually made contact, it was in the open and the French and Bavarian units were somewhat separated, so they lost the advantage of a prepared defence.
Finally, Hussars on both sides were useless. The Austrian 3rd Hussars were shot to bits by Bavarian artillery and infantry, like fish in a barrel. On the other flank, the French 5th Hussars were reluctant to obey orders. When they finally decided to charge, the Uhlans made mincemeat of them.
Zut alors!
ReplyDeleteI shall return with more leetle lead men.
(LeBeaux)
Ve shall be vaiting!
Delete(Wulfe)
It looked like another good one. Have you played other Napoleonic rulsets? I also like the little buildings, they look like card. Somewhere in the back of my mind I feel like I've seen or downloaded something like this, but it's lost in the morass of my hard drives at this point.
ReplyDeleteWe played a bit of DBN a while ago, but it never really seemed very exciting. It would work well if you only had a small board, I think.
DeleteYes, most of the houses are card, though there are one or two resin ones at the ends of the table as well. The card models come from a long defunct manufacturer whose name I cannot recall. I've still got an unopened "chateau and farmhouse" set somewhere; if I can find it then that would have the name on it.
Mind you, I've seen these same models available for download more recently. I don't know whether this was with the author's permission or not...
LeBeaux here.
DeleteI've tried a few rules - most with far more detailed rules (Intended to increase realism) than Black Powder.
My (subjective) opinion is that Black powder is the only one where my battalions have behaved like historic accounts of battalions in brigades and divisions.
Our battles with 10 or 12 units per side have an ebb and flow, reserves actually get into the action, and a commander often get an opportunity to reinforce a successful attack, or exchange worn units for fresh reserves.
The simple rules permit a sophisticated interaction between units. In my opinion this is the source of their "realism" (The term still makes me cringe a little), and it trumps all manner of petty complaints about command roles, move distances or weapon ranges.
Valeur et Discipline!
very good report. a miss for France, I am sure it is all due to the lack of proper "petit dejeuner" (breakfast)
ReplyDeleteWell, the French may have retreated - but they achieved their objective of halting the Austrians. I'd say that they won the game!
DeleteNice game set-up and by game end I think both sides could claim some form of victory.
ReplyDeleteThis aar seems far more lively than others I've read using the Black Powder rules and you seem very taken with them.
Your 6mm armies forces look excellent.
Black Powder has a lot of abstractions and simplifications and in many ways is quite different from many earlier rulesets.
DeleteAs a very simple example, we spent a long time looking for the extra movement distance when on a road - there isn't one. Instead, you get a bonus to your chance of giving a march order on a road, thus achieving much the same effect.
Once you've acclimatised to such nuances, Black Powder seems to give both a realistic result and a fun game, which is quite a feat!
While I love 28mm for many things, it just doesn't represent large-scale horse and musket battles for me. I've never seen a unit of 20 figures as a "regiment", though of course, you could argue that 120 figures in a 6mm unit aren't representative of a regiment either. 6mm certainly looks the part (and I don't have to worry about the trivia of uniform details!)