Thursday 28 February 2013

FUBAR: successor to Battle! ?

Introduction


Normally in a mid-week post, I report on the game that I hosted at the Helensburgh Games Club's weekly meeting (Tuesday evenings during school term times, Victoria Halls, 6pm-8pm).  Unfortunately, this week I ended up with 8 players and this contributed to making everything so hectic that I forgot to take many pictures.  Those photos that I did take were rushed and have turned out to be very blurry and poor quality.  I won't be able therefore to provide a full narrative of the battle in any way that I'd be happy to publish.  Bah!  More on this later...

Battle.  Practical Wargaming.

Did any of you start wargaming with this book, I wonder?  When I was a boy, my father gave me a copy that he had bought one day while at work in Glasgow.  He used to go for a walk at lunchtime and Glassford's model shop in Cambridge Street (long gone and sorely missed!) was just a minute or so from his laboratory.  It was one of the best things he ever did for me, though I don't know that dad ever appreciated this.

My copy of Battle is still intact, though the dust jacket is tatty and there are various pencil marks inside the book.  The rules themselves are very simple, based around alternate turns and straightforward "move, shoot" mechanics.  However, the book also described platoon and company organisations, the use of support weapons, effects of cover and so on.  For a young boy, this was gold dust!  All the rules proper could be written on a single side of paper and memorised easily.

FUBAR

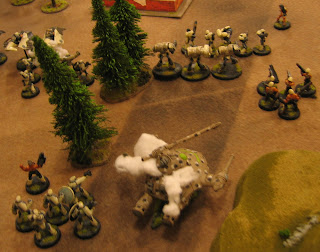
Tuesday's game board, with Junkers Convict Legionnaires defending an important crossroads and a cannon emplaced in the middle of the road
On club night, I had taken along some of my old 28mm VOID models, from the Junkers and Syntha forces.  However, I didn't intend to use the VOID rules, but rather we played the game using FUBAR.  This is a free set of modern or sci-fi skirmish rules that are explicitly designed to fit on a single side of paper (wow, deja vu!)
FUBAR is easily adapted to any setting and there are many fan variants, including Star Wars, Warhammer 40K, Stargate, Starship Troopers and so on.  And, of course, my own adaptations for VOID.
So, how does this relate to Battle!  Well, in some ways FUBAR is a descendant of the older rules.  All it needs is a bit of imagination; the core mechanics are learned within a few minutes and play is then fast and furious.  I suppose that I'm suggesting FUBAR as an easy way in for the younger children at the club, for whom Warhammer 40K is (in my opinion) far too complex and far too restrictive in the forces you can field.

Game Night

Syntha forces (mostly robots, with one squad of bionic marines and a couple of biomechs/cyborgs) advance along the road.  Their jetbikes had charged ahead earlier, on their own, and had not lasted long against even weak long-range Junkers fire.

A Syntha grav tank exchanges fire with the Junkers cannon and comes off worse, while the Syntha infantry continues to advance steadily (relying on their armour for protection rather than on cover!)

One of the Syntha cyborgs peers through the wreckage of the grav bikes to destroy a Junkers buggy.  The other cyborg had just destroyed the quad-bike in the top right of this picture.  In fact, there are a lot of dead vehicles here, from both forces.  Who'd have thought that soft-skins were so vulnerable to infantry weapons :-) ?

Sadly, time ran out just as the Junkers started to counterattack.  Sandrunners (troopers with explosive lances, riding 2-legged lizards) charged some of the larger robots, while human bombs and legionnaires with thermite poles attacked the other Syntha grav tank.  I think (at least, I hope!) that all the players had a really good evening.

So, this post is a bit rambling, but I hope my point is clear.  Start simple and make it fun!


Sunday 24 February 2013

Frontline Wargaming: Modern Civilian Casualties

Introduction

Recently, I became aware of Frontline Wargaming, a small British company with an unusual and eclectic list of products.  This is the place to go if you want an igloo, furniture for your Old West buildings or a monorail for your evil overlord's underground lair.  It all looks wonderfully different!
I thought I'd test the waters with a small order; this was with a slight amount of trepidation since Frontline still use the old-fashioned system of ordering by post or telephone.  We're all spoiled in recent years by sites which offer instant-gratification Internet shopping carts.
I needn't have worried, since I received timely emails in turn to acknowledge the order and to request payment (via PayPal).  Although the website states that delivery may take up to 28 days, my packet arrived in about half this time.  So, what did I receive?  I bought items for several different types of games that I play, but for this article I'll concentrate on the civilian casualties, rather than any of the other terrain or fittings.

SP2 Zombie Nosh

For £3.30, Frontline sells a packet of 6 dead, modern 28mm civilians.  The models are resin and are one-piece castings with integral bases.  Out of the packet, these bases have square corners, but I've rounded them off - the resin is easy to cut and this was a simple modification.
The figures are quite clearly dead - indeed in some cases the corpses have been ripped apart.  Not for the squeamish!  Here we go:

Firstly there are 2 women.  One is lying on her back,dressed in a miniskirt and short top.  Her head has been partially torn off, though there are no other visible wounds (not that I'm trying to make light of the trauma she has received!).  The second woman is face down, dressed in a long skirt, jacket and beret.  She has no obvious injuries.  I could have painted a pool of blood underneath her, but less-is-more and I think it's effective without the extra gore.

Next, we have 3 men.  Oddly, they all have belly wounds and their guts are spilling out.  One of the men even seems to have been torn apart at the waist, since his torso is somewhat further from his pelvis than I would consider natural!  Not very nice, really - though quite appropriate for zombie games.

The 6th figure is of a slightly smaller person, perhaps a teenager.  It's not obvious if it's a boy or a girl; it could be either, I think.  This corpse is wearing trousers, a t-shirt and a cap.  The clothing has quite a few rips and tears, but beyond this there are no obvious injuries.  I've painted this model as though he/she was killed by multiple bullet or stab wounds, so possibly killed by a survivor rather than a zombie.

Conclusion

Firstly, the negatives:
  • The sculpting on these models is acceptable rather than great.  In particular, the shoes on the men are somewhat blobby.  Still, this won't be a problem unless viewing at very close range.
  • The resin casting isn't perfect: the models have numerous holes caused by air bubbles.  Most of these are tiny and not really a problem, but I did have to add some filler in a few places.
Now, the positives:
  • This is an unusual (possibly unique!) subject for a set of 28mm models and is therefore much to be applauded!
  • The variants are all quite distinct from each other.  Having 6 poses should allow much more effective use than if there were (say) only 2.
  • The price of £3.30 (plus postage and packing) is extremely low!
So, my summary is that these are very good value for a useful set of figures.  Keep up the good work, Frontline!

Wednesday 20 February 2013

Return of the Assault on Starbase 13!

Introduction

A couple of months ago, I ran a Full Thrust game at the Helensburgh Games Club entitled "The Assault on Starbase 13".  In that game, the attacking Federation fleet did stupendously badly - so much so that it has become near legendary.  Since then, I've been wondering if my scenario was too unbalanced, one side was supernaturally lucky or whether the fleet players merely blew it.  In order to answer these doubts, I decided to rerun exactly the same game again.  Call it a parallel universe, if you like!  So, here's how it went...


Briefing

Federation Intelligence are aware that a flotilla of Orion pirates are operating out of an old battlestation near the Tholian border.  This starbase is heavily fortified and so the pirates have been immune to attack by local forces.  The recent arrival of capital units from Starfleet has changed the picture though: Admiral Polanski has decided to use his squadron to capture or destroy the Orion base and thus prevent the pirates from raiding this sector!

Forces

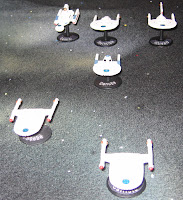
The Federation attacking fleet consists of:
  • USS Intrepid (Battleship)
  • USS Invincible (Battle-cruiser)
  • USS Gemini (Carrier)
  • USS Danube (Heavy Cruiser)
  • USS Callisto and USS Phoebe (Light cruisers, adapted for mine-sweeping)

The Orion defences were:
  • Starbase 13 (Battlestation, built of 4 quadrants.  Each quadrant is approximately battleship strength. 2 segments can fire in any one direction.  The station automatically rotates 90 degrees clockwise each turn)
  • Minefield (a thick minefield, about 24" from the starbase)
  • Terror (missile-armed heavy cruiser, initially docked at the battlestation)

The Approach

The Federation fleet approached the minefield with glacial slowness this time round (2" per turn!).  Although the Orion base commander was initially panicked by the appearance of the hostile fleet as they came out of warp, he had time to finish his 3-course meal.  Indeed, he was well into the after-dinner mints and coffee before the intruders came into range of the starbase's heaviest class-4 phasers.

For several turns, the minesweepers at the front of the Federation fleet took hits from the base's long range weapons.  At this range, the firing was not particularly effective, but it was completely one-sided.  4 squadrons of Orion fighters were launched from the starbase; they were pleasantly surprised to find that the Federation carrier didn't respond by scrambling its own fighters.

Just as the Federation sweepers breached the minefield, they were swarmed by enemy fighters and also by missile salvos (fired by the now-undocked Orion heavy cruiser Terror).  The Federation carrier hadn't launched any of its own craft to intercept, so the sweepers just had to sit and take it!  USS Phoebe was destroyed outright, while USS Callisto was crippled with failing life support and a smashed command deck.  Still, at least they had forced a passage...

The Assault

The Orion fighters now turned their attention to the USS Gemini, which still didn't scramble its own fighters in response.  2 of the Federation ships (USS Danube and USS Invincible) accelerated through the hole in the minefield, but the battleship USS Intrepid hung back in order to line up better with the gap.  This separation of forces was ultimately to cost the Federation badly!

Now things started to get ridiculous.  The Federation carrier USS Gemini tried to escape the hostile fighters by accelerating and avoid the minefield by turning, both at the same time.  Neither was successful, as the ship crashed through 2 rows of mines and the nimble attack craft easily caught up with her.  Fortunately for the USS Gemini, the Orion craft finally ran out of ordnance (!) and so after their attack they returned to the space station to refuel and re-arm.  Unfortunately for the carrier, she was now badly damaged - though she had only lost 1 of her 4 hangar bays.


Finally, the surviving Federation squadrons were launched from the USS Gemini.  They immediately raced to attack the Terror - but the Orion cruiser was still under the umbrella of the base's defensive systems and the majority of the Federation craft were destroyed before they were able to shoot.  The last few fighters did manage to inflict a troubling warp core breech critical hit on the pirate ship, though.

At this point, the Federation cruiser USS Danube and battlecruiser USS Invincible scored some telling hits on one quadrant of the base.  The battleship USS Intrepid was a long way behind and didn't really contribute much to the fight.
In return, the starbase played an event card to overload a pair of its heavy phasers.  To the Federation's great relief, both weapons burned out instead of unleashing a hurricane of firepower on their poor vessels.  Even so, the base's other weapons caused a lot of hurt to the USS Danube and a moderate amount of damage to the USS Invincible.  These 2 ships were just not powerful enough to go toe-to-toe with a battlestation all on their own!

Conclusion

At this point, we ran out of time and packed everything away.  Had we been able to continue, the starbase's rotation would have turned its somewhat damaged quadrant 2 away from the attackers and brought the undamaged quadrants 3 and 4 into play.  When that happened, the USS Danube's life expectancy would have been very short indeed.  The USS Invincible might have inflicted some more damage before it was destroyed in turn.  The battleship USS Intrepid was still too far away to be more than a minor nuisance at this stage; it would either have to flee or to tackle the battlestation on its own (and that would only have ended in one way).

I'm still wondering if this scenario can be won by the Federation, or whether they need considerably larger forces to do so.  Reason tells me that it should be possible, though I think it needs much better co-ordination and manoeuvering skills than my Federation players possess.  Here's how I would do it:
  • Move at a reasonable speed (6" or 8", perhaps) so as to lessen the amount of closing fire.
  • Send the minesweepers a turn ahead, to clear a path through the minefield.
  • Use the Federation fighters solely to defend the fleet against missiles and hostile fighters; the starbase has a stupendous amount of flak and so attacking it with these is tantamount to suicide.
  • The Federation capital ships must arrive at optimal range of the base at pretty much the same time.  It should be possible to get 3 heavy ships (plus 1 or 2 light cruiser/minesweepers, if they survive) to attack and overwhelm a single quadrant on the base.  Of course, as the station rotates it will constantly present fresh quadrants, but as long as the majority of Federation ships survive then these can be depleted in turn.

Sunday 17 February 2013

Showcase: Tomb Guardians

Introduction

I've just returned from a Sunday family outing to the wonderful Kelvingrove Museum, where we saw the "Pharaoh: King of Egypt" exhibition.  That being so, there was never much doubt about what I would post today: 28mm Tomb Guardians!  These are part of the opposition for my intrepid Egyptologists, who were showcased in a previous article.

Monsters

Pharaoh Set-nakhte is the owner of the tomb; he doesn't take kindly to intruders!  Figure is from Blue Moon Manufacturing.

Even in death, the mummy has many faithful servants to help protect his domains.  Here are some of his elite bodyguard.  Figures are from Games Workshop; weapons are from Crocodile Games.

Vicious critters also live in the tomb and are tolerated or even encouraged by the undead lord.  Here are some scarab swarms.  Beetles are from Black Cat Bases.

Snakes live in some of the deserted chambers near to the surface.  Woe to the unwary adventurer who falls into such a pit!  Miniatures are from Black Tree Design.

Finally, a monstrous hybrid creature has been sent by the gods, both to keep humans out and also to keep Set-nakhte imprisoned.  The scorpion-man is from the Koralon faction of the Void 1.1 line, no longer available anywhere, I think.

Afterword

So, that's the good guys and the tomb-dwellers sorted.  I still need some other groups of not-so-noble adventurers (possibly Nazis, cultists or slavers.  Maybe even Belgians, if that's not going too far!).  And if I'm going to make a game like this work then I'll need to build the tomb itself, complete with secret doors and traps.  Does anyone have any good rules for that sort of thing?


Thursday 14 February 2013

I'm melting! Melting!

As a gamer, I don't normally make models just for the fun of it.  I don't mean that cutting, gluing and painting isn't enjoyable; it's just that normally all my creations are destined for use on the table top and therefore they have to fit in with some game or games.
Very occasionally, I'll make something because it seems like a neat idea (or did at the time!), even though it may have no practical value beyond the decorative.  This is one such piece that I completed recently; I cannot see how it could be deployed in a game:


I don't quite know what happened here!  I imagine that the zombie is in some trouble, but how did it get that way?  Perhaps she crawled into the barrel of chemicals to search for meat?  Maybe some enterprising survivor pushed her into the corrosive fluid ["Zombie kill of the week"?].  Or perhaps I've got it all wrong and there's something quite different going on?
I'd be interested to hear what my readers think is the story behind this model!

Sunday 10 February 2013

Zombies! Thousands of 'em!

I'm feeling quite pleased with myself: I finally managed to tidy up and clean my hobby desk!  This has needed to be done for at least a month, though probably rather longer in reality.  Finally, I'll be able to do some painting again!

The downside of this is that I haven't really done much model-making for a number of weeks.  This is especially so for terrain projects, which I tend to work on in my garage.  The weather has been so grey, damp and cold during the winter that I've barely ventured down there, even though I have a pressing need to make up some new buildings.

Since I've got nothing new to show right now, I'll have to make do with some of the older stuff in my collection.  What better than a horde of zombies to whet some interest :-) ?

So, here's John (the photographer) trying to take a group shot at the recent zombie reunion ("HordeFest 2013").  These are all the finished/complete zombies I have.  At least, all the modern ones, as there are medieval/fantasy ones in some of my Hordes of the Things/Warhammer armies as well.

Another shot of the same mob.  For the statisticians amongst you, there are 10 zombies in each column, apart from the rightmost - which has 9.  Since there are 13 columns, I make it a grand total of 129 zeds.  Of course, I have at least another 70 or more yet to make up and paint!

Character Zombies

Even in a horde, there are some models that are a bit more memorable than others.  Here are a few of my favourites:

This guy was one of the first zombies I ever painted.  I don't think it's that good a job, to be honest.  However what makes him special to me is the bag of chips (French fries if you are American) on the ground.  Obviously he's found a local takeaway that served him with a "Leg Supper".  It's a Scottish joke, probably doesn't translate well...

Sandwich-board zombie is one of my most recent models; you'll have seen him before if you follow my posts.

"You looking at me?"  "Who's laughing now!"  What more can I say, these guys are great!

Finally, have a nice day!

Thursday 7 February 2013

HotT: The Valley of Death!

Introduction

This week at my local games club in Helensburgh, I hosted a game of Hordes of the Things (HotT).  However, rather than a stand-up battle between 2 equal forces, I decided to run a Breakthrough scenario of my own devising.
It's very simple: the Knights of Lyonesse are returning from an expedition to the badlands when they are ambushed by necromancers from the Cabal of the Black Hand.  The knightly forces total about 50AP, whilst the Cabal's undead are 70AP or more (i.e. outnumbering the smaller force by around 3:2).  However, the ambushers are split up and some are disadvantaged by having to cross a river to come to grips with their foes.
Victory is decided by the number of knights who manage to escape off the opposite table edge.  If half the knights escape then they score a major victory.  If none of the knights escape then the Cabal wins crushingly.  Any other result can be judged on its own merits!

The Game

Initially, the southern Cabal army advanced swiftly.  The blocking force shook itself out into a line of skeletons, leaving masses of bats behind them.  Both northern groups were on the wrong side of the river to be immediately effective, though they did send a very large bat across to threaten the knight's rear.
All 3 columns of knights advanced in their march formations.  This was a dangerous choice as it left the lead elements very vulnerable to recoils in combat, but it did mean that they could move all their units for a minimum command effort.

Disaster struck the knights as magicians targeted the central column.  With no way of recoiling, their general was the first to die.  The loss of their commander would make it much harder for this group to move, just when it needed to engage the enemy.

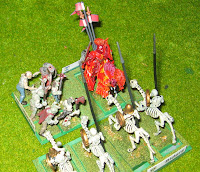
The southern column of knights changed into a line and charged over the hill to engage the hordes of ghouls on the other side.  Their general ploughed through the first rank of the enemy easily enough, but was held up by the second line.  Within moments, he was surrounded and despite fighting valiantly, he also fell.  2 of the 3 commands of knights were now leaderless, almost before the battle had begun.  Their prospects now  looked grim indeed!

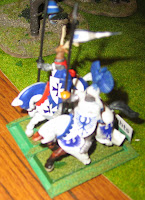
The central group of knights attempted to charge through a hole in the undead ranks, but the gap was quickly filled with swarms of rank bats.  Outnumbered and surrounded, they took terrible losses through a combination of foul magics and flank attacks.  Even the Paladin, Saint Florence of Artenay, could not stand against the skeletal horsemen under these cicumstances.  Of course, once the saint was lost then the remaining few knights were greatly more susceptible to hostile spells.

Back near the river, a lone group of blue and white liveried archers had been left to act as a rearguard.  They shot the giant bat out of the sky and drove off its lesser relatives with accurate archery.  Seeing this, the Cabal sent an evil hero to kill them.  However, before the wight could cross the river, Sir Artois de Beaumain flew overhead on his winged steed and challenged the undead lord to a duel.  The fight was a rather soggy affair since both heroes were in the river, but the Cabal's champion unhorsed his opponent with a roll of '2' to the knight's '1'.

The victorious wight then charged the archers, but they turned and shot him down as his steed tried to scramble up the muddy riverbank.

Seeing the debacle in the centre, the northern body of knights forged their way across the river in a vain attempt to break through.  In doing so, they were facing terrible odds, the running water would no longer protect them from evil magic and they would have difficulty in retreating (should the need arise!)

Run for your Lives!

Soon, many of the knights had fallen.  A remnant of the southern force still held on, but they had barely moved from their starting point and couldn't disengage from the Cabal's heavy infantry.  Elsewhere, the scattered fragments of the forces of Lyonesse fled through any gap they could find.  But how many of them could escape?

The red/yellow archers almost made it, but were assaulted by no less than the chief Cabalist himself.  They were swiftly reduced to piles of smoking ashes.

The fast scouts dodged all enemies and fled for safety...

...followed soon after by the blue/white knights, though these had to fight their way through swarms of bats to make their getaway.

However, the Red Knight was caught and brought to bay by hordes of the undead.  He was too stout a hero to fall immediately, but escape now looked impossible for him.  Elsewhere on the battlefield, the other remaining knightly hero (the Castellan) was still holding out, though again he was surrounded and his fate seemed inevitable.

Finally, the valiant blue/white archers had a clear line to safety, with only a single enemy rider slowly crossing the river to pursue them.  Would they make it?  Time ran out and the game was packed away before we could find out!

Conclusion

Well, that was my first foray into scenario-based HotT gaming!  Both sides claimed a victory, Lyonesse on the basis that some of their forces escaped, whereas the Cabal declared the result to be a massacre.
The knights' early decision to advance in a dense column turned out to be a disaster, as they quickly lost a number of significant models for no return.  They could, perhaps, have achieved local superiority over one of the nearby Cabal armies if they had engaged them quickly enough.  But there was always going to be a balance to be made: who fights and who flees?


Sunday 3 February 2013

ATZ Campaign: The Cast

Introduction

For some time now, I have been promising/threatening to produce an "obituaries" page for my ATZ campaign.  When I sat down to the task, though, it seemed more appropriate to create a Cast List instead.  The difference?  Mainly this: the latter includes characters who are still alive as well as those who succumbed.  I can thus catalogue the appearances of all my characters.

Note that I've only listed player characters here.  This means that a number of other named figures do not appear in this list.  Left out for this reason are gamesmaster-controlled figures: a few gangers and quite a number of policemen and women (including the ever-popular Officer Columbo).  I'm still debating the wisdom of omitting them.  On the one hand it saves me a great deal of work, since most of these minor characters only appeared in a single episode.  On the other hand, this article feels incomplete without them.  Hmm.

At the time of writing, this cast list includes all my ATZ campaign games from #1 to #9.  I'm not sure if or how this list should be updated when further games are played...

The Cast List

Name Picture Appeared in game(s) Fate Notes
John
1: The Search for Gramps,
2: John goes shopping,
3: Help!,
4: Quarantine!,
5: The Battle of Golden Hills,
6: Evacuation,
8: Breakdown! 
Alive John and Bomber are the "star" characters in this campaign.
Darcy
1: The Search for Gramps,
5: The Battle of Golden Hills,
6: Evacuation,
8: Breakdown!
Alive
Lizzie
1: The Search for Gramps,
5: The Battle of Golden Hills,
6: Evacuation,
8: Breakdown!
Alive
Mr. Braxton
1: The Search for Gramps
Killed by zombies while trying to steal a car
Clancy
1: The Search for Gramps,
5: The Battle of Golden Hills,
6: Evacuation,
7: Rally!,
9: Return to Golden Hills
Alive Initially Mr Braxton's dog, later claimed by Bomber.
Rob
1: The Search for Gramps
Killed by zombies the moment he appeared
Dougie
1: The Search for Gramps
Ran from zombies and hid out in "Teenage Fiction" section of bookstore
Sam
1: The Search for Gramps
Killed by zombies in a bookstore
Willie
1: The Search for Gramps
Killed by zombies the moment he appeared
Albert
1: The Search for Gramps,
5: The Battle of Golden Hills,
6: Evacuation,
9: Return to Golden Hills
Alive Gertrude and Albert often need rescuing!
Gertrude
1: The Search for Gramps,
5: The Battle of Golden Hills,
6: Evacuation,
9: Return to Golden Hills
Alive Gertrude and Albert often need rescuing!
Chad
2: John goes shopping
Shot dead by gangers
Bomber
2: John goes shopping,
3: Help!,
4: Quarantine!,
5: The Battle of Golden Hills,
6: Evacuation,
7: Rally!,
9: Return to Golden Hills
Alive John and Bomber are the "star" characters in this campaign.
Captain Salty
3: Help!,
5: The Battle of Golden Hills
Bitten by a zombie, risen as one of the undead but immediately put down by Bomber.
Goofy
3: Help!,
7: Rally!,
9: Return to Golden Hills
Alive Taciturn and private
Nancy
3: Help!
Killed by zombies while being filmed by a TV News crew.
Terry
3: Help!,
4: Quarantine!,
7: Rally!
Taken by surprise and killed by a zombie
Laddie
3: Help!,
5: The Battle of Golden Hills,
6: Evacuation,
8: Breakdown!
Alive Initially a stray, now John's dog
Edna
5: The Battle of Golden Hills,
6: Evacuation,
8: Breakdown!
Alive
Abe
5: The Battle of Golden Hills,
6: Evacuation,
8: Breakdown!
Accidentally shot by Lizzie, then finished off by zombies
Lieutenant Costner ?
6: Evacuation,
8: Breakdown!
Left for dead near a mob of zombies
Corporal Van Damme ? 6: Evacuation,
8: Breakdown!
Alive Psychotic killer
Connery ? 6: Evacuation,
8: Breakdown!
Alive Injured by rioting mob
Dalton ? 6: Evacuation,
8: Breakdown!
Alive

Eastwood ? 6: Evacuation,
8: Breakdown!
Alive Injured by rioting mob
Iain

7: Rally!,
9: Return to Golden Hills
Alive Fit, but amateur
Pike

7: Rally!
Killed by zombies while trying to steal a motorbike.
Pavel

7: Rally!,
9: Return to Golden Hills
Killed by zombies whilst trying to flee from the horror