Introduction
Yesterday, my friend Steve visited and we played several games. In the afternoon, my sons joined in for a long-overdue game of All Things Zombie; more on that another time. However, before the zombie game, Steve and I went through our 3rd game of Congo and it was just as exciting and engaging as the previous two!
The Moussouko Ritual

From the Congo rulebook, we chose to play scenario #7: The Moussouko Ritual.
A tribe that lives in the village of Moussouko is intimidating its neighbours with its extreme practices of black magic. Eventually it all becomes too much for the other villages and a punitive expedition is organised to root out this nest of devil worshippers by destroying their sacred places & fetishes. Without these, Oagasou, the evil witch doctor, would lose his power and his supporters would drift away.
I've got a Forest Tribes force, including a witch doctor, so there's no problem in supplying the defenders. As the scenario is written, the attackers come from the African Kingdoms list, but I don't have such a force. Instead, we'll use my fledgling Zanzibari Slavers column. I see no reason why the Zanzibaris shouldn't be just as incensed by extreme paganism as any other group. Anyway, having such a defiant village around is probably bad for business...
 |
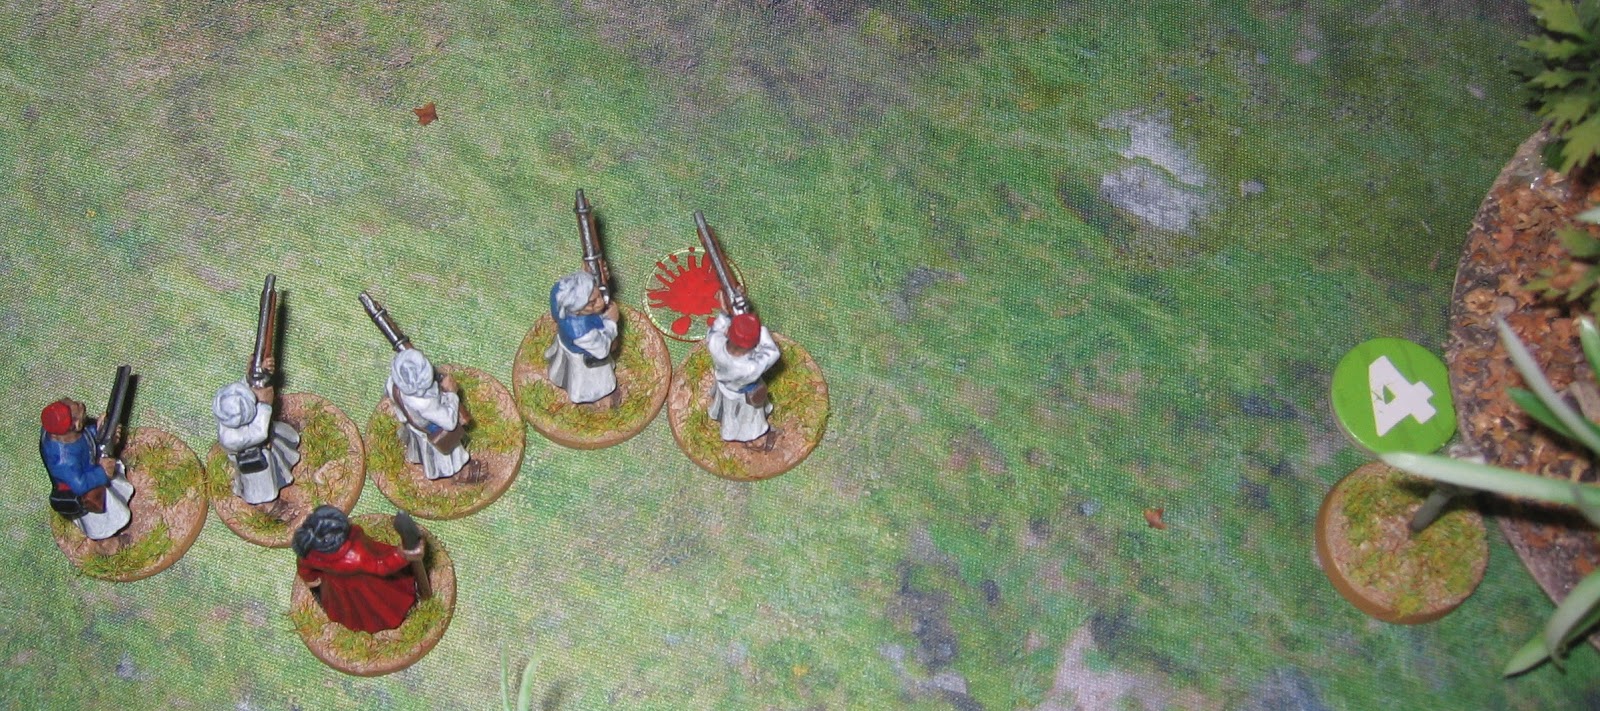
| Note that the fetish numbers (in orange) were hidden until after deployment choices had been made. My Zanzibaris had decided to enter on the left hand side before knowing which fetish was which. |
This scenario is quite a complicated one, but here's a summary:
- There are 6 fetishes scattered around the table, Each has a randomly-assigned number (from 1-6) and the fetish can only be destroyed on that specific turn. If it is destroyed then it scores the attackers that many points. For example, fetish number 5 can only be destroyed on turn 5; this would score 5 points for the Zanzibaris. Obviously, the higher numbers are worth more, but both sides have more turns to prepare forces to attack or defend them.
- The fetishists score points by panicking and/or defeating the attacker's units.
- There's a lot of superstition and uncertainty in the air: every turn has at least one special rule which can make it subtly different from any other. Examples are Confusion, Paralysis, Consternation, Madness... As you will see, these can have dramatic and unforeseen results!
The Plan
 |
| Zanzibaris waiting to enter the table on turn 1 at the blue arrow. |
This is, of course, told from my point of view! My Slaver column consisted of:
- 5 Zanzibari musket men, plus an Emir.
- 2 x 5 Ruga Ruga (mercenaries. Tough, but superstitious)
- 5 Baluchis (Indian/Arabian mercenaries with shields and swords), plus a Brute.
I didn't think it realistic to attempt every fetish, so I decided early on to enter on one side and ignore the furthest two targets. Bearing this in mind and looking at the now-revealed numbers, this is how I planned the game:
- Fetish #1 will be quite a stretch as it is barely in reach even if some of my units move at full speed for all three phases of turn one. I'll make an attempt on it, but fully expect that Steve's warriors & witch doctor will block me from reaching this fetish in time.
- Fetish #4 should be reasonably easy to achieve; my entry point is close enough to cover the area with my people.
- The interesting ones will be the central fetishes (#3 and #6). Obviously these will be contested; I'll aim for both but I'll be happy if I can claim either one of them. There should be enough time to make this possible.
- Fetishes #2 and #5 are just too far away to be worth bothering about; I'll ignore them completely.
The Game
Did my plan work? Let's find out...

Despite the Confusion special rule on turn 1, my forces advanced with all speed. As predicted, Steve's witch doctor & warriors sat on fetish #1 and thus blocked my access to it. From that position, a nasty combination of sorcery and psychological (terror) attacks left one detachment of Ruga Ruga "a bit wobbly" (or terrified for their lives, if you prefer!).

Turn two saw the witch doctor and his cronies charge at the Zanzibaris. They were seen off after a volley of musket fire and a brief spell of hand-to-hand fighting. After this repulse, they slunk back out of range - but they had done their job already: it was already too late for me to destroy fetish #1.
In the middle of the field, the Baluchis advanced rapidly and camped on top of fetish #3. This put them in the right place, but they'd have to hold the position until the end of turn three before I could destroy the item and claim the points...
Turn 3

It wasn't to be: hordes of enthusiastic young warriors, egged on by their Champion, threw themselves at the Baluchis. My Brute won his first duel, but fell in the second fight and the Baluchis were driven back off the objective in a rapid series of clashes [incidentally, the tribesmen scored several victory points for these fights].

The final group of young warriors then attacked my central Ruga Ruga. The latter were sent scurrying backwards, leaving a couple of comrades where they fell. There was no chance whatsoever of the Slavers reaching fetish #3 now.
To add insult to injury, a fierce gorilla had been awakened by the sounds of fighting. He peered out of the jungle just behind the remaining Ruga Ruga.

I did get some revenge, at least. The other Ruga Ruga, freshly rallied, moved round the jungle trees and caught the still-celebrating young warriors in the back with a stupendous volley of musket fire. No fewer than 5 his were achieved and only 1 save was made; the target group was therefore reduced to a single, shocked warrior.

Finally, the gorilla charged, but this "Kong" was just a wannabe: the damaged Ruga Ruga slaughtered the beast effortlessly and then efficiently stripped the carcass of the valuable bits.
Turn 4
OK, so far I had failed to take fetish #1, hadn't tried for fetish #2 and had been driven away from fetish #3. It was now turn four and fetish #4 should be easily achievable. Having seen off the witch doctor, all my Zanzibaris had to do was move a short way and sit on top of the fetish until the end of the turn. There were no enemies anywhere nearby who could have interfered, or at least not with any realistic chance. It's in the bag, right?
Here's what happened: the special rule for turn four in this scenario is Consternation and reads as follows: "During the 4th turn, if a Panic Stress token is drawn, the turn ends immediately". I had read this, but wasn't worried as I should have at least one move before any stress tokens were drawn for fighting, right?

Wrong! At the start of turn four, we rolled for the effect of Black Magic (this is a very sacred grove, after all). We rolled a '3'.

One of Steve's groups of young warriors was parked on top of fetish #3 (which I had completely failed to break in turn three). He therefore drew a stress token for them to show the effects of the black magic - and it was a Panic marker.
It took a few moments for this to sink in: turn four had ended almost immediately after it had begun and before anyone could move, shoot or undertake any other actions!
The wails of the natives on realising that they had trespassed on their witch doctor's sacred fetish so unsettled the Arabs that all they could do was to cower down and hold their hands over their ears. When the unearthly screaming finally subsided, the Zanzibari emir realised with consternation that the optimum moment to destroy the nearby fetish had passed. He knew that it was just a skull on a stick, but the superstitious tribesmen would only accept the desecration of their holy items if it was done in a particular sequence...
Turns 5 and 6

Turn five saw me march the intact group of Ruga Ruga on top of fetish #6. The Zanzibaris followed as best they could, to stave off any attempt by the natives to interfere with this. So far I had totally failed to break any fetishes at all. #5 was too far away to be practical, but I was not going to let anyone stop me from breaking #6!

Instead of challenging my fresh troops, Steve's damaged units in the centre concentrated on hunting down the remnants of my Baluchis and first group of Ruga Ruga. Both of these were ultimately destroyed, earning even more victory points for the tribesmen in the process. They even stole my looted gorilla parts!
Victory
Zanzibaris
- At the end of turn six, I destroyed fetish #6 and thus earned the Zanzibaris the heady amount of 6 VP.
Fetishists
- The forest tribe racked up 2 VP for a panic token that I had drawn early on (it had no lasting effect beyond this and doesn't appear in the narrative above).
- They also scored 8 VP for combats that they initiated and won.
- Finally, the young warriors captured 1 VP of looted gorilla bits.
Grand total: 11 VP to the defenders, 6 VP to the attackers. Therefore it's a very solid win for the fetishists. Their evil witch doctor will continue to dominate and harass neighbouring tribes and passing caravans for years to come!
Conclusion
In hindsight, I did some things wrong and had some bad luck. To be fair, Steve did everything he needed to and would certainly have won anyway, even if I had managed to claim 4VP for fetish #4. His victory might not have been by such a huge margin, though!
What I did wrong:
- The Emir was all but useless where he was and wasn't worth the cost. I should have either chosen a different character or placed his unit near the Baluchis so that his morale effect could have been used to assist these morale-sensitive troops.
- In hindsight, one unit was enough to see off the witch doctor; the second unit on the left flank would have been much better employed in the centre where my 2 groups were horribly outnumbered. Of course, had the witch doctor's warriors been a bit more effective, they might have beaten a lone Zanzibari unit...
My bad luck:
- I don't normally rail against fortune on the grounds that (a) it all evens out in the end and (b) it's not good manners. However, the sequence of events that cancelled turn four just as I was poised to score an easy 4VP really threw a spanner in the works and I knew immediately after this that the game was unwinnable for me. Still, it was fun and I don't mind losing as long as it's with style!


