Thursday, 25 April 2013

TRWNN: Taking out the trash!

Introduction

Near the small town of Coyote Canyon, an illegal logging settlement has sprung up.  This is now populated by ruffians and other bad sorts, to the extent that decent folk are afraid to venture near it.  The sheriff won't do anything about it, so some of the town's slightly-less-than-upstanding citizens have decided to take the law into their own hands and clean out this nest of vipers!

The Scenario

At first glance, this was a straightforward, 2-sided battle with no holds barred.  However, I wanted to add a bit of confusion (as normal, muahaha!), so I came up with the following twist:
  • Each player would control 2 characters; 1 from the townsfolk and 1 from the squatters.
  • Victory at the end would be decided on bodycount; the faction with the most men still standing would be the winner.
  • All players who still had a character alive on the winning faction would be victorious!  If desired, then the extent of that victory could be determined by the state of that character.  So, unconscious would result in a marginal, wounded in a minor and unwounded in a major victory.
Technically, all players could collaborate to share a major victory by agreeing with each other that one faction would shoot and the other would run away or surrender.  But even if they'd thought of such a pact, what's the chance of it holding?

The Characters

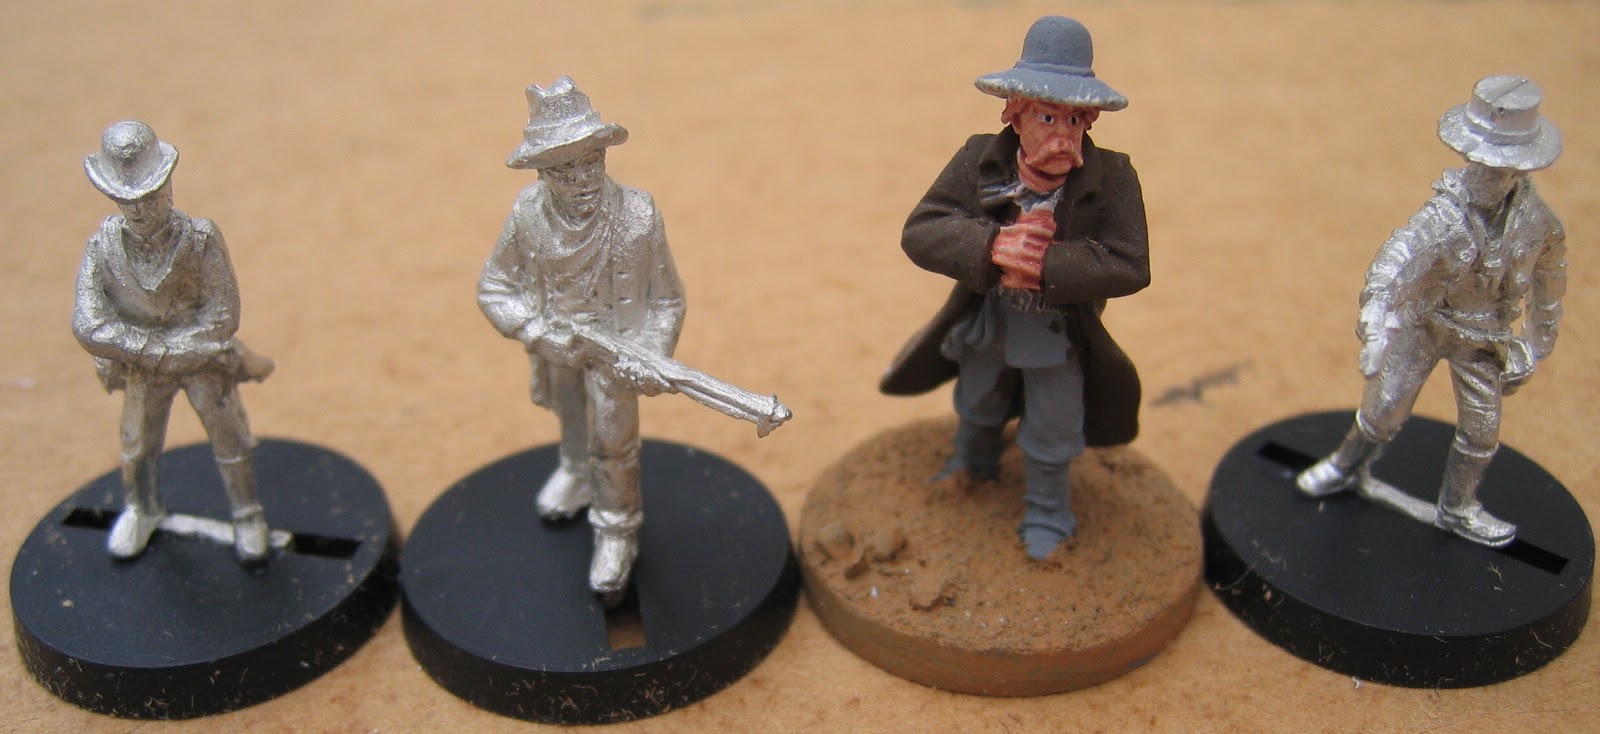
Jebediah comes out of his tent to see what is making all the noise
There were 5 players, so we had 5 townsfolk characters and 5 squatters.  Note that I've not listed every weapon and skill for each model, just the ones that made more impact on the game:

 Townsfolk

  • Blondie (legend)
  • Preacher Adams (shootist, sawn-off shotgun, crazy as a loon)
  • Jesse (shootist, strong)
  • Old Pete (gunman)
  • Kid Sheleen (citizen, 2 pistols)

Squatters

  • Emmett (legend)
  • Black Bart (shootist, tough, terrifying)
  • Injun Joe (gunman)
  • Rico (gunman, drunk)
  • Jebediah (citizen)

The Game

So, how did it play?  Here's how:

As soon as he got a turn, Jesse advanced slightly, challenged and shot down the surprised Injun Joe.  Both of these characters were controlled by the same player, so right from the start he was banking on the townsfolk winning the game!

Despite his advanced years, Old Pete ran along the road like a young deer, only stopping when he came close to Black Bart.  However before either man could move, Preacher Adams decided to act (he was dealt 3 action cards plus his own character card and used these to take 4 turns in a row!).

The preacher walked purposefully in from the side, never hesitating until he was close enough to Black Bart to smell the sweat.  As he raised his sawn-off shotgun, he was suddenly assailed by terrors and started to shake with fear ( the 'crazy as a loon' attribute kicked in and the preacher was determined to be 'yellow'.  It probably didn't help that Black Bart had the 'terrifying' attribute as well).  Even so, the preacher blasted away with his gun and scored 3 flesh wounds on his enemy (Bart's 'tough' attribute cancelled out the +1 damage for a shotgun at point blank range, but he still took some serious hurt).

Old Pete ignored Black Bart as he struggled to regain his feet and run away.  Instead, the townsman stuck his head round the corner of the trading post and shot Rico in the belly, leaving him sprawled and unconscious on the ground.

Jebediah tried to creep up behind Preacher Adams, but the crazy man was too fast for him and spun round.  A shotgun blast forced the squatter to take cover behind the old hanging tree, though the range was too long for it to cause any real injury.

Having managed to stand up, Black Bart attempted to flee.  However, his injuries were too much for him and he collapsed back down to the ground.

The Pendulum Swings?

So far, everything had been going the townsfolk's way.  They'd killed 1 opponent, seriously injured 2 more and scared a 4th, all for no harm to themselves.  However, it wasn't to last:

Emmett finally woke up to the fact that his camp was being raided.  He walked up to the fence which surrounded the trading store's yard and took several deliberate shots at Preacher Adams.

First he shot the preacher in one arm, then he carefully shot him in the other one.  This was too much for the minister; he turned and fled.

While this was happening, Jebediah was attacked, initially by Old Pete and then by Blondie as well.  Between them, they beat up the squatter until he begged for mercy, whereupon Old Pete tied him up.  I suspect there will be either a lynching or a tarring and feathering later on!

The badly wounded (and drunk) Rico finally recovered consciousness and stood up groggily.  As he did so, Blondie came round the front of the store and Jesse approached from the rear.  Emmett, having seen off the preacher, positioned himself behind some crates and exchanged a few shots with the latter.

Jesse was too impatient for gunplay, however.  Relying on his strong attribute, he charged at Emmett, fists whirling.

The townsman had badly misjudged the calibre of his opponent; the legend was quite capable of defending himself in a brawl.  Emmett gave Jesse a tremendous whack with his pistol butt that dropped the attacker on the spot, dead!

Blondie also fancied his chances against the squatters' hard man. Ignoring the stumbling Rico (despite his drunken threats), Blondie moved up and shot Emmett multiple times.

When the smoke cleared, Emmett was still standing, though bleeding from several flesh wounds.  He returned fire and this was much more effective: Blondie went down, unconscious and badly injured.

Seeing his hero fall, Kid Sheleen ran towards the enclosure with both guns blazing.  Rico tried to line up a shot on the youngster, but went down with a bullet in the head.

Next, the Kid blasted away at Emmett.  Improbably, he hit the outlaw in the head, killing him instantly and thereby pulling off an extraordinary victory!

Results

Townsfolk

  • Blondie: badly wounded
  • Preacher Adams: badly wounded
  • Jesse: dead
  • Old Pete: uninjured
  • Kid Sheleen: uninjured

Squatters

  • Emmett: dead
  • Black Bart: badly injured, captured
  • Injun Joe: dead
  • Rico: dead
  • Jebediah: lightly injured, captured
Clearly, the townsfolk have the victory, though a somewhat Pyrrhic one.  Of the townsfolk, Old Pete and Kid Sheleen are the clear winners, with Blondie and Preacher Adams gaining only a marginal claim.  Sadly, the player in control of Jesse (who shot his other character, Injun Joe, right at the start) loses completely.  Better luck next time!

Friday, 19 April 2013

Happy Blogday to me!

Introduction

It's exactly a year since I started this blogging lark, so I thought it would be a good time to recap what I've done in the past 12 months.

Statistics

Over the year, my blog has had:
  • 99 posts (this is the 99th).  My goal of 2 updates per week  almost worked, but there were periods when holidays or other events intervened.
  • 30550 views.
  • Visitors from 89 countries, including every single state from the USA.  Some countries have a single visitor only, so a special message to these individuals: you're not alone as long as you have a shared interest with so many others around the world!
  • 59 followers.  My most sincere thanks to each and every one of you!

Here's a rough breakdown of the articles I've posted:
  • 6 battle reports (Hordes of the Things)
  • 8 battle reports (Full Thrust)
  • 14 battle reports (All Things Zombie)
  • 5 battle reports (The Rules with No Name)
  • 5 battle reports (Adventures in the Lost Lands)
  • 8 battle reports (other rulesets)
  • 12 articles on designing and making cards and other game accessories
  • 26 posts showing off or reviewing models
  • 15 others (workbench updates, competition and award announcements, 20 questions &c)

Highlights and Lowlights

It's been both exhilarating and humbling to see how much (or how little!) interest has been generated by some articles.  After a while, I thought I could predict which posts would gather a lot or a little of response - but on looking back I realise that my estimates weren't always close.  There have been a few real surprises in there!

Most popular post (by a long way):
  • ATZ Event Cards: Finally!  The most sincere form of praise is when people start to reference or to copy your work.  Some of these random events made it into All Things Zombie: Final Fade Out and I'm always delighted when I see such events or ones from the card set appearing in other people's games!

Least popular post, at least when judged by lack of response.  Tie between:

The Future

So, where will the Infinite Legion go next?  I'm not really sure, though I don't imagine there will be many changes to the format.  I still expect to publish roughly twice a week: one battle report after Games Club night (at least during school term times when the club is running) and one "other".  I may add more different rules to my stable of rulesets.  I've already got SAGA but haven't finished painting figures for it and 5150: Fighter Command is demanding that I play it.  I might start writing the occasional piece on scenario construction; this seems to be of some interest to many players.

Finally

Once again, many thanks to those who read my articles and to those who respond to them (either here or by replying on other forums such as various Yahoo groups, The Board of the Living Lead and The Miniatures Page).  Special thanks are also due to the group of players at my local games club in Helensburgh.  Without you guys, I wouldn't have nearly as much material!

Thursday, 18 April 2013

HotT: 7 Heroes!

Introduction

The Helensburgh Games Club restarted this week after the Easter break.  I planned a big game of Hordes of the Things; this usually works quite well for multiple players.  However, none of my usual group turned up (though the usual numbers of Warhammer 40K enthusiasts were present), so I took one side and my son took the other.

I set up a straightforward 72AP battle, with a settlement on one side and an attacking army on the other.  The story?  The Knights of Lyonesse had sent assistance to the aid of a village in the East that was being plagued by skeletons, zombies and other undead terrors.  Even though the villagers were strangers (and foreigners, to boot!), the Knights were sworn to defend the weak and oppose evil wherever it might be found!

 So on the defending ("good") side we had:
  • 2 x 24AP armies of the Knights of Lyonesse, heavily loaded with heroes and knights.
  • 1 x 24AP Kung Fu army consisting of a few heroes, some foot soldiers and hordes of peasants.
whereas the attackers - the Cabal of the black Hand - consisted of:
  • 3 x 24AP armies, each led by 1 or 2 magicians, with a mixture of other troop types (especially bats and hordes of zombies & skeletons).
It occurred to me after setting up these forces that the defenders had a total of exactly 7 heroic characters, consisting of 1 paladin, 1 aerial hero, 1 cleric and 4 heroes.  Surely that's a good omen for them!

The Battle

For the most part, both lines of troops advanced towards each other until they met in the middle.  While this was happening, there were a number of noteworthy incidents around the battlefield:

Sir Artois de Beaumain


 In the north, Sir Artois de Beaumain flew his winged charger over the undead line and attacked their reserve of bats.  He knocked back the big bat before turning round and charging an assistant magician from behind.

This new foe was completely taken by surprise and Sir Artois killed him before the magician could curse the knight with dark arts.

However, the hero was now in the midst of his foes.  Recovering quickly, swarms of bats pulled him and his mount from the sky.  Once some skeletal horsemen joined in as well, the knight was doomed and fell beneath the weight of enemies!  1 hero down!

 Bats in the Centre!

In the middle, the Cabal's bat swarm decided to leapfrog over the villagers and distract them from their advance.

They hadn't counted on Lin Jie, the Kung Fu master.  This hero had a great time destroying the hapless flyers one after another,though it's not known whether he did this by leaping into the air to catch them, by throwing stones with great accuracy or by tricking them into landing.  First one set of bats was wiped out, then another.  I guess that all heroes have their trade secrets...

Meanwhile, things were going badly for the Cabal in the centre.  Knights broke through the ranks of skeletons and so terrified the ghosts that these sneakers fled off the table and were never seen again.  Surely that's the wrong way round!

Another one bites the Dust!


Back in the north wing, the forces of Lyonesse surged forward to avenge their fallen comrade.  The Red Knight challenged the Master Necromancer himself, but the titanic duel ended with him being ensnared in foul magics and transported away as a prisoner!  2 heroes down!


Meanwhile...

In the woods to the south, just beside the river, huge numbers of zombies clashed with a thin line of Lyonesse halberdiers.  Even though the humans were vastly outnumbered, the stout yeomen didn't give an inch and destroyed vast numbers of the undead.  But however many they killed,  more zombies appeared to replace the fallen...

Nearby, Saint Florence of Artenay and Sir Roger the Castellan were caught unsupported by the opposition's undead hero and heavy infantry.  Sir Roger managed to throw his enemies back, but the paladin was wounded and immediately fled the field to seek penance in a hermitage.  3 heroes down!

The loss of the paladin's spiritual protection left heroes in this part of the battlefield vulnerable to magic (Abbot Chao Kung, the cleric, was elsewhere).  It wasn't long before the warlock in charge of this part of the Cabal's army targeted Sir Roger.  He entranced the hero with visions of delight, causing him to fall captive to the forces of evil.  4 heroes down!

The Beginning of the End


Back in the north, both sides were reeling from their losses and close to breaking.  Even though he was in danger of being surrounded, the Necromancer fought in the front rank and managed to destroy a stand of knights.  This pushed the opposing forces of Lyonesse over the edge and they turned and fled.

The Necromancer's joy was short-lived, however.  Lin Jie appeared, seemingly from nowhere, and leaped off the hillside to tackle the big bat.  He felled the beast with one mighty blow; this was enough to break the Necromancer's force as well!

Lin Jie then raced back to the centre of the field (heroes can move a long way in HotT!), where he was credited with an assist as Li Feng took on a mighty undead lord.  Between them, the village heroes destroyed the wight and scattered his bones.  The central Cabal army then collapsed.  Some elements fled immediately, while others lost their animation and stood rooted to the spot, only to collapse into dust when approached by any of the peasants.

2 of the 3 commands from the Cabal army were now broken.  Only the warlock in the south remained, but his forces were scattered.  Zombies were still roaming the woods and tussling with Lyonesse halberdiers, but they were too far away to support the remaining heavy infantry.  With enemies approaching from 3 sides, the warlock decided to retreat.  He'd have to get his revenge some other day!

Aftermath

Man of the match

  • For the forces of Good: definitely Lin Jie, the Kung Fu master!  He personally slew 3 stands of bats, broke 1 enemy command and aided in breaking another.
  • For the Cabal: I think the Necromancer in the north did well.  He ensnared the Red Knight and destroyed some of his companions, all in hand-to-hand fighting.  This broke the opposing command.

Lessons to be learnt

  • We really need to know how to use flyers more effectively!  Neither the aerial hero (Lyonesse) nor the flocks of bats (Cabal) pulled their weight.
  • Blades versus Hordes is a match-up that will only end 1 way!  Not a good day for the skeletons and zombies...
  • The villagers didn't lose a single base (the mostly-infantry army was probably helped in this by having both flanks secured by more mobile forces).  Truly they'll be celebrating tonight!
 

Sunday, 14 April 2013

Studio Survivors and Zombie 3

Introduction

Back in December last, I showed some of my Studio Miniatures 28mm plastic zombies.  I also described a survivor that I'd converted from one of the same models.  Well, I've continued to experiment; here are 2 more survivors and a further zombie.

Scott

Scott was made from the body, head and left arm of a Studio plastic zombie.  The right arm and gun were spares from the Hasslefree "Kev" figure.  Because of the way that the gun arm was sculpted, I had to remodel the (plastic) supporting arm quite a bit to make things fit.  Indeed, Scott's left arm is a bit longer than his right arm - though this is only noticeable from certain viewing angles.

Isaac

For Isaac, I only used  a body from the Studio plastic zombies.  The head, arms and weapon are spares from a set of Westwind bikers.  Again, the left arm had to be repositioned quite a bit to make it fit.  The added metal parts are clearly a bit chunkier than the plastic body, so Isaac looks rather top heavy.

"Traffic Cone" Zombie

At the same time, I made another zombie as it was intended to be made!  This is a straightforward, Studio Miniatures, plastic zombie to help swell the ranks of my horde.  The traffic cone is scratch built.

Conclusion

If you have a well-stocked spares box then it's obviously possible to convert the Studio Miniatures plastic zombies into something else.  Positioning arms for a 2-handed weapon (or a 1-handed item braced with the second hand) is a pain, in my experience.  If you're looking for an easier build then don't choose a 2-handed pose!  Also note that even though I have a reasonable amount of spares from other manufacturers, many of these parts just didn't look right.  Typically, spare metal parts will be too bulky for the more delicate Studio plastics.

My final thought: I've spent a lot of effort on these (bah!) but ended up with some unique models, very cheaply (yay!).  Of course, if I'd been just a little more patient then I believe that Wargames Factory are now about to ship or are already shipping a set of plastic, multi-part survivors.  Perhaps converting models like this is not needed after all...

[Update: now that the Wargames Factory survivors are available (Men and Women), I've done some further conversion work here: http://colgar6.blogspot.com/2013/09/wargames-factory-conversions.html ]

Wednesday, 10 April 2013

"Not-Star Trek" Orion Fleet (Irregular miniatures)

Introduction

Not long ago, I showed you my "not-Federation" starships.  This time, it's the turn of my second-oldest fleet: their "not Orion" opponents, also from Irregular Miniatures.  These are not canon Orions; they don't quite match the official ship classes from Amarillo Design Bureau (owners of the Star Fleet Battles copyright).  However, they're a great deal cheaper (especially since Irregular is on the near side of the Atlantic for me, so postage costs are also less) and that's good enough!

Irregular's Catalogue

For my Orion fleet, I'm using the "Dysonian" ships from Irregular Miniatures.  These can be found (with some difficulty) by going to the main site an choosing "6mm" from the bottom bar.  Then click on "Science Fiction and Spaceships"; the DYD codes are about 75% of the way down that page.  As before, it's probably helpful to republish the relevant extract of the catalogue here:

DYSONIAN FLEET

DYD1Corvette, Blitzspear Class
DYD2Frigate, Jarl Class
DYD3Destroyer, Thor Class
DYD4Heavy Destroyer, Wraith Class
DYD5Light Cruiser, Javelin Class
DYD6Heavy Cruiser, Loki Class
DYD7Battlecruiser, Chieftain Class
DYD8Dreadnought (Battlecruiser with 4 engines), Odin Class
DYD9Light Carrier (Battlecruiser with 2 hanger bay modules), Raven Class
DYD10Light Tug (Light cruiser with cargo pallet), Heimdahl Class
DYD11Revised Blitzspear Class Corvette
DYD12Rapier Class Gunboat

Orions in Full Thrust

As with my Federation fleet, I decided to base my Orions on an existing set of Full Thrust designs.  This was mainly to avoid the effort of creating an entire fleet of ships from scratch!

In this case, I chose to base the Orions on the ESU fleet.  Their design philosophy (from Full Thrust's Fleet Book 1) can be paraphrased thus "mostly beam armed, varied means of protection, optimised for long-term independent operations".  That fits my idea of the pirate fleet quite well and I'm not averse to swapping a few systems here and there to customise ships.  In particular, I've given many of the larger ships a needle beam; this should allow them to target the engines of a fleeing merchantman and thus be able to capture it without destroying the cargo.

The Fleet

2 things should be noted before we rush into the pictures:
  1. These Orions use my own "Fireball XL5" colour scheme: large amounts of silver offset by red and yellow stripes.  That's not Star Fleet Battles canon at all!  However, I reckon that a pirate chief can paint his ships any way he likes; indeed he may even want to make his fleet very distinctive.
  2. I started this collection with a "Fleet Pack" from Irregular Miniatures.  This came with no instructions and all the parts were in a single bag (note that I bought this many, many years ago; the way Irregular package and label items may have changed since).  While I'm reasonably confident in my identification of the smaller, 1-piece ship models, the larger ones may not resemble anything actually in the catalogue.  Basically, I took the collection of bigger hulls & separate engines and assembled them in ways that seemed good to me!
I've given the manufacturer's designation for each model where I'm reasonably confident that I have the right number.  However, please accept that I may have made some errors.  Update: I've filled in the missing codes, many thanks to Rich McGee and Irregular!

Irregular DesignationPictureFull Thrust SSD
Update: DYD2 - Frigate, Jarl Class
DYD3 - Destroyer, Thor Class
DYD4 - Heavy Destroyer, Wraith Class
DYD5 - Light Cruiser, Javelin Class
Update: DYD6 - Heavy Cruiser, Loki Class
Update: DYD7 - Battlecruiser, Chieftain Class
Update: DYD10 - Light Tug (Light cruiser with cargo pallet), Heimdahl Class

So there you have it: my "not Orion" Star Trek fleet for Full Thrust.  These are all Irregular ships and they are all from their DYD range.  However, I'm not at all sure of many of the product codes; if any reader can help me to fill these in then I'll be very grateful!

Sunday, 7 April 2013

Gamer's Gold: I'm a winner!

Back in January this year, a competition was announced on the Dice of Legends blog.  The rules were quite simple; to enter all you had to do was to submit an article related to Old West gaming.  Prizes (and there were quite a few) were then drawn randomly from the entrants.  Well, to cut a long story short - I won a blister of figures and it arrived yesterday!  The full list of prizewinners is here: prize winners.


I'd always thought of Rebel Minis as a maker of 15mm models, so it was somewhat of a surprise to discover that they also make a few 28mm figures.  However, I cannot find any mention of this Old West pack, either on Rebel Minis own website or elsewhere on the Internet.

I'm somewhat curious about these miniatures, so if anyone can fill me in then I'd appreciate it.  Are they a limited edition, given away with Rebel Minis' rules?  Were they a failed entry into the market, since withdrawn from the catalogue?  Perhaps they are the start of a new range, too new to be known on the web?  Or maybe the data is out there and I've just missed it?

Anyway, here are the 3 cowboys from the blister.  One holds a rifle, the second has twin pistols and the third is firing a revolver.  The sculpting is decent, but not outstanding.  There were a few mould lines on 2 of the miniatures, but these weren't too hard to clean up and I haven't spotted any other issues with the casting.

Here's a comparison shot with a partly-painted Artizan figure.  This clearly shows that the Rebel Minis models are a bit smaller and slimmer.  My Artizan, Foundry and Dixon cowboys are similar in size to each other, so the new models will probably end up as adolescents or just as smaller than average men.  After all, not everyone was as tall as John Wayne!  Or Gary Cooper.  Or James Stewart.  Or Clint Eastwood...


It might take me a little while to paint these up and get them ready for action.  However, I will certainly do so and they'll appear in future games of "The Rules With No Name".  Many thanks, Dice of Legends!

Wednesday, 3 April 2013

Army Showcase: Viridians (part 2)

Part 2: Light Infantry

A while ago, I posted some pictures of my Viridian mounted troops.  This was not one of my most successful articles, at least when measured in terms of the responses (there weren't any!).  However, I'm not writing this blog entirely for the adulation of others; it also serves as a record of some of my collection.  So, I'm not prepared to give up just yet.

This time, I present the light infantry from my Viridian force.  The Viridians are a science fiction army from the VOID universe and the models are still available from Scotia Grendel.  The infantry in this force are split into 2 separate categories: fully-armoured warriors ("not-Space Marines") and unarmoured grunts.

The light infantry have a distinctly Hollywood-Vietnam feel to them, especially as there are some non-standard pieces of uniform such as sunglasses, bandanas and stetsons.  Additionally, their mix of weapons is very traditional and would be very familiar in a Vietnam movie: assault rifles, rocket & grenade launchers, mortars and heavy machine guns.  No aerial drones, mass drivers or light sabres here!

In my mind, these are a relatively low-tech force, particularly well suited to being a generic army on a backwater planet.  As such, they have appeared in some of my battle reports as "Planetary Defence Force" militia, not particularly well trained or equipped:
 So, without further ado, I present the Viridian Light Infantry!

Infantry Squads

Strike Commandos

"Strike Commandos" is a very grand title for a squad who differ from the regular infantry only in having a minimal amount of body armour.  Oh, and lighter weapons.  One of them is carrying a box which could be used as any kind of gizmo needed in a scenario, such as a pulse generator, phase emitter or beer cooler.  This is an equal opportunity squad: there are 5 women and 4 men in it, which is as near balanced as you can get with an odd number.

Rifle Squads

The basic infantry squads have a nice range of different figures in them because I've mixed the official "marine" and "commando" figures together.  I really didn't see enough distinction between these sets to warrant keeping them separate.  There are a few odd poses, particularly among the "marines", but overall these are decent figures.

One other observation: I painted the Viridian infantry in 2 phases.  The first batch was done early in my painting career (at least, early for my 28mm figures).  These can be distinguished by the green trousers and the flocked bases, with a single sprig of plastic foliage stuck to some of them.  I'm slightly embarrassed when I look back on them now.

The later batch of figures have grey, camouflaged trousers and their bases are textured; static grass has been used for sparse ground cover.  There's also some shading on the clothing.  Much better, in my opinion.

Support Weapons

Chain Guns

I have 2 ground-mounted chain guns for my Viridian infantry.  Again, the difference in skill between my earlier version and the later one is very obvious!  I scratch-built a number of spare magazines for the chain gun on the left; the way these have been strewn about suggests that the weapon has been in action for some time.

Mortars

My older support weapons had all the crew and the weapon itself on separate bases.  While this is very flexible for casualty removal or for fitting the figures into difficult terrain, I don't think it looks so good.

Here are a couple of newer mortars, each mounted on a single base.  This allows the addition of piles of ammunition, spare weapons or helmets and some interesting scenic elements.  It also permits more varied placement of the crew.

Still to do

I collected a lot of VOID figures from eBay at a time that they were becoming unfashionable.  This means that I have many more infantry to paint, if or when I find the time.  Ideally I'd start by painting up many more squads, since the support weapons above are at least company level assets but I only have enough basic grunts for a strong platoon.  Also I need some command figures, possibly some communication or medical specialists too.  Oh, well - maybe one day I'll get round to this...

[Update: Part 3 (Heavy Infantry) is now available]