Sunday 27 March 2016

7TV: Doctor Who and the Pyramids of Venus

Introduction

This is a report on our first game of 7TV (2nd edition).  I've had a copy of the 1st edition rules for a long time, but I never got around to playing a game.  The new version was so enticing that I determined not to make the same mistake of just letting it gather dust on the bookshelf.

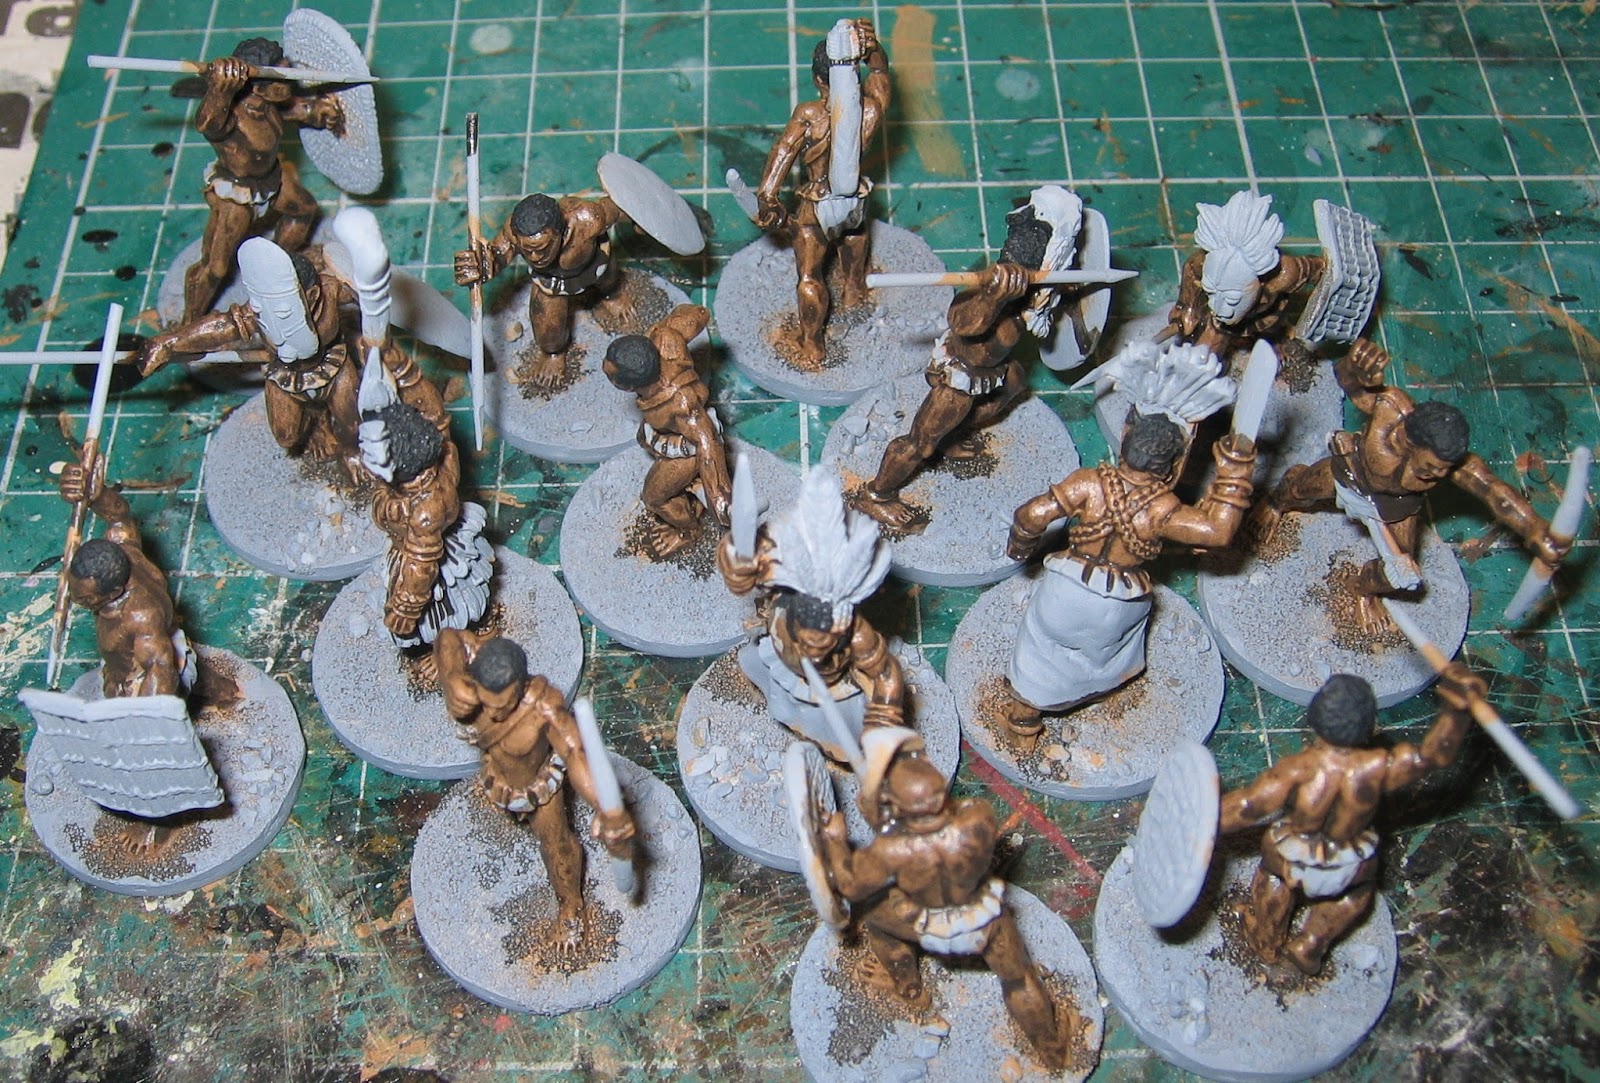
The Doctor and allies are in blue; the Master's forces are in red

Sometime in the future, or maybe in an alternate universe, Venus has been terraformed enough to permit human settlement.  The growing mining and agricultural towns have encroached on ancient monuments left by some long forgotten race of aliens.  Most people regard these pyramids as mere curiosities; dusty relics from a distant age, but maybe they're more than that?

The Doctor has determined that the structures are anything but harmless; they form part of a key which could be used to summon back their terrifying creators.  He and his companions have decided to neutralise the threat by removing certain components.  In this they are accompanied by some local corporate law enforcement officials who have been persuaded of the danger.

However, other eyes have spotted the possibilities of the ancient, alien monuments as well.  The Master has tricked a squad of Sontaran soldiers into assisting him.  He seems to delight in sowing chaos and trouble wherever he goes, but who knows what are his real goals?  It's now a race to see which force can reach the Pyramids of Venus first!

The Forces

For our first game of 7TV2, we decided to keep the sides quite small; we used 25 ratings each.  Also, there would be no customisation of any profiles; we'd use the characters exactly as written on the cards.  Fortunately there were enough suitable archetypes amongst the prebuilt 7TV characters to fill all our needs.

The Doctor


We decided that the heroic side should be heavy with stars and co-stars, backed up with a few local nonentities:
  • (Star) Unearthly Traveller.  The Doctor.  Note that this model is one of my son J's rather than my own.
  • (Co-star) Plucky Assistant.  Sarah Jane Smith.  Another of J's models.
  • (Co-star) Strongarm.  Dexter, a local ruffian from the nearest township, tolerated but loved by the forces of law and order.
  • Security Guards.  3 corporate police types from the nearest mining/refinery complex.  Let's call them Knuckles, Starbuck and Paddy.
  • Doctor.  Dr. Ness, a local MD with an interest in antiquities.
The heroic side ended up with 4 gadgets.  I've just realised that this was a mistake; they should only have kept 2, chosen from 4.  However, we only used 2 of the items during the game, so it's probably OK...

The Master


In contrast, the Master had a whole bunch of hired/tricked muscle with him, but wouldn't brook any competition from equals:
  • Otherworldly Invader.  The Master (in partial Timelord ceremonial robes).
  • Alien War Leader.  Sontaran commander (without helmet)
  • Alien Heavy.  Sontaran with disintegrator rifle (no helmet, big gun).
  • Alien Warriors. 4 Sontaran soldiers (with helmet).
Since the Sontarans are all clones, there didn't seem much point in trying to give them names.  They'll remain as faceless minions, then.

The Master's side had just 1 gadget.

The Game


Both sides set up in 2 separate groups, each very close to an objective marker.  Indeed, the Master used his Spy ability to set up a bit further onto the table, right on top of one marker!

If we've understood the deployment rules correctly then it is entirely legal to begin within just a few inches of an objective.  Consequently, 4 of the 5 such markers were claimed within the very first turn.  I think I'll need to re-read this part of the rules quite carefully; it seems like a surprising result and I'm concerned that we may have misunderstood something.


The first hostile act occurred when Knuckles attempted to advance round the extreme right-hand pyramid.  A squat alien with a very big gun stepped forward to get a better shot and then gunned down the human at long range.  The disintegrator cannon didn't leave much of Knuckles, just hot ashes  [What?  The alien heavy has a strike value of +12!  Most minion attacks are in the +6 to +8 range.  That's an anti-tank weapon; poor Knuckles didn't have even a remote chance of surviving].


Although Knuckles distracted some of the alien soldiers, this was really just a sideshow.  The main action took place in the centre of the table in the flat ground between the 3 pyramids.

Further Sontaran warriors, encouraged by the Master, claimed the 5th and final objective.  The Doctor was busy studying the ancient writing on the ceremonial bowls on top of one of the monuments, so it was up to Sarah Jane and Dexter to try to thwart the evil side's nefarious plans.


As the aliens started to retreat with their prize, Dexter ran forwards.  "You wanna fight?  Ah'll gub you, see if ah doan't!" he shouted as he threw a tear-gas cannister towards the aliens.  The bomb left both the Master and a Sontaran reeling.


Dexter flattened the Sontaran warrior with his jemmy, then rampaged onwards into a second alien.  As he did this, Sarah Jane ran forward to help (though it's not obvious what assistance she might have offered).  All the alien heads immediately swivelled in her direction and she was met by a torrent of fire [that's the Danger Magnet special effect; enemies within 6" may not attack anyone else when it's activated].

Somehow, Sarah Jane survived the fusillade; the alien pistols and rifles all missed.  The soldier with the disintegrator cannon had also wandered in; this was a much more significant threat that would probably have left SJ as a cloud of rapidly expanding hot gas.  However, the timely application of a First Aid Kit gadget cancelled the effects from that strike.  As one of the good guys, this alien heavy was really worrying me!


OK, what can we do about the nasty Sontaran cannon, then?  I don't fancy the Doctor's chances if he tries to talk the alien into disarming, nor Sarah Jane's chances in a brawl.  Instead, the only guy we've got nearby who isn't occupied is Paddy, the corporate guard.  He edged round the pyramid and pulled out his pistol.  It wasn't much of a chance against the Sontaran's battle armour, but he fired anyway.

The evil side were so full of confidence (or lacking in experience of the rules?) that they didn't bother to spend any plot points to boost their defence roll.  The good guys were running on empty and couldn't afford any plot points to improve their own chances.  And what do you know - Paddy rolled high and plugged the bad guy!


The remaining 2 unengaged Sontarans now advanced from the woods to assist their embattled colleagues.  Paddy had a pistol, which gets 2 shots per turn.  He was the only thing between the alien warriors and his friends, so he fired.  Once again, pistol versus battle armour isn't a good match, but he scored fatal hits with both shots.  Jaws were dropping by this time, I can tell you!

Sarah Jane had been injured by the Sontaran leader during another round of "Danger Magnet" shooting, so she had retired a short way to be tended by Dr. Ness.  She was soon bandaged and ready to go again.


Not to be outdone by a pseudo-policeman, Dexter crowbarred another Sontaran warrior into a motionless heap.  Within 2 (?) turns of fighting, the evil cast had been thoroughly axed!


To add insult to injury (and for no well-explained reason), the Master suddenly exploded!  He wasn't hurt by the fireball, but it might have rattled the players on the evil side...


The evil side were now down to just 2 figures.  Dexter charged at the Master, shouting a traditional war cry: "Hey, you!  Big man!  You're going DOWN!"

Paddy took aim at the Sontaran commander.  Once again, the odds were against him, but his bullet hit the bad guy.  The evil side were quick to point out that this Sontaran had 2 health points, so Paddy fired again (pistols are allowed 2 shots, remember?).  There was a stunned silence when his second shot hit the alien leader squarely between the eyes and felled him.  That's 5 shots in a row against the odds, without a single miss...


Dexter gave the Master an almighty thump that staggered the Timelord.  However, before he could capitalise on this advantage, the scheming villain pulled something from his sleeve and sprayed it in Dexter's face.  The human fell to the ground, momentarily disoriented.  When he recovered his wits a short time later, the Master was nowhere to be seen; he had fled!


Conclusion

This game started off a bit slowly.  I think that we all felt a slight sense of let down when all the objectives were claimed within 2 or 3 turns.  There was a distinct sense of "what happens next?  What do we do now?"  However, once Dexter and Sarah Jane attempted to drive off the aliens, things certainly hotted up.  In the end the Master escaped, leaving his minions scattered and destroyed.  This seems very appropriate!

I think we were probably playing on too big a table (4' x 4') for the small, 25 rating casts that we used.  Coupled with this, we should also have used 5 cards in each countdown sequence rather than 6, so that the small game would have ended sooner.  Still, for a first outing I'm quite pleased with the way this game went.

Biggest disappointment: the Doctor spent almost all of the game just staring at ancient stonework.
Biggest surprise: has to be Paddy!  I mean, the man deserves a medal or something.  Without him, the heroic side were almost certainly in big trouble.


And the final victory point score, for anyone who cares:
  • Evil/The Master: +3 points for objectives
  • Heroic/The Doctor: +2 points for objectives, +1 point for axing the opposing cast.
So it's a draw!

Sunday 13 March 2016

6 Projects: part 3

<== Part 2 is this way

Introduction

Last week, in part 2 of this series, I had completed 2 of the 6 projects, some of the other 4 had progressed and some hadn't moved at all.  Let's see what I've been up to over the past 7 days, then...

6 Projects, Part 3

Still finished!

The horse herd is finished, but not packed away.  I reckon that still counts as completed, even though there have been a few comments against this position!  I even wrote an article about how I paint horses for wargames, using these to illustrate my simple (but fast) equine model colour recipe.


=>

Finished!  I finally plucked up enough courage to attempt the marble plinths and it wasn't as bad as I had thought it might be.  Consequently, these are done; I'm not planning any further work on them.

These statues ended up a totally different colour from my first idea.  Initially, I had planned to do bronze statues on a white marble plinth.  After a while I changed my mind though; I decided against the metal colour because stone statues just seemed more likely in a pseudo-medieval setting and therefore more appropriate for Frostgrave or similar games.  Once I had painted the statues grey/white, I wanted a contrasting plinth, hence the black/green marble.


Pyramids not changed, but top details started

I've not make any updates to the step pyramids themselves, though I have thought about doing it often.  It just keeps falling off the bottom of the "to do" list...

At least I've started work on the large stone bowls that will be used (optionally) as the top details for the pyramids.  These might have held wood & oil and been beacons, or perhaps they were used to store blood during sacrifices to the Sun God.  Who knows?  Whatever their original purpose, the bowls are somewhat broken and obviously haven't been used in quite some time.  They come as a set of 4 from Fenris Games.


Still Finished!

The Rock Top Gang have now been boxed, though I haven't yet found anywhere to store the box!  At least I now have my "Forgotten King Upgrade Deck", which will make it easier to use these in version 2 games of Super Dungeon Explore.  That deck took some effort to find, I can tell you!


No change

Once again, the Frostgrave miniatures haven't had any attention.  Perhaps now that my workbench is a bit clearer (because of the completion of other projects) I'll be able to work on these figures?


=>

Finished!  The 15 cannibals are complete and can now be added to the 16th tribesman whom I painted up as a plot point a few weeks ago.  These were great fun to paint and although I probably have enough for any conceivable need in Pulp Alley, I'm tempted to get some more.  This is not so much to threaten Tarzan in my jungle-based games, but rather because I'm eagerly looking forward to Studio Tomahawk's upcoming "Congo" rules.

Since Darkest Africa has been one of my oldest interests in literature, though somewhat latent in gaming terms, I'm thinking of collecting a force of 30 or 40 jungle cannibals.  Of course, I'll then need a force of Arab slavers and perhaps a rather larger expedition of white men & native guides than I have already.  Hmm, what else might I need, I wonder?


Conclusion


Last week, I suggested that I might be able to complete all 6 projects by the end of week 4 (i.e. 7 days from now).  4 of the 6 are finished, but can I progress enough on the other 2 in just 7 days?  I guess that is still possible, though as always the amount of model-making time can vary from one week to another as work, family and other demands on my time fluctuate.  We'll see - not long to go now!

Part 4 is this way ==>

Wednesday 9 March 2016

Painting Horses for Wargames

Introduction

What colour is a horse?  It's one of those questions which can be answered by every schoolchild quite easily: usually brown, possibly white or black.  This answer is along the same lines as "trees have brown trunks and green leaves", or "rivers are blue": it's much too simplistic (or even just plain wrong).

As wargamers, unless we're concentrating solely on mid-20th century or later, we often need model horses.  In this article I'll present a recipe for painting the most common horse colours in as simple a manner as possible.

Note that I've used 28mm horses to illustrate my technique, but it can be used equally for smaller models, especially if some of the steps are omitted.  For example, I don't bother to paint hooves on a 6mm horse!

Equine Colours

There are many serious articles about horse colours available on the Internet such as these, for starters:
However, what it all boils down to is that unless you are modelling an unusual population of horses, then there are 2 very common patterns: chestnut and bay.  These are very similar to each other in technique, so both are covered by this article.  However, if you want blacks, whites (actually called "greys" by horse enthusiasts), Palominos or anything else then you'll need to look elsewhere.

DISCLAIMER: I'm not an expert on horse markings, but I've read a fair few articles on painting them over the years.  This is my simplified scheme for painting model horses to a standard that looks reasonably convincing to those of us who don't have a great deal of contact with the real, live animals.  It works for me, though if I've made any gross mistakes then please feel free to point them out!


Chestnuts and Bays: Base Colour

Step 1: paint most/all of the horse (both bays and chestnuts) in some shade of brown.
Chestnut and bay horses come in quite a variety of shades of browns: yellowish, reddish, pale and dark.  Possibly I've got too much of a range of base colours here (I suspect that within a single herd there would be more animals in the middle range of colours; few would have completely different shades?)


Step 2: Paint the points of the bays (mane, tail, legs up to the knee) in black 
In my simple recipe, the only difference between a bay and a chestnut is this step.  The bays have their legs, mane and tail painted black.  The chestnuts just skip this step.


Step 3: drybrush the mane and tail with a paler colour
Some chestnuts (?) have manes and tails that are darker than their coats, but in this production line method I always use a paler colour.  If you're feeling really fancy then you could use 2 or 3 successively lighter shades for drybrushing; I only used one in this example.


Adding Details

Step 4: paint 1, 2 or 3 white socks on each horse
Almost all horses (?) have white socks on some, but not all of their legs.  As with human socks, these can be just around the ankle, almost up to the knee or pretty much anywhere in between.  I don't think that I'd mix different lengths on the same creature, though.


Step 5: paint the hooves in grey.  I use a "lichen grey" that is slightly green-tinged.
Technically, a horse's hoof colour can vary depending on whether the leg is pale or dark.  However I don't think that most gamers would notice such a detail.  For simplicity, I just use a single colour for all hooves.


Step 6: paint muzzles with either (Caucasian) flesh or dark grey/black
Most/all horses have some different colouration around the muzzle.  This can be either a pinkish flesh or a black and it can cover anything from just the tip of the nose & lips to half the face or more.


Step 7: paint a white flash, blaze or star on the forehead
As with the socks, most/all horses have a white mark on the forehead.  This can be anything from a small spot to a considerable vertical stripe or mask and there is a large set of technical terms for the various shapes and sizes of such markings.  For simplicity, I'll just say that I put a white "splodge" on my horses' heads.


Step 8: paint the eyes and nostrils with black
The last detail that I add is to spot the eyes and nostrils with black paint.  Of course, if the horse has its mouth open then the mouth and teeth will have to be painted as well, but that's very simple.  Also, if this is a draft or cavalry horse then it probably has some form of harness; that'll need to be painted at this stage too.  I'll leave it to your imagination, then...


Finishing Off

Finally, use a black wash to bring out the contours
Lastly, I paint the model all over with a thin, black wash.  This will darken the colours slightly, but more importantly it adds definition to muscles, hair and other textures.


Based and ready for action!  Note that there are a couple of "paint" horses in with the bays and chestnuts
The painted horses can then be based as you see fit.  This lot are a herd that I may use in Old West games, either in a corral or as wild animals.  They could be the target for rustlers, a dangerous stampede or just movable cover for gunmen!

Sunday 6 March 2016

6 Projects: part 2

<==  Part 1 is this way

Introduction

In part 1 of this series, I showed how I was progressing on 6 concurrent model-making projects.  As it turned out, I made no progress at all on 3 of the 6 projects by the time of that post (though I did manage to complete one of the others).  I thought when I started this series of articles that I might force myself to make progress, if only to avoid disappointing my readers.  Let's see how well (or badly) I've done in the 7 days since part 1.

6 Projects, Part 2

=>

Once again, the herd of horses is first to be reviewed.  Well, I'm pleased to announce that these are finished (if only just!)  They're maybe not the best paint jobs I've ever done for horses - I think I'd call them "decent wargames standard" - but I'm pleased to have completed them anyway.


=>

The statues are progressing in fits and starts.  They ought to be quite simple to paint, however I just can't get the right technique for painting marble.  I've read several tutorials, but my first attempts were so dismal that I gave up and overpainted them.  I'm still hoping to achieve a dark green stone effect on the plinths though, else they might look a bit barren & sterile.


=>

Some limited progress has been made on the pyramids.  I've finished the scribing of the blockwork and have added stairs to each one.  Yet to come: some filling, painting/covering and the still-to-be-seen top details!


Still Finished!

I'm glad to report that the Rock Top Gang which were completed last week are still complete!  They haven't been put away yet, as I haven't found a nice, safe box in which to store them.  That doesn't disqualify them, right?


No change

The Frostgrave miniatures remain untouched.  I'll need to do something with them soon; this is becoming embarrassing...


=>

My Congo tribesmen have moved on quite a bit.  They've had their eyes, bases and loincloths painted and I've started on the shields as well.  There's plenty more work needed, mostly on the more exotic figures with masks and headdresses.  Still, I'm pleased with the progress on these so far.


Conclusion


How many weeks will it take to complete all of these 6 projects?  At the moment, I'm thinking I might be done after 4 weeks (i.e. "Part 4"), though I'm prepared to eat my words in a fortnight from now if not everything is finished.  Surely it won't be more than 5 weeks, though?  It can't take that long...

Part 3 is this way ==>

Wednesday 2 March 2016

Supreme Littleness: In the Potting Shed

Introduction

I've been wondering how to make mode flower pots and seed trays for some time now.  Why, I hear you ask?  Well, I've got a part-finished 28mm  greenhouse from Blotz and I don't want the benches inside it to appear bare and sterile.  Small details perhaps, but it matters to me...

Now, I could have just scratch-built some model seed trays - but I never seemed to have enough time (or maybe it was the inspiration that was lacking?) and so nothing happened.


Supreme Littleness

As it happens, I also found myself in need of a small crate for a 7TV2 base I'm planning to make (I'll have to leave you guessing on this one, though here's a probably useless hint: S.I.G.).  So, small crates and trays: I wonder if anyone sells such models already?

Once the idea to hunt the web had formed, a quick Google search came up with a company that I hadn't heard about before: Supreme Littleness.  They have quite a variety of MDF clutter, including all manner of different boxes, crates and barrels.  A small order was fulfilled very rapidly and at low cost (it helps that these small sheets of MDF and fibreboard can be sent cheaply, by letter post).

So, what did I get?

Medium crates (19mm) and Long crates
 Firstly, a minor word of caution about ordering from Supreme Littleness's web site.  The pictures of their packaging kits and the (text) descriptions are in 2 columns on the ordering page, but the text in each column doesn't necessarily align with the correct picture.  I had intended to order the "Assorted boxes" packet, but ended up with the "Shallow boxes" instead.  It's not a disaster, but it's not quite what I wanted.  My mistake, through not being careful enough.

As it happens, these crates and boxes are rather too large for my current project, but they'll find a use for something in due course.  Perhaps the long crates might be cases of rifles being trafficked by gun-runners in a game of Pulp Alley?


Shallow Boxes.  The one on the left is made up as the manufacturer intended; the other 4 have been converted.
As well as the crates, I also got some "Shallow Boxes", which come in 2 lengths.  The shorter version is very close in size to the open boxes that I'd intended to purchase, so I decided to convert some of them into seed trays rather than putting in another order.  The conversion was very simple: use just the lower layer of MDF, add the pre-cut ends (with the carrying handles) and add some straight sides cut from scrap fibreboard.  Sand has been glued in 3 of them to model dirt; once this has been painted then I'll add some flock to represent seedlings.


Conclusion

Could I have made these myself?  Of course I could - I've got all the raw materials and the tools & skills necessary to build such items from scratch.  But that would have taken time and, what with family and job, I don't have as much of that as I'd like.  For me, the investment of a small amount of money instead is a very obvious decision!

Now if only I could find a way to make flower pots in 1:56th scale!