Saturday 28 December 2013

Black Powder: The Bridges over the Traisen (1812)

Introduction

These days, I don't play many historical games at the Helensburgh Games Club.  However, occasionally my friend Steve and I play a game of Black Powder with our 6mm Napoleonic armies.  This is, to me, the best scale with which to depict large horse & musket battles.  I think it gives a much better impression of the huge numbers of men and horses that would have been involved (though we all know that even 6mm figures aren't going to represent a division at 1:1, let alone an entire army corps or bigger).  See what you think...

Recently, Steve sent me a whole load more Austrian infantry (see here), so I was eager to try out my reinvigorated forces.  I had my chance last weekend...

Scenario


Somewhere in eastern Europe and sometime between 1809 and 1812, the Russian and Austrian empires are at war [note that this isn't totally impossible.  Although both these countries usually fought against the French, a weak and reluctant Austria did send an army corps to help Napoleon's 1812 invasion of Russia]. On this hypothetical occasion, a division from each army were racing to secure the crossings over the river Traisen, either to make it easier for following troops to cross or to allow engineers time to demolish the bridges.

This would be a simple encounter battle but with a slight twist.  Each side would approach from one side of the river; victory would be determined by counting the number of bases of troops that were on the far side when the game ended.

The river could be crossed at any one of 4 bridges by a unit that was in column of march [good luck doing that if opposed].  Also, it's possible that the Traisen could be forded.  The section of river with the island is automatically deemed to be fordable.  The status of each of the other 4 sections can only be determined when a unit reaches the river bank at that point.  A roll of 5 or 6 then indicates that the section is fordable.

A fordable river section may be crossed by any unit at half speed.  If a unit is defending a riverbank when faced by an attacker who is in the river then the defender gains bonuses equivalent to defending a building.  This makes it difficult, but not impossible, to succeed in such an assault.

Forces

Both sides had roughly comparable forces:
  • 2 brigades of infantry, each of 3 or 4 regiments of infantry and some artillery.  Many of the Austrian line infantry units were large, while one of the Russian brigades consisted of Jaegers.
  • 1 light/vanguard brigade of 2 or 3 regiments.  The Austrian vanguard had a mixture of light infantry and hussars, whilst the Russian equivalent had just cavalry.
  • 1 reserve brigade of 2 or 3 regiments of heavy cavalry plus some horse artillery.

The Game: Early Moves

In early moves, most of the Russian army advanced at a reasonable speed.  Their dragoons reached the curve of the river Traisen in the centre of the table.  A hapless subaltern was sent forward to find out if the waters could be crossed at this point; he quickly discovered that they were too deep!

The Austrian army mostly responded with apathy and only marched slowly forwards.  There were 2 exceptions to this: the vanguard blundered and went in the wrong direction, leaving it to the 2nd infantry brigade to make a forced march up to and over the nearest bridge.  The latter was a very risky move, as there were several regiments of Russian light cavalry just on the other side of the small hill.  However, these failed to spot the Austrian columns and just stood around waiting for further orders.

As the first Austrian regiments started to deploy on the far side of the river, they were joined by friendly dragoons and cuirassiers who used the second bridge.  The Russians just stood and watched, not really appreciating the significance of these movements [some useful command rolls for the Austrians and some poor ones for their enemies!]

Austrian vanguard (bottom) and 1st brigade (centre) advance - but too late!
The fighting was opened with an indecisive skirmish between opposing heavy cavalry units.  Finally, the Austrian vanguard and 1st infantry brigade advanced towards the southern bridges, only to find that the far banks of the river were already lined with Russian infantry and cannon.

Alternate view of the Austrian vanguard exchanging fire with Russians across the river
The river was completely unfordable at this point.  Under the circumstances, neither side felt like trying to force passage across any of the bridges!

Confused Fighting

In the north, one of the Russian infantry regiments charged forward without orders [i.e. a blunder was rolled!] at the Austrian unit on the hill.  Casualties were very heavy; both units remained deadlocked for some time with neither willing to give way.

Austrian and Russian dragoons knock the crap out of each other.
A savagely renewed heavy cavalry charge in the centre left both sides shattered and reeling.

...while to the south, lucky Austrian skirmishers shot to pieces an opposing Russian regiment.

Austrian infantry advanced slowly in the north, though every step was heavily contested.  In the centre, heavy cavalry commanders glared at each other through spyglasses, each side unwilling to risk another bloodbath with a fresh charge.  Further south, infantry and artillery pounded each other across the river, with both sides taking heavy casualties.

Breakthrough

Finally, the infantry of the Austrian 2nd brigade managed to destroy the opposing Russian units in savage fighting.  This caused the enemy's closer infantry brigade to become demoralised.  Indeed, Russian General Palitsyn was nearly captured by the advancing whitecoats; he had to flee quite some way to seek safety with a friendly regiment.

The Russians weren't about to give up, though.  Light cavalry forced the tired, leading Austrian infantry to form square and their accompanying horse artillery then pounded the square with cannister until it disintegrated.

While the remaining units of the Austrian 1st brigade paused to redress their lines (and to shoot down those pesky Russian gunners), massive reinforcements were pouring across the river.  The rallied Austrian heavy cavalry formed up behind the infantry line, whilst elements of the 2nd brigade waded across the river near the island and started to skirmish with the central Russian infantry.

Alternate view of the fighting.  Observe the cavalry massing on both sides in the far distance.

It was time for the cavalry to earn their pay.  Firstly the Austrian dragoons charged at one of the Russian hussar regiments.  The heavy cavalry obliterated their lighter opponents, then retired back behind friendly infantry to lick their own wounds.

Then the Austrian cuirassiers charged at the Russian dragoons.  In a thunderous meeting, both sides were devastated - but it was the Russians who broke and fled.  This last victory was enough to break both the Russian heavy cavalry brigade and their entire army.

As the remaining Russian units withdrew in reasonably good order, they were pursued closely by a few Austrian infantry units (and the Uhlans, who had finally decided to take part in the action).  All the rest of the Austrian cavalry was exhausted and had suffered severe losses; they were in no fit state to hound the enemy.

Conclusion

It was always going to be a race for the bridges, since the rules would have savaged anyone who tried to march across in the face of any opposition.  As it happened, the Austrian infantry to the north had a general who was really on form in the early game; several units had crossed before the Russians could react.

The game could have turned either way at several points, I think:
  • If the southern Russians had reached the nearer bridges before enemies turned up near the other bank then they might have crossed.  This would have given both sides a conundrum: reinforce your own bridgehead or squash the enemy's one?
  • If any of the river segments (other than the central one with the island, that is) had been fordable then that would have made a much easier crossing than the bridges.
  • Finally, the initial Austrian bridgehead was very crowded and somewhat precarious for a turn or two.  If the Russians had been able to bottle up these units then they might have done crippling damage to them.  Poor command rolls cost them this opportunity.  It didn't help that one of their generals chose that moment to blunder and start micro-managing an artillery battery into the wrong position!

Sunday 22 December 2013

HOTT: Santa's Army

Introduction

 Just over a year ago, I completed my 28mm "Santa" army for Hordes of the Things.  This was something I'd wanted to have for quite a while, but it took me a very long time to find the right figures for it.  Since then, Santa's army is brought out for a special game once a year, just before Christmas. You can read the battle reports for the games so far here:
Since this army has now appeared a couple of times, I thought it was worth devoting an article to its construction.

Santa [Aerial Hero General] (6AP)

There's no real doubt about how Santa is classified in this army: he cannot be anything other than an Aerial Hero General!

As might be imagined, this was by far the most complex piece in the army to make.  It's made up of parts from several different sources:
  • Santa himself is from Copplestone Castings.  This model is perfect just as it is; he's been painted and then pinned onto the sledge's floor.
  • The reindeer are from Company B, from the Finnish army range.  Other than the fact that these are mounted on wires (i.e. they're flying!), they're also straightforward models.  I've added the harness and traces from green stuff and thread respectively.
  • The sleigh is quite a different matter; this was a hard model to find!  It's based on the 2004 Christmas Sophie from Reaper Miniatures.  However, the body is heavily modified.  Firstly, the bat wings which extended past the rear of the vehicle were cut off.  The relief parts of the wings were filed off the sides of the carriage (and that was hard work!)  Finally, the 2 sides of the sleigh have been fixed inside out, so that the interior panelling effect becomes the new exterior and the last remnants of the bat wing effect are hidden on the inside of the model.  Note that the sword scabbard is now on the outside of the sleigh and on the opposite side from the original Reaper model.
  • Finally, some poles and wires were used to lift the ensemble up from the base; the sleigh has been modelled with the reindeer somewhat higher than the carriage, as if it's taking off.  A few tree-tops were added to the base, to try and give the impression that Santa is flying high over a forest.

Toy Soldiers [Artillery] (3AP)

This is a set from Eureka's "Toy Town" range.  I've tried to keep the painting very simple for these models, with only the most limited shading.  The soldiers are rather tall models; they stand well clear of 28mm human figures, but I suppose that's OK since they're just mannequins.  So far, their toy cannon hasn't achieved anything very much in any battle in which they've participated...

Elf Militia [Shooters] (4AP)

Santa's elves have formed a militia and have armed themselves with a mixture of rifles, pistols, sten guns and a flame thrower (perfect for dealing with recalcitrant snowmen!)  These models come from Wargames Supply Dump and can be found in the Santa Claus Wars range.  The sculpting is a little crude, but they're very characterful models and an unusual subject matter.

Ice Bears [Beasts] (6AP)

Apart from Santa, what might you find at the North Pole?  With a bit of a stretch of geography, some polar bears could be included; here's my version.  The models are from Wargames Foundry: GPR 19 Bellicose Bears.  Officially these are brown or grizzly bears - polar bears should have a somewhat different shape, especially for the head - but I couldn't find any polar bear models.  They've been given a "polar" colouration anyway; that's good enough for me.

Snowmen [Hordes] (5AP)

There are actually a few manufacturers who make 28mm models of animated snowmen.  However, I didn't use any of them for 2 reasons.  Firstly, none of the models really appealed to me and secondly, to make a large horde from metal models would have cost a considerable amount.

Instead, I made my own snowmen from modelling clay.  Each figure has either 2 or 3 balls of clay for a body.  Scarves, hats and "carrot" noses were added from green stuff.  The "coal" eyes were small pieces of grit, picked out from one of my tubs of basing material.  The arms are clipped-down branches from plastic tree armatures, made by Woodland Scenics.

The bases on all the models and the bodies of the snowmen were painted in an appropriate undercoat (green for the ground and grey/white for the snowmen).  When they were dry, these areas were covered with white glue and were then sprinkled liberally with Bicarbonate of Soda.  This can be obtained readily from any pharmacy (cleaning product) or supermarket (baking section) and it makes very cheap model snow.

Conclusion

This was a really fun army to plan and build, though it took a very long time to become reality.  I still don't have a really appropriate stronghold for it, though in the past it's been suggested that some of the Lemax products might work.  Sadly for me, these aren't readily available in the UK so I'll just have to keep looking.

However, this army does have its own dedicated dice:

Finally, Merry Christmas to one and all!

Wednesday 18 December 2013

HOTT: One of our Santas is Missing

Introduction

In the last club night before Christmas, I always bring out my special army for a big game of Hordes of the Things.  This year, Santa and his helpers were under siege from the forces of darkness!  From the west, the massive undead armies of the Cabal of the Black Hand approached his hideaway, intent on destroying this beacon of goodness once and for all.

However, it wouldn't be as easy as the chief necromancer hoped. Santa had friends (?!) to help defend the spirit of Christmas.  From the east came hordes of Oriental workers, reluctant to see a good source of income overthrown.  From the south, a band of mercenaries approached, attracted by the promise of the endless profit to be had from the man in red.

Let the battle commence...

The Game

This was a straightforward big-battle game of Hordes of the Things, with no special rules or scenario (because I couldn't think of anything in time).  There are 3x24AP armies on each side.

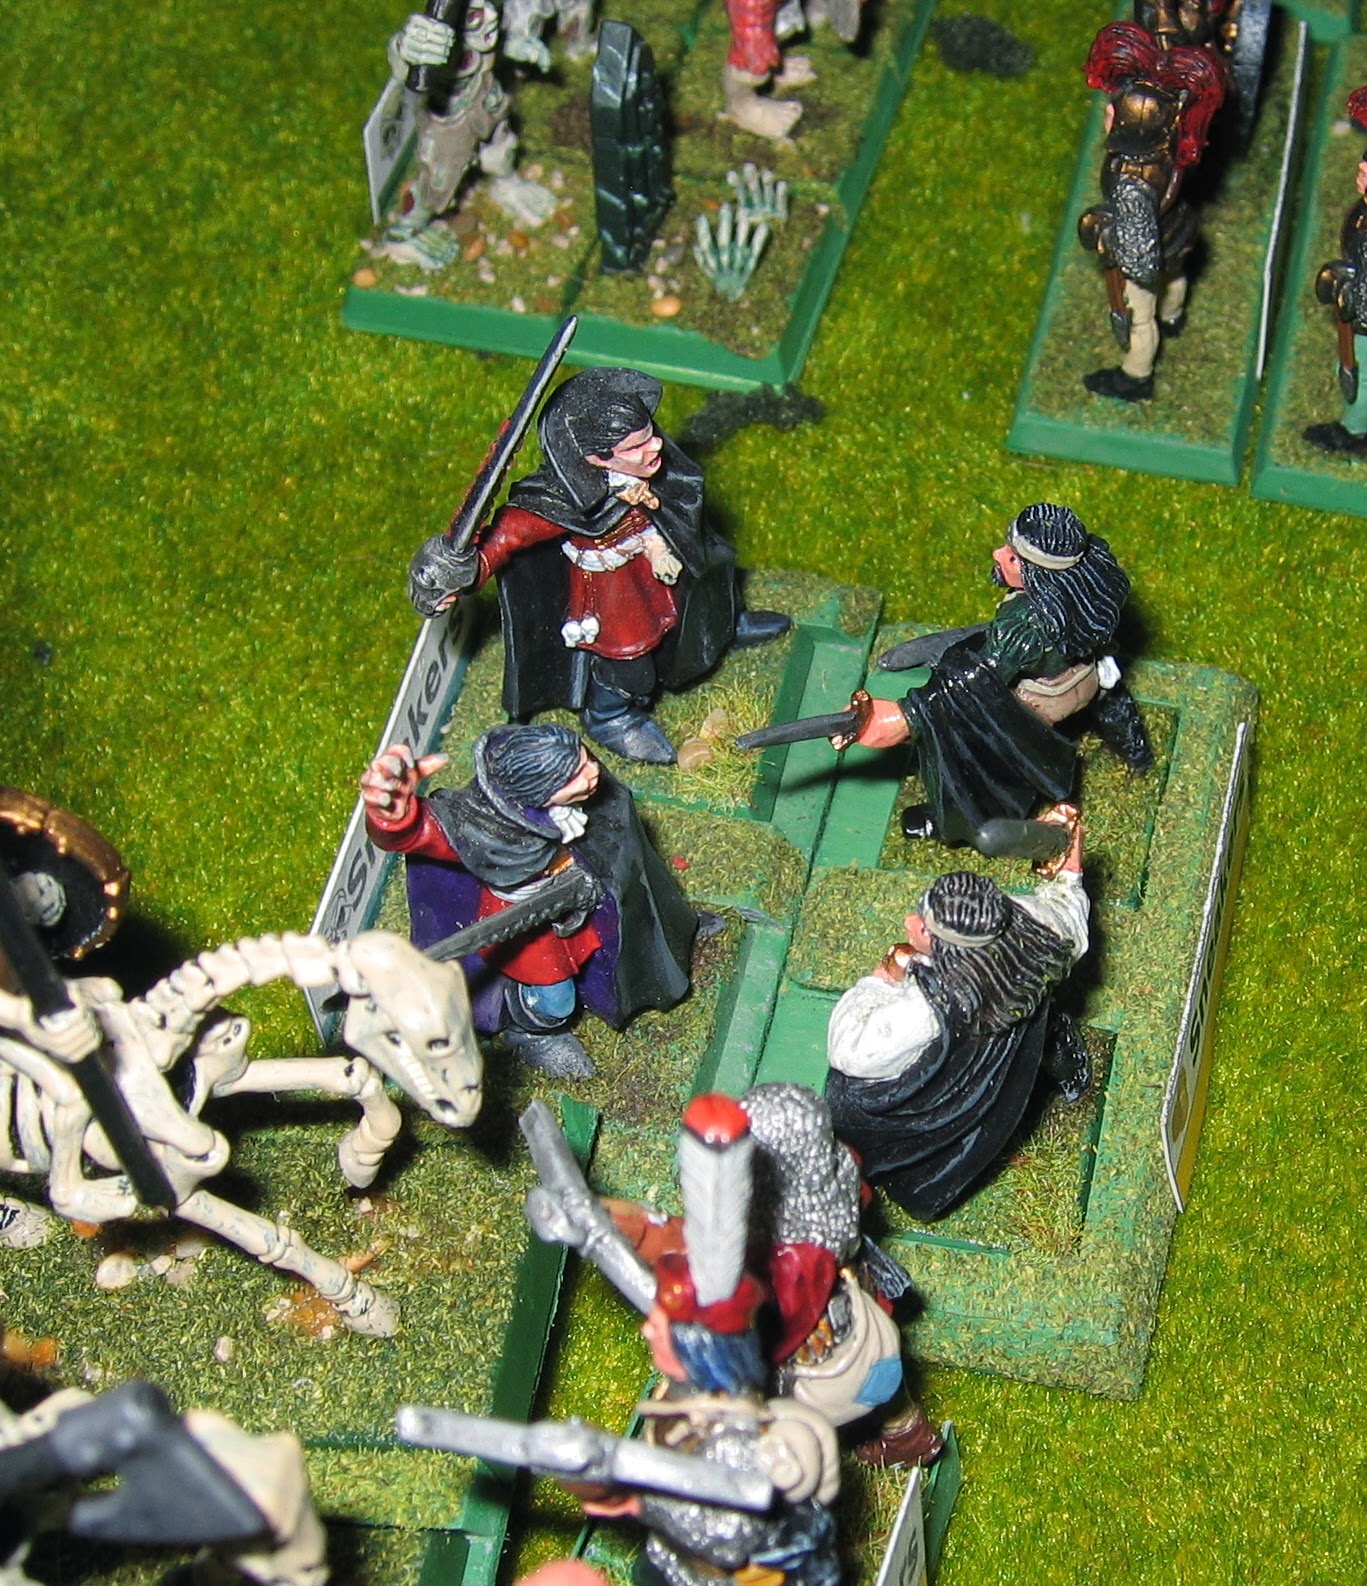
The 3 undead armies of the Cabal (on the left of the picture) are lead by magician generals and consist of the usual hordes of skeletons, zombies &c, with a mixture of bats, riders, sneakers and a few other troop types to pad them out.

The other 3 armies are all quite distinct!  To the north, the Kung Fu army is made up of several heroes, some infantry and hordes of peasants.  In the middle, Santa's army has ice bears, elves with guns, snowmen and a toy soldier cannon.  To the south, the mercenaries have a decent block of spears, some crossbowmen, a few knights, a pair of duellist assassins and a strange flying machine.

In the very first turn, the necromancer in the centre tried a speculative spell at the opposing general.  His illusion of a little boy dying from leukaemia drew the kind-hearted old gent into a trap.  Santa was captured and led away in chains before he realised what was happening [the necromancer needed to beat Santa in an opposed dice roll by 3 or more points, which he did...].  Big Man Down!

To the south, the mercenary crossbowmen quickly climbed the hill to their front.  From their, they showered bolts onto the undead forces, causing them considerable disruption.

They were soon joined by the mercenary spearmen, who marched rapidly to block the gap between hill and forest.  This penned in the Cabal's entire southern force very effectively.

Santa's ice bears charged forward and crashed into the huge horde of skeleton warriors in the centre.  It was slow work, but the beasts gradually ground most of the undead warriors into dust.

The Kung Fu army marched forward slowly through the northern woods.  Their general was ambushed by sneakers and lurkers at the same time [I don't think I've ever seen anything quite like this happen before], but Chinese heroes aren't afraid of ghosts and the evil spirits were quickly dispersed.  It took a little longer to deal with the ghouls behind them, though.  The rest of the Kung Fu army had to leave their general behind while their advance continued.

Then, with a jovial "Ho Ho Ho!", Santa broke his bonds and escaped from his captors!  His sleigh flew straight at the Cabal's bat swarms; the first one was easily isolated and pulverised.

In the south, the undead general sent his hero and knights to try to clear a path through the mercenary spearmen.  Because of the confined space, neither had any room to retreat and this turned out to be a fatal mistake.  Both undead mounted units were destroyed by the relentless ranks of pikemen.

Finally there was some good news for the Cabal as the Grave Guard engaged the snowmen.  The elite undead bladesmen quickly destroyed 3 out of the 5 bases, taking brightly-coloured hats and scarves as trophies to add to their war banner.

Santa may have escaped from his imprisonment, but he wasn't clear yet.  The Cabal's flocks of bats swarmed all around him and one particularly huge flyer attacked the reindeer who drew the sleigh.  Even though he was surrounded, Santa still wasn't worried [Aerial Hero General: +6 (though penalised -2 for flank and rear attacks), Flyer: +2 combat factor].  After all, to win the big bat needed to roll 3 better than he did.  This just wasn't Santa's day though: he threw low and the enemy rolled high.  The sleigh and its occupant and contents crashed to the ground and disappeared into the snow.

Simultaneously, one of the 3 stands of ice bears who were trying to break through and rescue their chief was also lost.  Along with the snowmen casualties, this took the central good army perilously close to collapse.

More snowmen were built in a hurry, but this only stemmed the tide briefly as more ice bears were lost.

To the north, the first part of the Kung Fu army finally cleared the forest.  They were immediately attacked by skeleton horsemen and zombies, but the oriental warriors were fighting fit and destroyed all who stood in their way.

The minor Kung Fu hero thought he saw an opportunity to kill the assistant magician and charged forward.  However, the easterner was outclassed by the undead wizard and was promptly ensnared by foul spells.

In the south, the Cabal attacked with everything they could in a fruitless attempt to shift the mercenary infantry.  This even resulted in the undead (vampire) sneakers attacking the mercenaries (duellist) sneakers - another first for me in Hordes of the Things.  Inspired by the stout resistance of the other humans, the duellists saw off the vampires, who then fled off the table!

Vampires attack Duellists!

Finally, the last of the ice bears was surrounded and killed; Santa's army collapsed and routed.  This happened just as we reached the end of our slot in the hall.  By this time, the various armies were considerably scattered and had little sense of organisation!
Conclusion

So, who won?  Losing Santa himself and the rest of his army as well was a terrible blow to the forces of Christmas.  However, all was not lost as each of the undead armies was badly damaged [from memory, they had lost 9, 7 and 7 points respectively - out of the 12 needed to demoralise them].  In contrast, the living side may have lost one complete army but the Kung Fu force had only lost 2 peasants and a captured hero: theoretically all of these could return to the fight.  The mercenaries hadn't lost anything at all, despite being heavily engaged.  That being so, I think that this battle was a clear win for the orientals and the mercenaries, though something of a drubbing for the traditional Christmas!

Sunday 15 December 2013

Austrians! Thousands of them!

Introduction

A couple of weeks ago, I received a package in the mail from Heroics and Ros, makers of 6mm figures and vehicles for a wide range of wars.  This was something of a surprise to me as I didn't recall ordering anything from them recently.  The packing slip indicated that they'd been sent by my good friend Steve.  OK, that's nice - but what's going on?

Regular readers will know that I've been unemployed for the last 5 weeks (don't worry - I'm starting a new job soon).  Steve had decided that I needed something to fill my time and cheer me up, so he very kindly ordered this package for me.  Also, he felt that my Napoleonic Austrians had put up a poor showing against his Russians the last time we played Black Powder.  This was at least partly due to my infantry being a bit thin on the ground.

2 large regiments of infantry: the German "10th Mitrowsky" on the left and the Hungarian "2nd Von Hiller" on the right

Black Powder in 6mm


Steve's parcel contained 8 packets of Austrian infantry and 2 of Grenadiers.  That's quite a large number of figures, since each packet has 50 or more figures.  Not thousands maybe, but certainly many hundreds!  Now, my existing Austrian infantry is a mixture of "German" and "Hungarian" bases (the Hungarians have blue trousers but are otherwise pretty much indistinguishable at this scale), with shako or helmet, in march or attack poses.  In other words, quite a varied lot!  This worked well enough for the DBN rules that we used to play where an army only required a few bases.  However it's not so good for Black Powder, where a unit is much larger and for visual effect should have a unified appearance.

So, how do we do this?  Firstly, base sizes are dictated by those from DBN, since I'm not going to rebase all my existing stuff.  That's simple enough: 40mm width with 20/30/40mm depth for infantry/cavalry/artillery.  How many bases make up a unit?  That's less obvious, but by halving the movement and shooting distances from the Black Powder rulebooks and doing some rough calculations on the unit sizes used by other players, I've come up with 6 bases for a large unit, 4 bases for a normal unit, 2 for a small unit and 1 for a tiny unit.  Being Austrians, my army will have a fair number of large units!

I've used the new models to create a large number of plain infantry stands, without command figures.  These can then be used with my existing stands to create either large or normal-sized units as desired.  My older command stands have been altered slightly, so that both flags are on the same stand (!) and so that each has the regiment name printed on a card upright at the back of the base.

Although it is technically possible to deploy a single base forward to depict a unit in "mixed" formation (i.e. with skirmishers deployed to the front), this isn't visually very appealing.  Instead I've decided to experiment with a separate "marker" base with a token number of skirmishers on it; this can be placed ahead of any unit to show that it is in mixed formation.  Note that this is a new idea of mine and I haven't tried this out in a real game yet!

The Formations

So how does this look in practice?  Using most of the new infantry and some of my existing bases (refurbished somewhat!), I now have 4 large units of line infantry plus enough extras to make up at least 1 or 2 normal-sized units as well.  Alternatively, I could choose to deploy them as 6 normal units instead of 4 large ones.  Here are some examples:

10th Mitrowsky in "mixed" formation
2nd Von Hiller (Hungarian) in "mixed" formation
Large regiment in attack column
Large regiment in line

Regiment in march column
Large regiment in square

Skirmisher marker base

As well as bulking up my regular infantry, I used some of the excess command figures to make a bunch more brigade commanders.  These are mounted on 20mm washers and have a standard to aid with identification:
A bunch of brigadiers!

So look out, Steve: we're ready for you!  We'll be back!

Wednesday 11 December 2013

TRWNN: The Old Hangin' Tree

Introduction

It's not often that I'm completely torn between 2 alternate titles for one of my battle reports.  However, yesterday's club game is one such, where the action went completely against my predictions and left me wondering how to write it up.

Originally I was going to call this battle "A Game of Two Halves", alluding to the infamous soccer cliché, for an obvious reason.  The setup is this: the small New Mexico town of San Fidel is divided between 2 rival, ruthless families and their employees.  To the north of the main road, the Delgados have control, whilst south of the road is under the sway of the Maxwells.  This is an unstable situation anyway, but the recent arrival of a Mysterious Stranger in town has upset the delicate balance.  People are on edge; even the most trivial incident could lead to a conflagration...

Scenario


This is a game for 3 players.  Each of the 3 forces is potentially hostile to both the others, though there are reasons why they might forge temporary alliances.

 Forces:

  • Delgados, Maxwells: Each family has 6 models with a range of capabilities from Legend down to Citizen.  4 of these start the game in play; the other 2 are potential reinforcements.
  • Mysterious Stranger: 1 Legend.  My version also had the Fast Draw and Luck skills.

Setup: 

Dice to see which family sets up first.  The loser places 1 model anywhere they like as long as it's within their half of the town.  The families alternate in placing the remaining figures, again within their own territory.  Once all of the families' models have been positioned, the Mysterious Stranger player then places his/her figure anywhere desired.

Reinforcements

Each family has 2 reinforcement figures.  One of these will come into play when/if one of the figures already in play is lost.  When that happens, choose a reinforcement model at random and shuffle the appropriate action card into the deck.  On their next activation, the reinforcement may be placed at the front door of any desired building within their own family's territory.  The second reinforcement is placed in a similar manner when the family takes a second loss.  After that, you're on your own!

Victory

Each of the families scores points for members of the other family who are dead, captured or have lost their nerve by the end of the game as follows.  Note that it doesn't matter which force incapacitates their enemies, just that the hated rivals are cut down to size!  In order to claim a victory, a family must score at least 4 points more than the other family:
  • Legend: +4 victory points
  • Shootist: +3 victory points
  • Gunman: +2 victory points
  • Citizen: +1 victory point
  • Mysterious Stranger: -4 victory points!
(Yes, that's right.  If either family KOs the Mysterious Stranger then they lose points.  It might still be worth their while, though...)

The Mysterious Stranger is trying to play one side off against the other.  He/she wins if the scores of both families are less than 4 points different.  In other words, the stranger wins if neither family can claim an outright victory!

Our Game

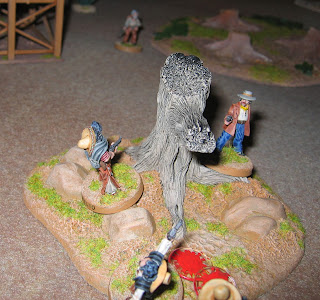
A number of lesser gunmen had already been placed hiding well within their own territories, when the Delgados put the rifleman Emilio provocatively behind the old hangin' tree.  The other family responded by placing Black Bart immediately on the other size of the trunk.  Tit-for-tat led to Tuco supporting Emilio and Jebediah behind a nearby cactus.  It would be interesting to see who drew the first action card from this lot!

Even as Juan, the rookie, ran up to support his boss, Black Bart's action card was turned over.  He snarled at Tuco: "You yellow-bellied skunk!  I saw you eyeing up my sister yesterday.  If you know what's good for you then you'll leave town immediately!"
Tuco went for his gun, but Black Bart was faster: his shot caused a flesh wound and forced the Mexican to duck back out of sight.  Jebediah joined in from behind his cactus and emptied his pistol firing at Juan, but only managed to graze his target.

This was about as good as things got for the Maxwells, though.  Tuco recovered from the shock and popped round the tree stump.


He shot Black Bart, twice.

 
Meanwhile, Emilio used his rifle to prevent help from reaching the embattled Black Bart.  With an improbable series of action card draws, Emilio aimed and fired repeatedly at anyone who approached.

Between them, Tuco and Juan finally incapacitated Black Bart...

...while Emilio gunned down anyone else who approached.

A Saviour?

The Maxwells were pretty despondent by now.  They'd lost 2 of their better men for not much gain and hadn't received any reinforcements yet.  Then we drew an "Old Friend" bystander card.

Cole had just ridden into town and was unwittingly behind the Delgado lines.  Perhaps this would even things up a little?

Nope, not a chance.  Tuco spun round and gunned the newcomer down.

Mysterious Stranger Decides to Act

So far, Blondie had just been sauntering up the street.  He was now dealt a whole fistful of action cards at once and decided to join in before matters got too far out of hand.  The loner ran towards the tree, firing as he came.  Emilio took a flesh wound, but that was all.  Juan, his gun empty, decided to charge the tall stranger in desperation, but Blondie had saved an action card especially for such a situation.  He blazed away at the Mexican, hoping to use his luck to negate any possible ill effects.  This plan went horribly wrong, as he threw 3 '1's out of 8 dice and promptly realised his gun was empty.  Oops!

The citizen Juan did well to hold his own against the legend Blondie, until Emilio joined in the melee.  Even then, the outcome should have been anything but certain, but Emilio gave the mysterious stranger an incredibly solid punch that knocked him out cold.  Blondie still hadn't recovered by the end of the game!

Maxwell reinforcements were beginning to arrive, but Tuco wasn't going to wait for that.  He turned his gun on the citizen Jebediah, who had been taking pot shots from behind his cactus all game.

Tuco's shot may not have been the most accurate, but the bullet went straight through the cactus and struck his target in the belly.  Although Jebediah wasn't seriously hurt, he decided to cower in the dust and wait for help, rather than continuing to fight.

Whilst the Delgado family was clustering around the tree, Injun Joe ran up onto the gallows and opened fire.  Despite the large number of bullets, he narrowly missed all his targets [this is the first time in playing "The Rules with No Name" that I've felt it worthwhile to look up the page on "stray shots"The Mexicans were clustered very tightly together!]

Injun Joe wouldn't get another chance, for Emilio raised his rifle and fired.

In true Hollywood fashion, the injured Injun Joe then fell backwards, through the trapdoor in the gallows, and ended up unconscious in the dirt below.

In an act of brutal revenge, Tuco then approached the badly injured Black Bart and executed him [this was only possible because of his evil attribute].

This act had no consequence on game-play, other than to cause horror in those who saw the deed. The rest of the Delgados felt somewhat uneasy, but said nothing.  The last remaining Maxwell (Emmett) was appalled at the despicable act; he approached with the intention of gunning Tuco down - though the bad guy had other ideas!

Conclusion

At this point, we ran out of time and had to pack the game away.  However it's hard to see how playing on would have altered the result in any significant way.  So, final scores:

  • Delgados: +11 VPs.  Incapacitated 2 shootists, 2 gunmen and 1 citizen.  Also +2 VPs extra if the "Old Friend" is counted - I hadn't made a ruling on this.
  • Maxwells: 0 VPs.  Some of the Mexicans had flesh wounds, but nothing serious.
I was debating whether to penalise the Delgados for incapacitating the Mysterious Stranger as well, though technically Blondie was only unconscious and could have recovered.  The odds of this happening and him then being able to take effective action seemed extremely slim, though.  He'd better hope that there's a friendly innkeeper and/or coffin-maker to hide him while he recovers and plots his revenge, I think!

As it stands, it's completely academic whether the Delgados have this penalty or not.  Their score is so high that they have clearly won a very major victory with or without the -4 VPs!

I cannot think of another game I've played, of any genre, where an arbitrary piece of terrain has played so prominent a role as in this one.  I'm not counting the only bridge over a river, the one pillbox that is holding up an advance or a similar "designed" focal point.  Rather, when I set the town out, I imagined that the old hangin' tree was just 1 terrain feature of many, yet as far as the game play was concerned it might as well have been the only thing on the board!