Wednesday 28 May 2014

Black Powder: The Falten Pass

Introduction

Last Saturday, Steve came round to visit and we spent much of the day gaming.  First up, as always, was an outing for our 6mm Napoleonic forces.  We did play a different game afterwards; you'll hear about that another time!

For the Black Powder game, a division of my 1809-ish Austrians took on a roughly equal quantity of Steve's Russians.  There were only a few differences between the forces: the Austrians had slightly heavier cavalry but the Russians had more cannons.  Also, many of my Austrian infantry units were larger than average, but General Gruneberg, my commander-in-chief, was addled with gout and had to be ferried around in a coach. Here's how it went...

The Scenario

Somewhere in north-east Austria lies the Falten Pass.  A strategically-important road travels through a gap between rugged hills on one side and dense woods on the other.  Each of the Austrian and Russian armies have sent a division on ahead to secure this passage, but these forces have arrived at much the same time. Orders are clear: the enemy must not be allowed to control the pass!

This will be a straightforward "last man standing" battle between 2 relatively equal forces.  The only twist that we used was hidden deployment: a barrier of tall cardboard was erected down the centre of the table whilst we placed our armies on the board.

The Game

My brave Austrian infantry wait for the signal to advance
When the barrier was removed, I could see that the Russian infantry formed a line across the centre, whilst small cavalry brigades were present on both wings.  On the other hand, I had deployed all of my Austria line infantry towards the right, with cavalry to the left.  My plan was to advance the infantry as fast as possible towards the Russian-held village, whilst the cavalry would screen and delay the half of the enemy army that faced them.  Essentially, I'd follow the line of the road across the board.

Initially, my plan seemed to be working well.  The infantry advanced (though the 2nd Brigade, on the near side, was a little sluggish) and their supporting artillery caused some confusion amongst the opposing Russian cavalry.

The Austrian 2nd Brigade advances, whilst everyone else just watches.  Note the C-in-C's carriage in front of the village at the top left of the picture.
Now things started to fall apart a bit.  Major General Homburg's 2nd Brigade continued to advance in the centre, but the 1st Brigade (led by the less-than-brilliant Major General Von Tripp) halted.  The Austrian heavy cavalry moved across from the far flank to support the infantry.

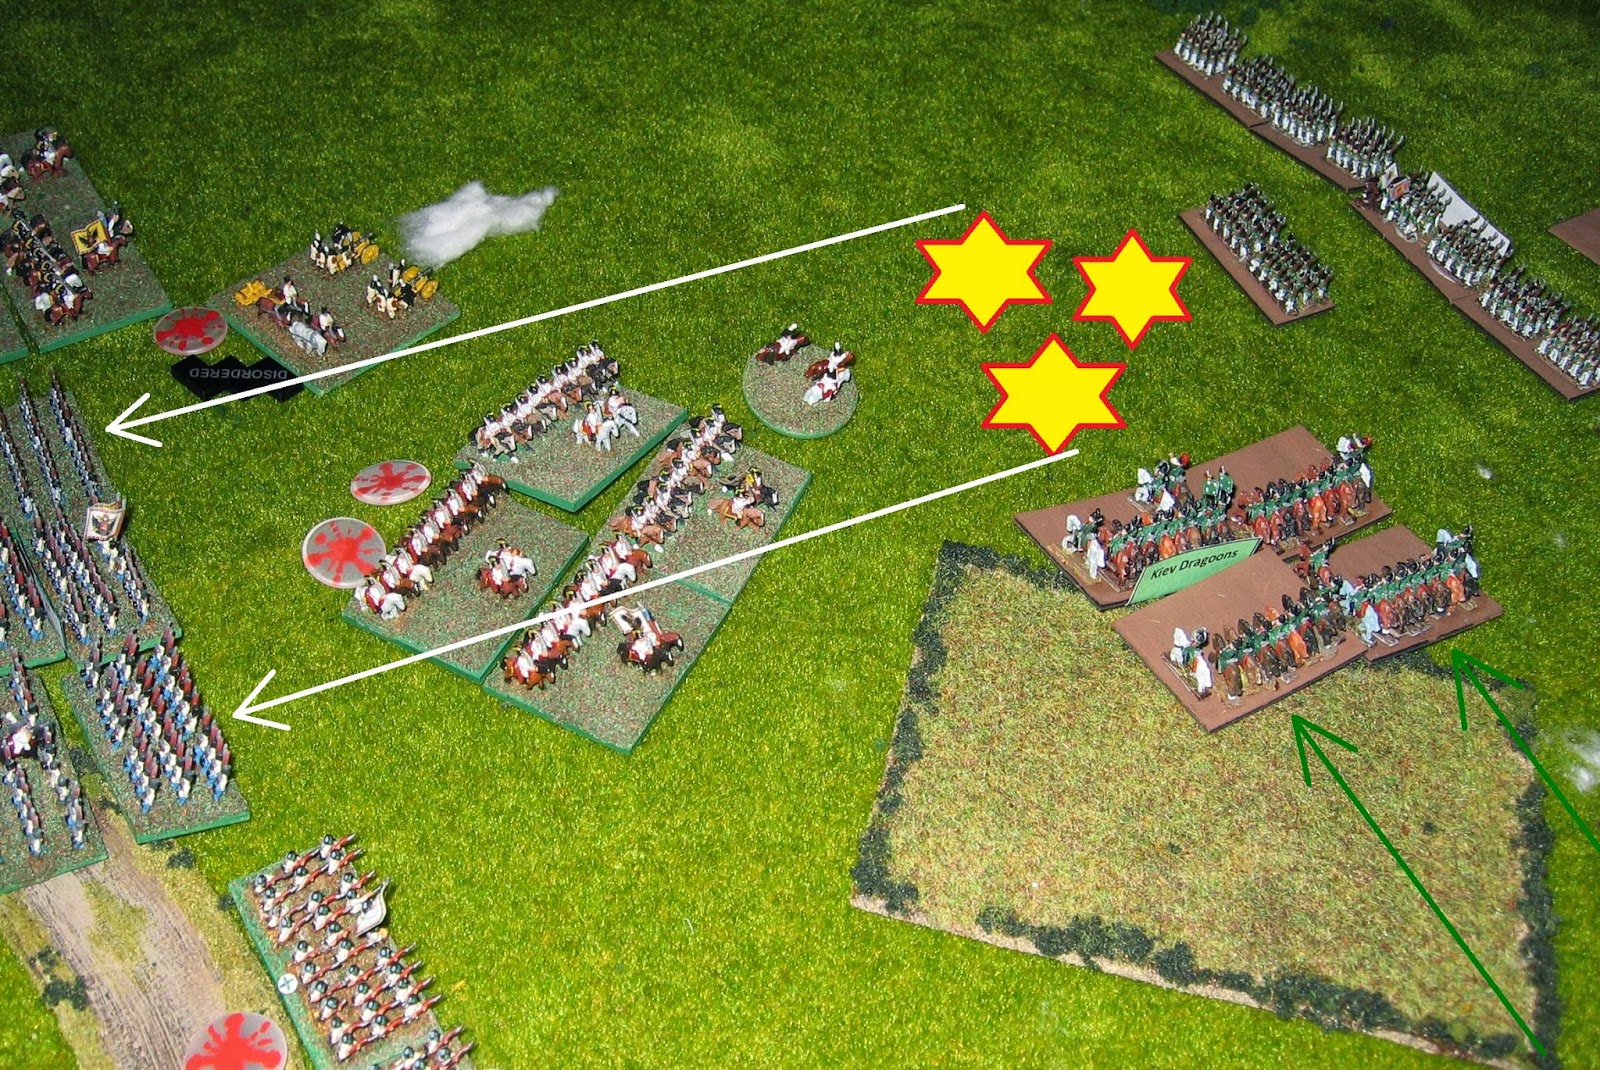
This is where it all went downhill very fast.  Some of the Russian dragoons saw the exposed flank of the Austrian infantry and charged in.  The poor infantry were caught completely by surprise and the unit was devastated!

The dragoons followed this up by charging a small detachment of Austrian grenadiers, but they had obviously blown their horses.  Although General Homburg and his aides had to turn and flee to avoid them, the dragoons couldn't do more than make the grenadiers retire a short way.

Revenge was swift as the Austrian dragoons attacked the spent Russian cavalry whilst the reformed Austrian grenadiers poured fire onto their flank.  This was too much for them and the Russian unit broke and fled.

Then the second Russian dragoon unit attacked the 2nd Brigade's other large infantry unit.  Again, the flank attack caused serious damage, though this time the infantry regiment retired, shaken. They might as well have routed off the field, though: since the brigade morale was now broken they would never rally and would automatically withdraw from any enemy approach.

Austrian cuirassiers now moved to finish off the enemy cavalry.  Unwisely, they advanced into a firestorm as an enfilading Russian artillery battery shot them to pieces.  Men and horses were torn apart and the unit just disintegrated as the few survivors limped away.

Well, this wasn't going at all the way I'd hoped!  So far, my complete mismanagement had cost me an entire infantry brigade and half of my heavy cavalry with very little to show for it.  At least Steve had the good grace not to gloat.  Right, let's see if I can salvage anything from this mess...

OK, first let's eliminate the remaining, damaged Russian cavalry.  The Austrian dragoons charged their Russian counterparts; in the ensuing fierce fight the Russians broke and the Austrians retired, shaken.  Because the formation had already lost the cuirassiers, the heavy cavalry brigade was now broken and the Austrian dragoons couldn't be rallied.  They retired to stand nearby the forlorn remnants of the 2nd Infantry, all of whom would have retreated precipitously had any enemy approached them.

A pause in the action
By now, the entire Austrian centre was brittle and would have evaporated if anyone had looked at them sternly.  On the left wing (top of picture), a few light cavalry and infantry units were valiantly holding off a large part of the Russian army.  Actually, that's rather too grand a claim - in reality this part of the Russian force had a lethargic general who advanced his units with glacial slowness.  It's nice to know that the Austrians don't have a monopoly on incompetent commanders!

So that leaves the untouched 1st Infantry Brigade on the right wing.  Could they save the day?

The 1st Brigade advanced and engaged the enemy under the watchful eyes of both their brigadier and the Austrian commander-in-chief himself.  Actually, I suspect that the latter was just looking for a good inn where he could get a hot dinner and rest for a while in the parlour to escape the rigours of riding in a coach all day.  He wasn't going to get his meal...

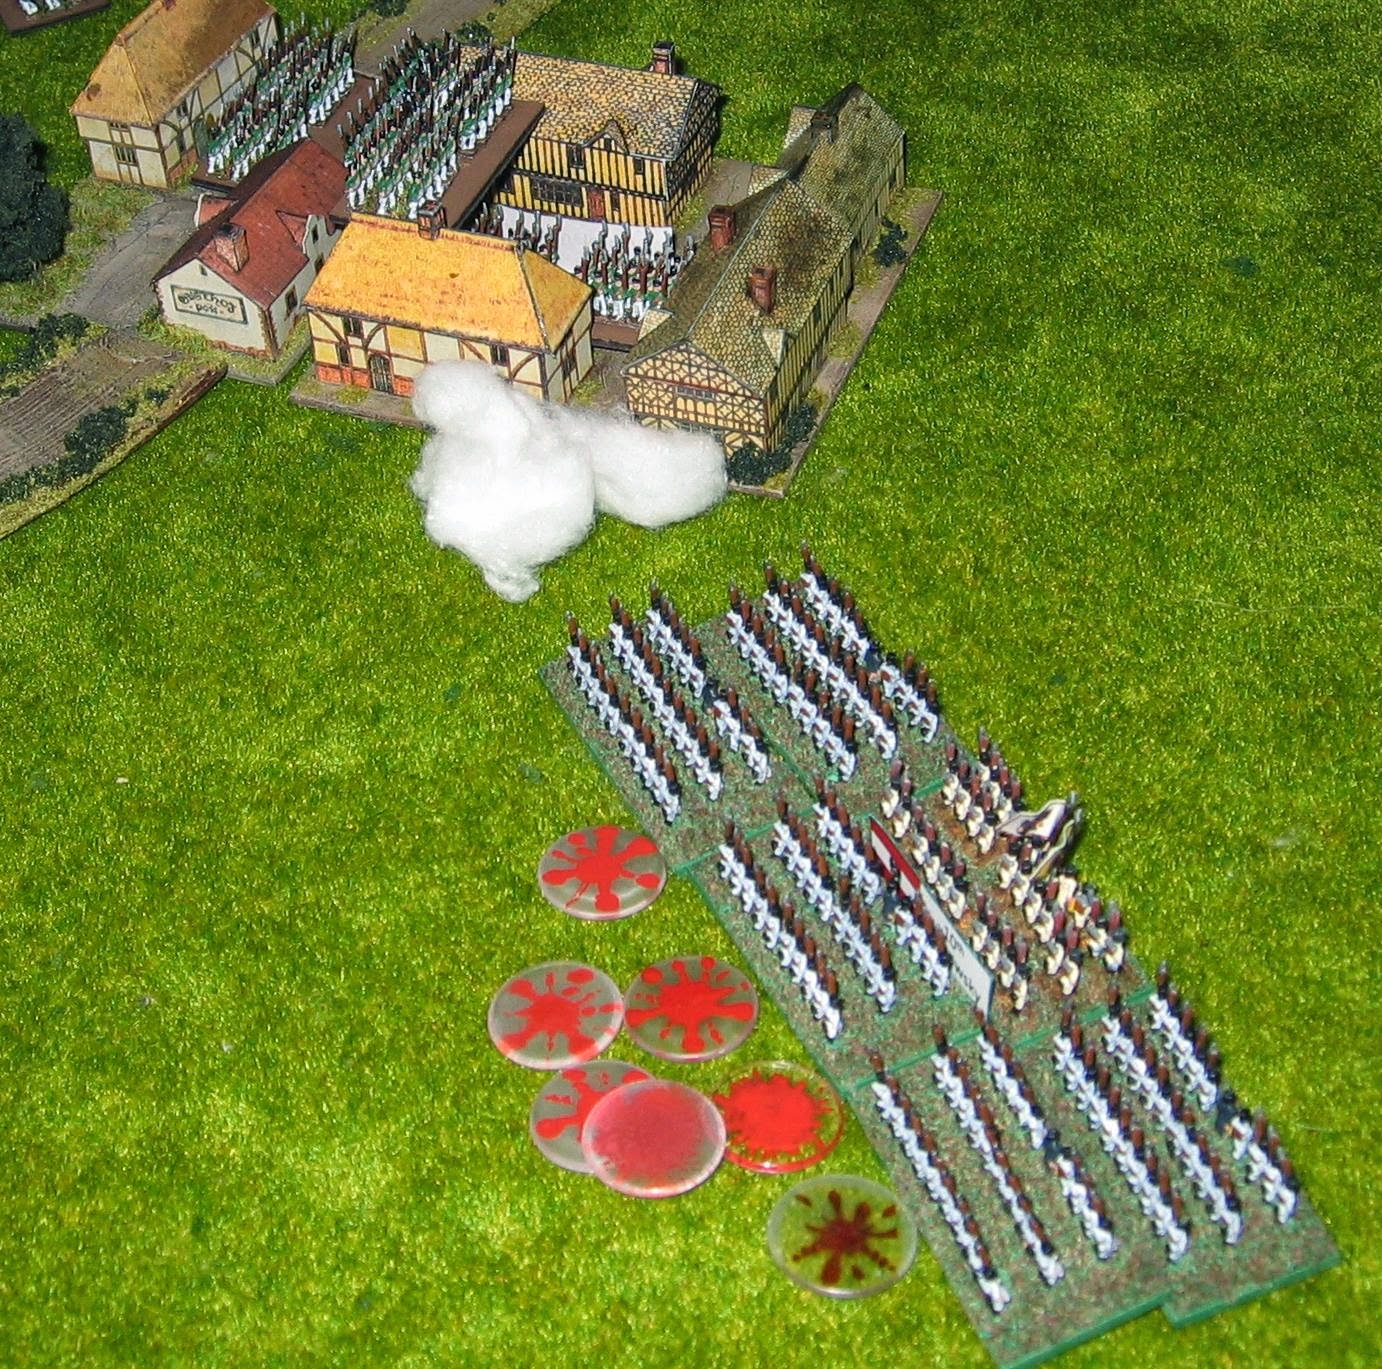
One unit attacked the village, but the Russian garrison were too strong and the Austrian infantry withdrew, shaken and disorganised.  The other large regiment fared slightly better as they charged and routed another Russian unit in the open fields.

When the Austrians paused to redress their ranks, the garrison of the village poured a murderous enfilading fire into their flank.  This was too much for the white-coats; they broke and fled.  With that, the 1st Infantry Brigade was ruined.  Since 3 out of 4 Austrian brigades were now demoralised, the entire army broke.  In any case, the Light Brigade on the Austrian left flank was under increasing pressure from overwhelming numbers of Russian troops; it would probably have collapsed very soon as well.  Game over!

Conclusion

What was left of the Austrian division probably could have conducted some form of fighting retreat, since the Russian cavalry units on one flank were totally destroyed and those on the other flank were heavily damaged (and there were no Cossacks around!).  Still, 3.5 out of 4 Austrian brigades were shattered in exchange for 1 Russian cavalry brigade eliminated, so I can hardly pretend that this was anything other than a major defeat.  Most of the Russian infantry were fresh and just needed good leadership to move into the fray.

Lesson of the day: watch those flanks!  And beware of enfilading fire.  Oh, also don't send in uncoordinated attacks by 1 or 2 units at a time.  In fact, could I have done any worse?

On the comedy note, the small unit of Austrian Jaegers that belonged to the 1st Brigade blundered on their very first order.  They spent the entire game hiding in the woods on the extreme right of the Austrian line, where they were too far away from their brigadier for him to issue them with a successful order.  Since my Jaegers had a rather fearsome reputation from some of our previous games, this helped to put things into perspective...

Sunday 25 May 2014

Amera: The Lost Bathhouse of Queen Semiramis!

Introduction

Previously, I reported how I had completed the amphitheatre from Amera.  In that article, I mentioned that I was also working on another terrain piece from the same company.  Well. here it is...

Apologies for the out-of-focus photo; I don't know what happened here...
This model appears in the Amera catalogue as F218 Temple Ruins.  I could have just painted it up as it was, perhaps adding some cabalistic symbol in the middle of the floor or a suitably ruined altar somewhere.   But that's been done by others; I wanted to do something a bit different.

I chose instead to turn this into part of a ruined palace. My version will become the long-lost bathhouse of the semi-legendary Queen Semiramis, where she was reputed to relax after ordering the execution of one of her many enemies.  20 young maidens would apply scented oils, play soothing music and recite poetry for her pleasure, or dive for the golden coins which the queen would scatter across the bottom of the pool.  Or so the stories say...

The Build

Firstly, I built up the front wall of the baths with a couple of layers of very thick plasticard.  I used a combination of sharp knife and a triangular needle file to mark the slabs on the upper surface, measuring carefully to ensure that the sizes matched that of the rest of the model.  A few of the slabs were made to look broken, again with knife and file.  Once this was all glued in place, I added Milliput quite liberally to fill gaps and to blend in with the somewhat rounded edges of the vacuum-formed main piece.

I've also softened the base of the model by shaping the edge into gentle curves.  As I explained in my previous Amera article, my hope is that the lack of straight lines will make the rim less obvious once the model is deployed on a gaming table.

Now on to the painting.  To start with, the bathhouse ruins were undercoated in grey.  I use a spray primer that is sold for car bodywork, bought from Halfords, but any grey undercoat should work.

The stonework was easy to paint.  I gave it a black wash and then a heavy drybrush with light grey.  Job done!

The dirt around the rim was slightly different, but not particularly difficult either.  For this I did the basecoat with a medium brown paint to which I had added a bit of sand, for texture.  Once this was dry, it was drybrushed twice with successively paler brown colours.

Once all the paint was dry, I stuck some vegetation on the model.  This is an area where a serious model-maker could really go to town and I did consider buying some brass-etched ivy and other such material.  However, in the end I decided to keep it simple.  My vegetation is fairly weak, but at least it was quick and easy.

Now for the water.  I painted the pool with a murky colour made from a mixture of leafy green and a touch of dark brown.  Once the initial coat was dry, I added a number of coats of gloss varnish.  These were diluted somewhat in the hope that the varnish would settle into a very smooth, even level.  However it didn't quite work out that way and so the surface is slightly rippled.

For a finishing touch, I printed out some pictures of water-lilies, each about 6mm across.  I used a hole punch to cut these out of the paper and then added a notch with a sharp knife, thus forming a green, "pac-man" shape.  I added one last coat of varnish to the bath, undiluted this time, and used this to stick on my lilies.

Conclusion

I've enjoyed making this ruined bathhouse.  It's a bit different from most of the models I build, but it was very easy to do (though it took quite a long time for all those coats of varnish to dry).  I'll be able to use it for pretty much any games that are set in the eastern Mediterranean, I think.  Perhaps Jason and the Argonauts will encounter some horror that's made its home in the murky depths?  Or maybe archaeologists will face off against Nazis in a race to save the supposed treasures hidden beneath the waters?  Maybe it's the only source of water in a wide, arid desert and both/all sides must capture it to survive?  Who can tell?

Wednesday 21 May 2014

Full Thrust: Rescue the Tanker!

Introduction

The Tholian Border Patrol (1 heavy cruiser and 2 corvettes) englobing the Minotaur with web
Amongst the Orion pirates, the MacTavish cartel (it's a long story) is known for taking risks.  This time they may have gone too far, though.  One of their squadrons, desperate for supplies, has arranged a rendezvous with the Minotaur, a large freighter carrying fuel and spare parts.  However, in order to avoid attention from Starfleet, the agreed meeting point is in a sector claimed by the Tholians.

Unfortunately for the MacTavishes, these xenophobic aliens have encountered the freighter already and have immobilised it with one of their strange energy webs while they await instructions from their leaders.

The Scenario

The MacTavish squadron: 2 light cruisers and 2 heavy destroyers
The Orion squadron must rescue their supply ship and escape before Tholian reinforcements arrive.  For their part, the Tholians are well aware of the wealth of materials that the freighter is carrying, as well as the possibility of useful data on the pirates' operations, so capturing the merchantman would be good!

Forces


Orion

  • The MacTavish Squadron (500 NPV) arrives from one table edge on turn 1.  They have an initial speed of 10.

Tholian

  • The Border Patrol (330 NPV) starts in the middle of the table.  They have already surrounded the bulk freighter Minotaur with web.
  • The Rapid Response Force (400 NPV) arrives later in the game, from the opposite table edge to the Orions.  From the start of turn 5, the Tholian player may dice for the arrival of these reinforcements.  To arrive on turn 5 requires a roll of 5+, to arrive on turn 6 needs a 4+ and so on.

Victory


  • If the freighter escapes off the Orion table edge whilst still under Orion control then the Orion player wins a major victory.
  • If the freighter is in Tholian hands when the game ends (by agreement or when all forces on the Orion side are destroyed or have fled) then the Tholians win a major victory.
  • If neither side holds the freighter (i.e. it has been destroyed!) then the side that was responsible for its destruction loses.  The other player scores a minor victory.

The Game

Seeing that the Tholian cruiser was outside the web and on its own, the Orion squadron accelerated hard. They planned to obliterate the larger enemy vessel before braking and turning sharply.  The smaller Tholian patrol craft could be mopped up at leisure.

When the Orion squadron reached effective range, things didn't go quite according to plan, though.  The Orion light cruiser Pegasus prepared to fire on the agreed target, but suffered a software fault in her targeting arrays.  Her entire volley was directed at the small Tholian corvette Topaz instead.  Even though the Topaz was partly shielded by the energy web, the tiny vessel took 3 damage points out of her allotment of 4 (a triple threshold check) and virtually every system on the ship went offline.  With the bridge wrecked and life support failing, the remaining crew abandoned ship.

This mistake didn't save the Lithos though, as the other 3 Orion ships all pummelled the Tholian cruiser.  In particular, the heavy destroyer Cyclone scored a runaway series of '6's, causing massive penetrating damage that (amongst other things) knocked out both of the Lithos' fire control systems.  Without these, she couldn't fire back!

Bizarrely, the Cyclone was then struck by a severe energy vortex which spun the destroyer almost back in the direction from which she had come.  Perhaps it was an effect of the over-charged phaser volley she had just fired, or maybe a spatial anomaly caused by the strange Tholian weapon?  Whatever the cause, the Cyclone didn't try to rejoin the rest of the Orion fleet.  A combination of asteroid fields and high speed would have made such a manoeuvre quite risky!  Instead, over the next couple of turns she sailed off the table.

The Orion ships were braking hard now, but they were still going to overshoot the freighter.  Almost contemptuously, the cruiser Manticore swatted the second Tholian corvette (Zircon), thus leaving the web without any power.  At the same time, the other Orion ships continued to hurt the crippled Tholian cruiser.  This time, the damage caused her warp core to go critical and her internal life-support atmosphere boiled away into space through the gaping holes in her hull.

As the web collapsed, the freighter Minotaur was finally able to move.  She started to accelerate in order to escape, but painfully slowly.  Meanwhile the Orion ships turned hard and the Tholian cruiser drifted away slowly, abandoned by her crew.  This was (I think) turn 7, and still the Tholian reinforcements hadn't arrived!

Finally, the Tholian battleship Tholos thundered on.  She was a long way from the action, but travelling at high speed.  Could she catch the Minotaur before the merchantman escaped?

In a bizarre mistaken order, the light cruiser Pegasus actually turned towards the huge battleship, though the other 2 Orion warships both fled.

Even though the range was moderately long, the Pegasus didn't stand a chance against the Tholian behemoth.  The Tholos' broadside scored multiple hits, resulting in a runaway warp reactor which exploded immediately.

Judging that the Minotaur had too great a lead, the Tholian Inspector General fired some long range warning shots at it.  He was hoping to scare the freighter into surrendering, or perhaps damage its engines.  Instead, a single phaser hit caused a series of explosions (the Minotaur was carrying fuel and engine parts, I suppose) which ripped through the containment field controls for the reactor.

At this point, fate intervened.  The Minotaur's chief engineer had been killed in the fire, but one of the deckhands stepped forward.  "I know what to do!" he exclaimed.  "I've got a feeling about this".  Before anyone could dissuade him, he activated the controls to flood the engine compartment with triclozine.  [With 2 damage control parties, I needed to roll a 2 or under to shut down the critical warp core.  By playing the "Use The Force" card I could halve the result of the dice, thus improving my chances considerably.]

Sadly, the crewman had chosen the wrong option [I rolled a '5'!  Even though the card allowed me to halve this, it still rounded up to a '3' and so the warp core was still critical.  We then rolled to see if it went supercritical and promptly came up with the necessary 5 or 6].  The Minotaur blew up in a spectacular fireball, thus ending the game rather promptly.  Actually, the 2 Orion warships that were still on the table were departing too fast to be caught by the battleship anyway, so there was little point in playing on for 1 turn until they made their "official" departure.

Conclusion

OK, that really didn't go as I had expected at all!  I think that the Tholian player made a bad mistake when he deployed the heavy cruiser outside the web.  Apparently he was hoping to draw off the Orion forces by manoeuvring, but this just wasn't realistic.  Once the Lithos was crippled, the Tholian corvettes were easy meat for the Orion ships.  If I had been running the Tholians, I think I would have tried to board the Minotaur and capture her instead.

The Tholian reinforcements took a long time in coming.  Because of the earlier losses, this meant that the Orion squadron was already on its way home.  Indeed, if the Minotaur had had Thrust-2 instead of Thrust-1, they would probably have been quite out of reach by the time the Tholos arrived.  As it was, an unlucky long-range shot wiped out the prize!

Technically, this was a minor Tholian loss, since they destroyed the prize freighter.  In any case, 3 of the 4 Orion warships escaped with only superficial damage.  The Pegasus would probably have made it also, if her captain hadn't blundered his orders.  The Tholians lost a heavy cruiser and a corvette destroyed and another corvette reduced to an abandoned hulk, so the Tholians would have lost on material as well.

I don't think there was anything much wrong with the scenario, but I do think that playing the Tholians will take a bit of thought!

Sunday 18 May 2014

"Not Star Trek" Tholian Fleet

Introduction

Tholians are a strange race in Star Trek.  For one think, they aren't represented as humans with a few extra ridges or bumps, but are instead have an extremely alien, crystalline appearance!  As a very minor race, they were limited to just a single episode of the original series of Star Trek.  I believe that a little more official source material is available in the other Star Trek series Deep Space 9 and Enterprise.

Militarily, the Tholians are known for 2 things:
  1. They are extremely territorial and xenophobic; Tholians will show great hostility towards anyone who intrudes into any area to which they lay claim.
  2. Tholian vessels can spin an "energy web" which is completely impassable to other spaceships.  However it takes them a long time to do this, suggesting that it is primarily a defensive weapon [it's difficult to persuade an enemy ship to stay still for long enough to be encased in web!].

My "not-Tholian" fleet: 1 battleship, 2 large cruisers and 4 small patrol craft

The Tholian Web in Full Thrust

For the most part, Tholian ships aren't very difficult to design.  I've drawn a lot of my inspiration from Star Fleet Battles (SFB), where they have good shielding, high-quality phasers and not a lot of anti-fighter or missile defences.  Most of their ships are rather small patrol craft, though they do have a few bigger craft.  Oh, they also have web generators...

For most of my other "not Star Trek" conversions, the appropriate weapons or other ship systems already existed in the original Full Thrust rules.  Sometimes someone else had already proposed suitable rules for a non-standard weapon, such as the Disruptor.  However, I've never come across a Full Thrust conversion for the Tholian Web.  So, here goes, then...

  1. Web Generator System: Mass: 1, Cost: 3.  This is fairly cheap, but since it has such a specialised use I don't think that's too unfair.
  2. Construction of webs: You can't!
    I'm not going to propose any rules on how the web may be built during a game.  Judging by the relevant sections of the enormous Star Fleet Battles rulebook, this is far more complex than all other aspects of the Tholian web put together.  Unless in exceptional circumstances, I don't think many scenarios will see a web being built, so I'm just going to duck the issue completely.  In all of my games, any webs will already be in place.
  3. Shape of Web: For scenario purposes, I imagine that web will either be laid in a circle of no more than about 8" in diameter, or else in straight segments of 12" or less between anchor points.  An anchor point may be a Tholian ship or an asteroid or small moon, but not a planet (any atmosphere, however tenuous, interferes with the energy web).
  4. Maintenance of webs: The web vanishes at the start of any turn when there isn't a Tholian ship with an active web generator system within 1" of it.
    In SFB, much of the complexity of the Tholian web revolves around the strength of the web, as judged by the number of energy points assigned to it from adjacent ships versus the "natural" rate of loss.  I don't want such book-keeping in my games of Full Thrust, so I'm only going to have 2 states for my Tholian Web: either it's at full strength or it has lost so much power that it has no effect any more (i.e. it dissipates).
  5. Movement through web: A non-Tholian ship, fighter or other craft which enters a web will halt in place immediately.  From then on (as long as the web persists), the ship is caught and may not use thrust to change speed, though it may use it to change heading.  Tholian ships are exempt from this; they may move through web as if it wasn't there.
    I did consider either assigning damage to a ship with a lot of speed when it hit the web (the "brick wall" effect) and/or allowing a sufficiently-powerful ship to break through a web.  In both cases, I found it difficult to frame any rules that modelled a decent effect.  It's simpler just to assume that the web "sucks the momentum" from any moving object.
  6. Combat: All beam weapons that fire through a web are penalised by counting the target as having 1 extra level of screens for every 2" (or part thereof) of web through which the line of fire passes.  Beyond Level-2 screens (the highest in the Full Thrust rulebook), extra "levels" reduce the chance of damage by 50% each, so Level-3 would need a '6' for 1 point of damage, Level-4 would require a '6' followed by '4', '5' or '6' and so on.
    Non-beam weapons, including missiles and bolts of all types, may not be fired through web.  The effect of area effect weapons doesn't pass through web.
    Note that the Tholian weapons are no more effective at shooting through the web than anyone else's.  However, their ships are designed with a high proportion of beam weapons, so little of their fire power will be blocked.

The Ships

My "not Tholian" ships are from Magister Militum, from the old, small Chariot Miniatures range of spaceships.  More specifically, they're vessels from the Trios faction.  When I bought my miniatures, the web store showed 3 different classes of spaceship as available, but I can only see 2 through the link given in the previous sentence.  The "patrol craft" doesn't appear to have the "Trios" label, but can be found by searching the site for "TA1".

Note that if anyone is interested, I have placed a copy of my source file for the following SSDs ==>here<==.  It's in OpenOffice Draw (.odg) format.

Keep watching this blog for a battle report involving these ships.  In a few days, I'll be posting the results of a tussle between Orion pirates and Tholian border guards over ownership of a lost freighter!


Magister Militum DesignationPictureFull Thrust SSD
TA1 Patrol Craft
TA2 Battleship
TA3 Dreadnought

Wednesday 14 May 2014

Survivors, Vikings and a lot of Bull!

Introduction

Once again, I've nothing much to say - so I'll show some pictures of recently-finished models instead.  That's what you all like, isn't it?  It is, isn't it?

OK, I've been fairly productive in the last 3 weeks or so.  I'm steadily working my way through my haul from Salute, mainly because I just can't face seeing any of these unpainted by the time the next show or birthday comes around.  A few older models have also made it off the construction line; I'm quite pleased at the diversity I've achieved.  So far, I'm obeying my self-imposed rule of "once on the painting table, only completed models may be removed".

I'm also making good progress on the Amera "Ruined Temple" that I picked up recently.  It's not going to be a temple, though - but you'll just have to wait a bit longer to see what I've done to it!

Survivors

Here are a couple of apocalypse survivors from the Wargames Factory set; I've called them "Trevor" and "Chris".  Trevor holds an assault rifle and is unconverted, straight out of the box.  Chris has a rocket launcher from the sister set (!) of Women apocalypse survivors but is otherwise a simple build.

I've just realised that both of these figures have been made from the same body pose.  I'm quite surprised at how well this is hidden; the models really do look quite different to me.

Trevor and Chris are slightly better prepared than many civilians: both men have backpacks or pouches as well as drinks bottles.  Not many people know this, but dehydration can be a major problem in the middle of a zombie outbreak.  A sports bottle could save your life!

There's something not quite right about the finish on this pair of figures; I wonder if my varnish wasn't behaving itself when I sealed them.  What do you think?

Vikings

Now here's a pair of Vikings who have been raiding and pillaging!  Quite successfully too, I'd say.  They're from Dixon Miniatures and are made as an inseparable pair.  It's quite a complicated moulding and although otherwise well cast, the right-hand figure has lost the top of his bow.  I did try to glue it back, but butt joins of very narrow pieces don't have much strength and the repair didn't hold.

Apparently, white (domestic) geese have existed since Roman times and were much sought after.  I don't think they'd taste any different when cooked though - and I imagine that is the fate awaiting this bird!

Notice how Hrolf, the richer guy (with chainmail, shield, Dane axe and brighter clothing) is doing all the celebrating whilst his lower status companion has to carry all the loot!

6-Horse Carriage

This is a bonus picture: it's a 6mm carriage that I bought from Irregular Miniatures (I think) many, many years ago.  The carriage sat around without any attention for a long time, but I finally decided to do something with it and I'm very glad that I did.  It wasn't the oldest unpainted model I have, but probably wasn't far off!

I think this will probably be used as the command marker for any exceptionally infirm or gout-ridden generals in my Austrian Napoleonic army.  I fully expect that any opponent will demand movement penalties for such a commander; I'll be sympathetic to such demands!

The Brazen Bull

In the ancient world, the Brazen Bull was supposedly a torture device invented by Perillos of Athens for a Sicilian Greek tyrant.  Whether or not that can be substantiated, this Wargames Foundry model is clearly animated.  I suspect that it's been sent by one of the Greek gods to torment some poor hero.

My bull will be used as an opponent for Jason and the Argonauts when I am eventually ready to play such games.  Typically such god-animated constructs are very difficult to beat unless you know the hidden weakness.  I wonder if the ring in the middle of its back is attached to a pull-cord?  Maybe that's the secret way to defeat this monster?

I'm quite pleased with the way the bull has turned out, but actually such models are really easy to paint.  The bulk of it is just a single colour and there are only a few details that needed to be added.

Sunday 11 May 2014

3 Viking Characters

Introduction

Today's post will be a quick one; I'm running out of time (again!).  A combination of trying to do a bit more painting and also spending a little more time with the kids has resulted in me not spending much effort on blogging in the last week.  I'm still reading everyone else's posts, but sometimes I don't get round to commenting; please don't take this as a sign of  lack of interest.

Viking Characters

As well as all the other loot that I brought home from Salute 2014, there was a packet of Vikings from Wargames Foundry.  I'd been thinking of adding some larger-than-life figures to my Saga warbands for some time and Svava's Warrior Heroes fits the bill nicely.

First up is the eponymous Svava.  I wanted to have a shield maiden in my collection and this is one of the more plausible female armed Vikings amongst Foundry's offerings.  I've no idea whether a woman warrior was at all likely in the Dark Ages, but SAGA has a mythic quality to it so I don't feel at all constrained by historical accuracy!  Like all my SAGA models, she's been given an authentic name: I'll be calling her "Helga".

"Freki" is next.  He's a big lad; easily a head taller than most of my other 28mm figures.  Personally I think he looks rather gormless as well, but I don't think there are many who would say that to his face!

"Drott" is somewhat unusual for a Viking since he isn't wearing any shoes or trousers.  He's also armed with a very large hammer, so perhaps he is a fan of Thor, the thunder god.  Anyway, he looks very strong and quite ferocious!

The Svava's Warrior Heroes pack contains a total of 6 figures.  So far I've only finished these 3; they're probably the models I like best.

So, that's enough for now - I've got to get dinner ready, paint some scenery, spend quality time with the spouse, think about how to convert harpies and so on (not necessarily in that order, though...)