Saturday 30 June 2018

7TV2: Eternia Base and the Daleks

Introduction

To my everlasting regret, I've only played 7TV once before (here), though I've played its precursor - the Doctor Who Miniatures Game (DWMG) several times.

The one previous game of 7TV was fun, but it wasn't a total success for two reasons.  Firstly the forces were too small for the table (or if you prefer, the table was too large for the number of figures) and secondly the objectives were too easy to collect very early on (and that took away much of the point of playing the remainder of the game).

Last Thursday, I decided to revisit the game at the Helensburgh games club, but with some adjustments which would hopefully improve the experience.


The Setup


Somewhere in Federation space, on a remote and otherwise uninhabited planet is a top-secret research establishment called "Eternia Base".  There, scientists are conducting dangerous experiments to establish the nature of anti-photons.

A cross-dimensional rift caused by these tests has allowed universes to collide; Davros and a group of xenocidal Daleks have been sucked through.  They would like to take the secret knowledge of Eternia Base for themselves.

However, all is not lost.  Another dimensional traveller (who calls himself "the Doctor") and his assistant have persuaded the nearby starship USS Matakishi to intervene.  Captain Bellamy is leading an away team to try to rescue the scientists and save the base.

Special Rules

This would be a regular 7TV2 battle with 60 ratings per side.  The only alterations that we made to the standard rules were concerning objectives:
  1. An objective wouldn't automatically be claimed just by spending a special action.  Rather, the objective would be successfully claimed only if the model making the attempt could pass a Mind test.  Of course, for the Doctor and for Davros (both with a Mind rating of '6') this was just a formality...
  2. The central objective is the plasmatron, which splits photons or something like that.  For the heroic side, claiming this objective means that the experiment has been shut down safely; the structure of the base will be saved (even if its inhabitants are overrun by Daleks).  On the other hand, if the evil side claim this objective then they set the experiment to overload and eventually suck the base (and maybe the planet too?) into anti-space.  Either way, once this objective has been claimed the effect cannot be reversed.
  3. The other 4 objectives are scientists.  Claiming one of these objectives allows the successful player to add the model to his cast (though note that the scientist's Gadget special effect will be of limited effect: it won't allow any more gadgets to be claimed as that's a pre-game effect only) as well as gaining the usual 2 plot points immediately and 1 victory point at the end of the game.
    Once in play, the opposing player can try to knock out the scientist, or can claim the model for their own cast by following the rules for taking an objective.  In theory, a scientist could change allegiances every turn, as the two sides plead, threaten and trick them!

The Game


At the beginning, the Federation advanced as quickly as they could.  Both the Doctor and Captain Bellamy manage to talk to a scientist and convince them that safety lay in joining the good guys.

In contrast, the Daleks were afflicted by a nasty Countdown Card which effectively restricted them to half speed for a turn.  Since they weren't exactly fast movers to start with, their progress was distinctly sluggish!

Davros took out some of his frustrations by shooting and injuring Brook Aria, the Doctor's plucky assistant.


In their second turn, the Federation advance continued.  The Doctor ran up to the plasmatron, though he didn't have an action left with which to try to defuse it.  Also, the redshirt squad advanced, firing for all they were worth and actually hit one of the Daleks.  [They were shooting at Davros, but he has a 'Sacrifice' special effect which can redirect hits to a nearby friend].  Sadly for them, each Dalek can take 3 hits before succumbing and even worse, this was one of only two times in the entire game where a redshirt hit anything!

However, this single hit did change the results of the game, as you will see...


In one of those "I did not see that coming!" moments, the Daleks then drew a Script Editing countdown card.  There was a weird continuity error as Davros was suddenly next to the plasmatron (and was immediately able to set the device to overload before scuttling back to his own lines)...


...whilst the Doctor found himself in the midst of a bunch of angry Daleks, who proceeded to zap him.  It took all the plot points they had for the Federation side to keep him alive, though injured (and then there was some luck involved as well)!


Never underestimate the Doctor!  On his next turn, he ran up to the red Dalek and did something with his sonic screwdriver, thus adding another wound to the battle machine [he used a "Pen Gun" gadget, but I imagine this was just a setting on his normal device rather than a separate piece of kit].


On the other side of the base, two grey Daleks had tried - and failed - to claim the 3rd scientist/objective.  In a moment of sheer coolness (or perhaps utter madness!), Captain Bellamy transported in and rescued the terrified scientist from under their blasters [in game terms, these Daleks were hit with a Countdown Card which prevented them from activating for a turn and then Captain Bellamy used a "jet pack" gadget to move up for free before claiming the objective and scarpering]!


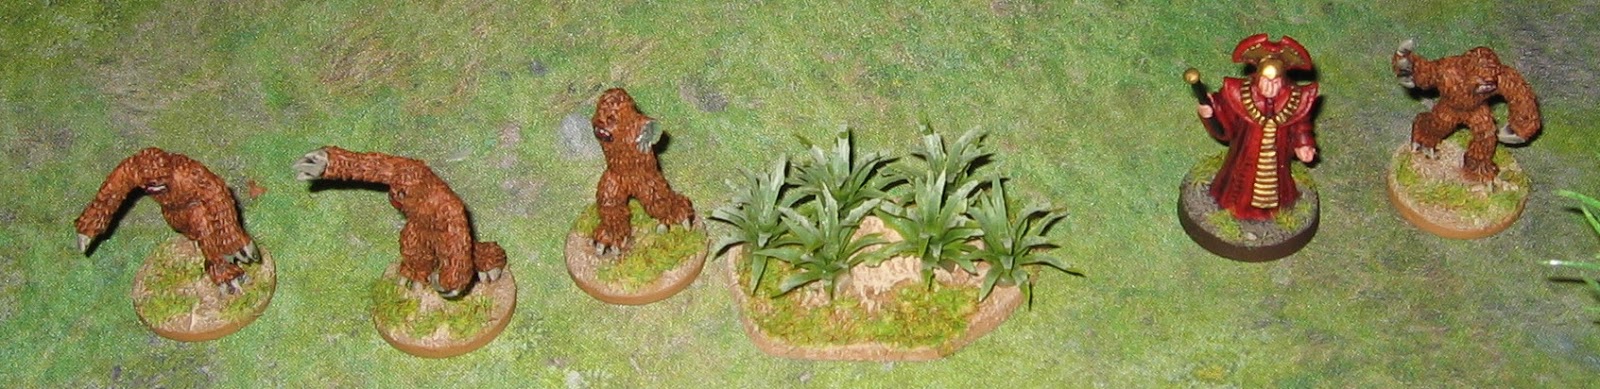
The Federation wasn't the only side to have gadgets, of course.  One of the Daleks produced a noxious cloud [nerve gas canister] that sent most of the redshirts coughing and reeling; it then exterminated a couple of the hapless humanoids.


Things started to get a bit hectic at this point:
  • The Doctor used a disguise kit to prevent the red Dalek from disintegrating him.
  • Davros threatened the 4th scientist into submission...
  • ...but just as he did this, a Federation shuttlecraft landed nearby and disgorged another squad of redcoats.  Two of them were promptly shot by the grey daleks, sadly.


The other two redcoats brawled with Davros, but had no effect whatsoever [honestly, they'd have done better to stand back and shoot him - though even that probably wouldn't have achieved much].  Fortunately for the heroic side, the Doctor was having a much better turn:
  • A Countdown Card allowed him to retrieve a gadget; the Doctor re-tuned his sonic screwdriver and inflicted the 3rd & final wound needed to destroy the red Dalek [with the same "Pen Gun" gadget as he had used before].  One down, four to go.
  • To cap this, the Doctor also persuaded the scientist that he didn't want to follow Davros after all...
So at this point, all four scientist objectives had been claimed by the Federation/heroic side - though the Daleks had set the plasmatron into irreversible meltdown.


Right, time to leave!  The Doctor and his new scientist ally ran from the enraged Davros, whilst the shuttle relocated to the centre of the table to pick up Captain Bellamy, his scientist and a stray redshirt.


The evil side wasn't going to take this lying down.  Only one grey Dalek was in range of the shuttle, but it hit the craft squarely and inflicted heavy damage [i.e. 2 of the shuttle's 3 damage points were gone].  However, if that was the worst they could do then it looked as if the heroes might escape after all...


...but the Daleks chose this moment to Steal the Scene and take a double turn.  All the Daleks that were at all close converged on the shuttle; it was rocked as bolt after bolt hit it.  The Federation side was all out of plot points and so there was nothing they could do except hold on and hope for the best.

Amazingly, the shuttle's armour [shields?] held.  It made every single saving throw needed and then flew off into the sunset with its precious cargo!


There goes my armed astronaut!
 The Daleks' fury was intense!  They spent the last turn or two shooting down anything that moved.

I spent my last four plot points trying to save this scientist!  Didn't work, though...

Another redshirt bites the dust.


I had spent all my remaining plot points trying to save the last fleeing scientist, forgetting that the Doctor was also threatened.  A single hit would knock him out easily, but this time the rolls went against the Daleks and the Doctor survived & escaped.

At this point, the Countdown Cards ran out and the game ended.  Whew!

Victory


At the end of the game, after the Daleks' last minute shooting spree, the Federation cast was axed.  The Doctor, Brook Aria and one scientist had escaped on foot, Captain Bellamy, a redshirt and a second scientist had escaped in the shuttle and another two redshirts were still on the table - but all the rest were dead.  +1VP to the Daleks for axing the opposition.

Against this, the Federation had possession of 2 objectives/scientists.  +2VP to the Federation.

Hmm, Davros set the plasmatron objective to overload: +1VP to the Daleks.

So far, that's a tie at 2VP each.  However, we need to add in the points for cast members killed.  Nothing for extras (for which the Federation were extremely grateful), but +3VP to the Federation for destroying an enemy co-star (the red Dalek).

The final tally:
  • Evil side (Davros and the Daleks): 2VP
  • Heroic side (the Doctor/Federation): 5VP
So, who'd have thought it?  The Federation won; even though virtually all their shots had no effect at all, the destruction of the red dalek was the key!

Conclusion

Well, that was a thrilling game and no mistake!  There were so many moments where it could have turned - Davros swapping places with the Doctor was a masterstroke, the Doctor seemed like a goner in the midst of his enemies but somehow survived, the Daleks were all but invincible, the shuttle's escape under fire was very cinematic...and so on.

Both players enjoyed the game tremendously.  A number of other attendees at the games club wandered by during the evening to try to figure out what was going (there were mutterings such as "there are Daleks - but that looks like Star Trek?!", though nobody actually asked).  From this, I anticipate that there's plenty of latent interest in 7TV - even if many of the club members don't yet realise it 😃.

We'll be back...

Tuesday 26 June 2018

Batrep: Robin Hood and the Tax Collector

Introduction


Time for another 4-player game at the Helensburgh games club.  This week it's a large Song of Blades and Heroes game, with 2 players on each side.  So..

Robin Hood and his merry men have learnt that a particularly noxious tax collector will be carting his ill-gotten gains near the forest.  It's an easy place for an ambush and the outlaws have never been known to pass up an opportunity to strike at the oppressors of the poor.


Of course, it's a trap!  The Sheriff of Nottingham and his forces close in from one side...


...whilst Guy of Gisborne leads more knights and men-at-arms in from the other side.  Can Robin and his men escape?  If they do, can they take the treasure cart with them?  What do you think?


The Game

The 2 (4?) forces quickly formed a confused melee, so I won't attempt to describe all the ebb and flow of the battle.  Rather, here are some little vignettes:


The very first character to activate was one of Robin's men.  He immediately shot the tax collector dead [so I don't really know why I bothered painting that model and putting it on the table, mutter, grumble...].

The Sheriff of Nottingham crept up behind one of the outlaws and knifed him in the back, scoring a particularly gruesome kill.

Guy of Gisborne ran ahead of his men, eager to engage the outlaws.  Much to everyone's surprise, he ran straight onto Robin's sword and was felled instantly.

More knights charged in, but this time it was one of the Merry Men who scored a gruesome kill.  Nottingham's forces were losing all their best fighters really quickly!

Just one of the original wagon guards was left, but he was close enough to prevent the outlaws from leading the treasure away.  Little John attempted to dislodge him, but in a show of stunning bravery, the lone guard knocked down the giant in green.  He failed to finish him off, though.

An outlaw stepped forwards, giving Little John some much needed respite.  It didn't look so rosy for the archer though: two of the Sheriff's men grabbed him whilst their boss stepped forwards to finish the outlaw scum.  However, the tables were turned unexpectedly as the merry man knocked the Sheriff over, into the mud!

While the Sheriff was engaged in slaughtering some of his own men who turned and fled (after Will Scarlet inflicted a gruesome kill on a nearby man-at-arms), one of the outlaws managed to get the wagon moving.

The Sheriff and several crossbowmen ran after the treasure, but Will Scarlet got in the way.  In yet another very quick swordfight, Nottingham was killed.

For much of the game, the Black Knight had been wrestling with Friar Tuck.  On the face of it, this should have been an easy win for the knight, but the doughty friar was giving it all he had; the knight was only saved by his heavy armour on more than one occasion.  Eventually, the combatants stepped apart.

Where was the treasure cart in all this?  It had almost left the table at the outlaws' exit point (which would have won them the game immediately), but it had outrun the outlaws who were guiding it.  Now the wagon was stuck in the ford; the carter wasn't going to try to move it on his own.

It was a race to see who could get to the treasure first; all the players were making risky attempts at 2- or 3-dice activations in an attempt to gain an edge.  One of the Merry Men was in the lead, hotly pursued by a man-at-arms and followed - slightly further off - by the Black Knight [who had left Friar Tuck to the tender mercies of a trio of spearmen].  Trailing the knight, just out of this picture, was Will Scarlet...


The Merry Man arrived first, but was unable to get the cart to move before he was set upon by his pursuers.  Between the two of them, Guy's men cut down the outlaw.

Before the authorities could turn the wagon around, Will Scarlet came running up.  He shot an arrow as he approached and it struck the man-at-arms for another gruesome kill.  This was too much for the Black Knight; he turned and fled off the board.

Will Scarlet may now have had possession of the treasure, but the rest of the field was a confused melee.  Most of the authorities' named characters and superior fighters were down, but they still outnumbered the remaining outlaws.  Not that this mattered, since the treasure was lost...

What of Little John?  He had drifted away from the main fight, but a couple of have-a-go men at arms tried their luck and attacked the giant outlaw.

Against the odds, the pair actually managed to wound Little John.  [I think this is the first time that has ever happened in one of my Robin Hood games!  Most characters are knocked out after a single hit, but Little John has the tough attribute and can take multiple hits.  He's never had his own blood shed before...].

Finally, with Will Scarlet encouraging him, the carter drove his wagon over the ford and into the forest, thus securing a win for the outlaws.

Conclusion

The Sheriff's side lost most of their big men/named characters very early in the game and I think we all believed that the outlaws would then find it easy to escape with the loot.  Nothing could be further from the truth!  Interference from multiple minions (including the heroic last man of the caravan guard) prevented Robin's men from moving the wagon until fairly late on.  Even then, it was pursued with vigour and could have been recovered, if a few die rolls had gone the other way.

Once again, the players all got into the spirit of the game and (I hope) enjoyed it thoroughly.  There was heroism, skullduggery and a finely-balanced finale - what more do you want?!

Sunday 17 June 2018

Tintin and the Pharaoh's Sword

Introduction

Last Thursday at the Helensburgh games club, my son and I introduced two new players to Pulp Alley in a thrilling 4-way adventure in the jungle.  The scenario wasn't anything particularly exciting (just various random plot points scattered around the board), but everyone had a great time.  Here's what happened...


The Leagues

So, we had 4 new leagues, all designed by myself and using my own models:

Tintin

Not the greatest of photos - and Professor Calculus has wandered off again!
Tintin should need no introduction really!  This is a league representing the young Belgian reporter and his closest associates.  It's a League of Heroes, so it has fewer members than average, but they're generally higher level characters than is common:
  • Tintin: the leader of this league is good at solving puzzles and following clues.  He can shoot too, but isn't a specialist fighter.
  • Snowy: Tintin's faithful companion is extremely smart for a dog.  He's got Finesse and Cunning, though in a fight his best defence is his very high Dodge ability.
  • Captain Haddock: Oddly, Tintin's best friend is an aging, alcoholic sailor.  He's good in a fist fight, but isn't particularly subtle.
  • Professor Calculus: Calculus is the epitome of the absent-minded academic.  He's as likely to wander off to follow a rare butterfly as he is to invent a new form of ultrasonic weapon.

The M.I.T. Archaeological Society


This league is formed around an intrepid adventurer/archaeologist and his various hanger-ons.  He's more at home chasing rogues, thieves, pirates and Nazis (or being chased by them) than he is digging and cataloguing artifacts carefully at a year-long site.
Perk: Network of Supporters [although we forgot to apply this at the start of the game]
Catchphrase: "It belongs in a museum!"
  • Idaho Smith: A dashing, inspirational leader, though prone to letting his fists and/or Colt .45 do the thinking for him.
  • Marion Allen: Idaho's on/off girlfriend, best described as feisty.  And then some...
  • Indiana: The family's bloodhound.  Not particularly smart, and liable to wander off.
  • Kerem: A Turkish policemen and excellent shot, totally devoted to Idaho after that incident in Smyrna some years ago.
  • Mother: Idaho's mother often seems to get tangled up in his adventures.  She's occasionally helpful, but more often needs rescuing...

Doctor Demento

Note that one of the Zorgls suffered an accident just before the game started and lost both its arms.  This didn't seem to affect its performance, however...
I'm not sure if the good Doctor is an alien in disguise, or just your typical mad scientist with dreams of glory.  Either way, he has a small army of creatures at his beck and call.
  • Doctor Demento: the leader of this league is Clever and Impervious; he can also affect enemies' minds.  Presumably his powers derive from scientifically-advanced artifacts rather than being supernatural in origin.  His dress sense is a bit...megalomaniac!
  • 4 Zorgls: It's not obvious whether these hairy monsters are biological experiments or an alien slave race.  Either way, Zorgls are tough fighters - if none too bright.

The Mummy


Amenhotep was an ancient Egyptian priest some 3,000 years ago, but now he's a resurrected horror followed by totally loyal servants from the grave.
  • Amenhotep: The mummy is tough, cunning and very dangerous.  His Achilles' heel might be that he doesn't have any ranged weapons - unless issuing curses at people counts.
  • 3 Tomb Guardians: These reanimated skeletons are slow, but very hard to damage.
  • Scarab swarm: A swarm of voracious beetles; they're difficult to hit and perilous on contact.

The Setup

We decided that the board would be defined thus:
  • The major plot point was placed in the centre, at the top of the pyramid.
  • 8 minor plot points (2 for each player) were placed around the board.
  • Climbing up or down the pyramid's sides would be perilous, unless the staircase was used.
  • The quicksand and the pit beast (and the areas around them) would be extremely perilous.
  • A leopard started in the middle of the board.  At the end of each turn, it would move 2d6 inches in a random direction.  It would be extremely perilous to anyone who activated within 3" of the model.  [Note: the peril isn't necessarily the same leopard each time; the jungle is full of such beasts and they come and go as they please]
  • Moving through one of the large, dense patches of jungle would be perilous.

The Game: First Half


Professor Calculus was the first character to move in turn 1, but he didn't get very far before he tripped over a hidden root [another player was very quick to use a fate card - which caused the good professor to take a peril - which he failed].  Not wanting to roll for a 50% chance of recovery, I responded with an I'm Alright card of my own.


Tintin raced straight up the steps of the pyramid, but the other players weren't letting him off easily.  A failed challenge injured the young man, though he did recover Pharaoh's Sword a turn later.


On the other side of the pyramid, a Zorgl climbed up to retrieve a tasty-looking giant snail.  When Amenhotep attempted to intervene, other Zorgls intercepted him.  This started an epic fight between the forces of Doctor Demento and the Mummy which lasted right to the end of the game.


Elsewhere, the scarab swarm attacked Kerem.  Although he shot at it repeatedly (and no doubt killed a few individual bugs), the swarm was only driven off - temporarily - when Indiana (the bloodhound) joined in.


Captain Haddock attempted to talk to the native guide, but was immensely frustrated to find that the plot point challenge required a significant amount of Finesse or Cunning - neither of which were the good Captain's strongest abilities!


Meanwhile, Doctor Demento glided over the quicksand and grabbed the pouch of diamonds from the drowning man.  Even the doctor, with all his powers, found the going tough here; it took him a couple of turns to exit the sticky mess.


About half-way through the game, this was the situation:
  • Most of the Zorgls were engaged in a battle royale against Amenhotep and his Tomb Guardians to the east of the pyramid.
  • In the north, the fourth Zorgl had picked up the journal plot point, but was being stalked by the leopard.  It seemed as if this supposedly-random peril was dogging the Zorgl's footsteps, as it followed him everywhere.  Indeed, in the turn after this, the leopard knocked out the Zorgl and then vanished into the undergrowth, not bothering anyone else for the rest of the game.
  • To the south, Idaho Smith was wavering over whether he should enter the lair of the pit beast to retrieve the crate of rifles plot point.  He did eventually shoot down a tomb guardian which threatened his followers instead.
  • Kerem and Indiana had (temporarily) seen off the scarab swarm.
  • Marion Allen was unchallenged in her attempt on the dynamite plot point, but Mother (who had been with her just moments before) vanished into the undergrowth [in other words, I know she's somewhere at that end of the board, but I cannot see the model in the picture and I can't remember exactly where she was!].
  • In the west, Tintin's league were unmolested as they attempted multiple plot points.  Professor Calculus dusted himself off after his earlier fall.

The Game: Second Half


Tintin had found the all-important Pharaoh's Sword, so he ran for the exit.  At the same time, Snowy recovered a hat and whip, only to be confronted by a middle-aged woman.  "Those are my son's things!" she exclaimed.  "Come here, little dog,  Drop them!" she commanded.  But Snowy wasn't having any of that; he backed off, dodging and weaving when Mother tried to grab him.  She didn't really stand a chance of catching the agile terrier!


Idaho Smith wasn't having a good time!  He had run out of ammunition after shooting a Tomb Guardian to pieces and had decided to go for the crate of rifles after all.  He fought his way into the pit beast's lair, not without some difficulty, only to discover that the crate of rifles wasn't real!  The beast had misled him with some of the remains of a previous victim, laid out artfully to entice him in.


Back on the lower slopes of the pyramid, the Zorgl/Mummy slugfest continued.  The hairy monsters didn't manage to put any hurt onto the hard-as-nails Amenhotep, but they made a stupendous number of recovery rolls to stay in the fight themselves.


The scarab swarm came forwards again; this time Kerem vanished beneath the seething mass of bugs and didn't reappear.  Indiana, the dog, was fine though; the insects couldn't quite figure out whether he was an enemy or just a neutral bystander.


Finally, Captain Haddock thought he'd managed to communicate with the native guide.  However, he was exasperated when the man simply nodded, turned and stalked off into the jungle.  Shouting at him had been going so well up till then...


Idaho managed to extricate himself from the pit beast, though not without much difficulty.  Indeed, I suspect that he had to leave his jacket and most of his shirt behind [Multiple players added Fate cards to the basic "extreme peril" in an attempt to make it easier or harder for him to escape.  This all added up to a very tense and complicated climax to the struggle!].


In another part of the jungle, Professor Calculus stumbled across an old journal just lying in the middle of the path.  "Hmm, this look interesting" he thought, as he picked it up [without any difficulty at all, thanks to a FREE PASS challenge].  He probably didn't notice the bloody streaks in the grass where the leopard had dragged away the Zorgl who had been the journal's previous owner...


In a fit of ungentlemanly pique, Captain Haddock ran at Mother in an attempt to remonstrate with her for persecuting Snowy.  The woman was terrified into submission by the sudden appearance of the rough-looking, large man and his stream of invective.  I'm sure he didn't actually hit her...


And still the battle between the Zorgls and the Mummy's forces continued, with neither side prepared to give an inch.  One of the Tomb Guardians had been destroyed, but every time a Zorgl was knocked down, it would just get back up and stay in the fight!


In the last turn, Idaho turned his attention to the dinosaur footprint.  He was shaken and injured from his encounter with the pit beast; this didn't help and he failed to grasp the significance of this plot point.  Hearing his master's voice, Indiana joined in as well - but the bloodhound was less than impressed by the muddy footprint and took himself off into the undergrowth instead [in other words, Indiana failed a peril and was "knocked out" by it].


Amenhotep finally gave up wresting with the Zorgls.  Calling his one remaining servant to his side, he charged the newly-approaching Doctor Demento instead.  However, this boss fight was simply too late to achieve anything and the Doctor dodged away, still holding his pouch of diamonds.


In the last act of the game, Marion Allen was looking for Mother.  She saw Captain Haddock shouting at the old lady and so she shot him in the back.  This was just a scratch, though; the enraged captain saw red, charged Marion and flattened her with a swift pair of fists.  He probably breathed on her as well; his whisky-charged breath could fell an ox...


So, at the end of turn 6 there weren't quite as many models on the board as there had been at the start of the game!


Conclusion

There was lots of derring-do and mayhem, but how did each league fare at the end:
  • Tintin: Tintin's league made off with the Pharaoh's Sword (3VP), the hat and whip (1VP) and the journal (1VP) for a total of 5VP.  No-one was knocked out, at least in part because they didn't really get into many fights.
  • Doctor Demento: The Zorgls stood up to everything that the Mummy could throw at them and came out (mostly) standing - though without the giant snail which they had intended to collect.  Demento himself had acquired the pouch of diamonds (1VP), which would no doubt help further his researches.  Of course, one Zorgl was taken by a leopard, so they must have a hidden vulnerability...
  • The Mummy: Amenhotep and his followers fought both most of Doctor Demento's league and a significant portion of the M.I.T. Archaeological Society.  They held their own - they inflicted as many casualties as they took - but were unable to claim any plot points at all.
  • M.I.T. Archaeological Society: Idaho Smith himself had a terrible time fighting the pit beast and barely escaping.  Indeed, this league had rotten luck with plot points; they failed to solve the dinosaur footprint, they had the dynamite in their grasp until Marion Allen tangled with Captain Haddock and dropped it - and the crate of rifles proved to be a trap.  Kerem vanished under a swarm of insects and both Mother and Indiana have vanished into the jungle and are lost!
So, technically Tintin won by a landslide, but that's not really fair on everyone else as several of the other players were raw beginners.  Did we have an exciting game?  Yes!  Was there plenty of narrative, with each league having its own successes and setbacks?  Yes!  Did everyone go away happy?  Yes, I believe so!  From that point of view, it was a universal win.  Pulp Alley delivers yet again!