Showing posts with label Paper models. Show all posts

Sunday, 30 September 2018

The Haunted Lighthouse from Tin-Soldier

Introduction

For some time now I have been looking for a lighthouse model that I can use with my 28mm figures.  This would play a vital role in certain Pulp-style games as the lonely rendezvous for a spy and his/her handler, or as a focus for a raid by Nazis/aliens/sea monsters/...

I did consider converting a bedside lamp.  Yes, apparently you can buy table lamps in the form of a lighthouse!  However, they're (a) a bit too expensive for this type of project and (b) often quite kitsch - not very realistic representations of anything found in the real world.

It took a long time, but my hunt is now over.  I discovered that Tin Soldier publish a range of slightly unusual paper models to download and print; amongst these is a "Haunted Lighthouse".


The Kit


For a mere $10 (US), I bought the kit and downloaded the resulting PDF.  It's taken me about a week to build this kit, though note that this could be done a lot quicker if desired:

  1. I was only spending an hour or two after work on this project most days.
  2. My version of the kit has a lot of reinforcement and other adaptations to make it stronger and more suitable for the games table.  This extra work did add to the construction time.
Other observations about the kit:
  • I found that I wanted some parts in paper, but others in card or even on a transparency.  Initially, I printed the entire PDF onto paper without thinking; this did waste some sheets.
  • Sometimes, the pieces I wanted on card were on the same page as others that I intended to print onto paper.  This is not unusual in paper modelling, but again it leads to waste as the same sheet needs to be printed onto both the thinner and the thicker materials.
  • The instructions were comprehensive, but largely written in prose rather than drawn as schematics or build stages.  There's nothing wrong with that, but it is harder to follow, I think.  As an experienced card modeller, I didn't need to refer to the instructions very often anyway; the sequence and location of most parts was fairly obvious.
  • Pieces fitted together well; I didn't have to make any changes to the basic shape and form of the model.

The Build

The first thing to say about my version is that I cut out an MDF base for the building.  This is slightly larger than the supplied (printed, coloured) ground and will be stronger & heavier than a foam core base.  It should make the whole assembly a bit more stable, especially considering the height of the tower.  I then painted and textured the base to fit in with my other terrain pieces, so the base you see in these pictures is quite different from that supplied with the kit.


So, here's the next adaptation: I didn't glue the tower to the base.  Instead, there is a rare earth magnet at the bottom of the tower and an iron washer buried in the MDF base.  Together, these hold the tower in place very well, whilst still allowing it to be removed for storage.


I made the roof as a separate piece too.  This allows access to the inside, though note that the kit does not supply textures for interior walls.  Instead, the inside is entirely my own work; it was easy enough for me to reuse parts from other kits or to download free wallpapers for dollhouses (look for 1/4" scale if you intend to do this as most dollhouses are intended for much larger figures).


Here's another adaptation: the top platform is separate from the main tower.  This uses a simple plug & socket joint; the socket is 3" of solid cardboard tube from some packaging or other, glued firmly into the upper part of the tower.

Whilst on this part, note that the railing around the platform is especially fiddly to build from paper & card; it's easily the most difficult part of the entire project.  I did consider very seriously trying to scratch build a replacement from wire and/or balsa, but in the end I went with the printed parts.


It's a lighthouse, so I couldn't resist making one final adaptation.  I embedded a cheap LED "pen" torch into the upper part (it's the "plug" part from the previous picture).  I added a clear plastic bead glued to the top to help redirect the light and then glued a plastic cap from a drinks bottle over that.  Yes, it does light up!  At night time it seemed very bright, though in this daytime photograph it's not so strong.


Conclusion

I'm delighted with this model!  It's certainly unique and should lead to some interesting games.  The kit didn't cost much in terms of money or materials, though it did take a certain amount of construction time, as all paper/card builds do.

Although it's described as a "haunted" lighthouse, there's nothing particularly spooky about it other than the derelict roofs and optional, grimy version of the lantern room.  Indeed, if the kit offered alternate, "clean" roofs then I think this could make an excellent working building instead.

Saturday, 27 January 2018

An Arabian Dhow for 28mm Figures

Introduction

Recently, I saw a blog post online about a card model of a dhow that was suitable for 28mm figures I'm very annoyed with myself that I cannot remember whose blog this was; my sincere apologies to the author.  However, this is something that I had been considering for myself as a useful adjunct for my Arab slavers (for the Congo game) or possibly for Pulp Alley games set in East Africa.


Once the idea was there, it didn't take much effort to find the source of this kit: it was made by a Russian outfit called "Umbum" and sold through the "Russia Best" website.

Interestingly, this website is in English [at least when I view it] and so it's quite easy to navigate.  Even more interestingly, their catalogue lists a number of other ship models which might be suitable for wargames:

  • Arabian Dhow
  • Greek Bireme
  • Medieval Caravel
  • Russian Ladja (like a small Viking ship)
  • Hanseatic Cog
  • Oriental Junk
There's no scale given for these kits, but the dimensions of the finished models are usually available on the web page.  I thought that I'd take a chance and so I ordered a dhow and a bireme [for my Greek Argonauts].  This article is about the dhow; more on the bireme another time.


Costs & Delivery

I was a little bit nervous ordering anything from Russia, as their postal system doesn't have the best reputation in the world.  However, I figured that at $8 (USD) for each kit plus about the same again for postage it wasn't too expensive to take a chance.

I ordered these models some time before Christmas and in due course, 6 or 7 weeks later, I received my package with various customs seals and labels attached to it.  It's not clear to me whether this timescale is normal when ordering goods from small Russian companies, or whether the Christmas holidays [and their associated effects on postal services] contributed significantly to the delay.  Anyway, I now had my kits...


The Dhow Kit


The Dhow kit came in a very large, very flat box.  On opening it, I found the following:
  • 1 large sheet of printed parts.  This is quite heavy cardstock, but nicely printed on both sides and die-cut very well.
  • 1 instruction booklet.
  • 1 sheet of paper (?) or plastic (?) sails.  I couldn't quite work out what the sails were made from; these are a very different material from the rest of the ship - much thinner, though still quite strong.
  • A hank of cord to use for rigging.
  • A set of "standee" figures and [oddly] foam bases for them.
  • 1 sealed toothpick!  This is nominally to help push out any small parts, though I didn't find it to be necessary.


The Instructions


I was very impressed by the instruction manual for this model.  It's easy to follow [it uses colour and simple diagrams very effectively] and it is language-neutral throughout.  Quite a delight!


A Suitable Size?


When I bought it, I took a chance that this model would work with my 28mm figures.  In the picture above, you can see the 15 (!) standees alongside a few of my Foundry Arab slavers.  Allowing for stylistic differences and the unusually thick foam bases, I'd say that the kit's card and my metal models are extremely compatible in size.  


The Build


Construction of the dhow was extremely straightforward.  The parts fitted well and were designed to be simply pushed together.

If I had done a "dry" build, I don't think the kit would have taken long to complete.  However, I intended to make this a very permanent model and so I used a paintbrush to apply white glue along the seams at various stages in the construction.  This meant that I had to leave it to dry quite often, thus slowing down the build quite a lot.


A sharp knife cuts off the tabs that protruded from the deck

One other issue that I wished to address was the presence of tabs.  Due to the push-fit nature of the  model, there were occasional tongues of cardboard intruding onto the deck or the sides of the hull [Note that these should NOT be confused with the protruding rigging points or the supports for the bases of the masts!].


Tabs/tongues cut flush and then painted with deck colour.  See if you can spot them all!

Once the glue was dry, I cut these tongues/tabs flush with the surfaces from which they protruded.  I then applied some paint to the exposed edges of the cardboard to hide them.


More construction tabs, this time on the sides of the hull.

After tackling the tabs on the deck, I assembled the hull.  More construction tabs stick out of the sides; these were also cut flush and the raw ends were painted to match their surroundings.

When the assembly was done, I painted all the remaining exposed edges of cardboard with a colour to match the surroundings.  Mostly this was one of two shades of brown, though the decorated prow of the ship, rigging points and some parts of the waterline needed a dark grey.


Rigging

The completed, fully rigged dhow

There's a lot of ropework on this ship!  It may look complex, but the instructions were very clear and easy to follow.  Two things are probably worth mentioning, though:
  • The stays for the mast are not symmetrical!  The mast is braced differently depending on which side the sail has been placed; I had to redo some knotwork when I realised this.
  • The string supplied with the kit was quite thick, inflexible and possibly wax-coated.  This made it difficult to tie the knots which were suggested in the instructions.  I ended up doing simple hitches instead, with glue to hold them in place and clamps to keep the tension whilst the glue dried.
In hindsight, the rigging took rather longer than the rest of the construction [and wasn't as much fun, either].  However, it does add greatly to the appearance.


Conclusion


I bought this model to assess its suitability for wargaming.  I'd say that in many ways it has surpassed my hopes in this respect:
  • It's cheap.  Even with the cost of international postage, the dhow should be within the financial reach of all but the most impoverished wargamers.
  • It's sturdy.  This model is really designed as a toy, so it's built from heavy-duty materials.
  • It's easy to build.  Apart from possibly the rigging, the parts went together quickly and easily.
  • It's a perfect scale, at least for 28mm figures.
  • It's pre-coloured, even on the inside of the hull [which cannot be seen in the finished model!].  The only painting required is to touch up the raw edges of the cardboard; I'd recommend strongly that you do this.
Of course, I have to balance this with a disadvantage or two:
  • Because of all the [realistic/unavoidable] rigging and deck clutter, it's actually quite awkward to place 28mm figures on the ship.  I managed 3 or 4 on the foredeck without too much trouble, but could only place a single Arab on the aft deck - and that required some dexterity.
  • There are no instructions or alternate parts to permit a docked or anchored ship [i.e. with the sails furled].  I don't imagine it would be too hard for someone to make such an adaptation, though.
So, if you want a dhow, or a whole fleet of them, for gaming then I'd certainly recommend this Russian kit.  I might replace the string provided for rigging with something a bit thinner and softer, though.

Now all I need to do is find somewhere to store the model...

Wednesday, 9 September 2015

The Wrong Glue.

A Salutary Tale

Once upon a time, a few years ago when I took up paper model-making, I scoured the Internet for advice on the best glue to use.  I wanted something that would cover well, dry relatively quickly and hold fast.  There were various horror stories about water-based glues that caused shrinking and warping of the models, so I decided to avoid those.

Eventually, the consensus on the net seemed to be that this was the stuff to use:


Note that this is not a common or garden glue stick, as used frequently in primary schools around the world.  Rather, this is a clear, thick, liquid glue pen that promises not to cause any problems with the paper or card being glued: no shrinkage, no ink smudges and no warping.  It's a bit more expensive than many other glues, but it seemed that this was indeed the answer to my prayers.

For a while, I used this glue on all my paper models and it worked well.  The joints were sound, colours never ran and the card was not distorted in any way.  However, after a while, I noticed that my older models weren't quite as perfect as when I built them.


For example, the walls of my hotel started to sag.  The fire escape fell off at one end (and was then torn off the other end by its own weight).  It looked as if the glue had re-liquefied or softened, the parts had moved and then the glue had hardened again.  What was going on?

Many of these models were stored on shelves high up in a back room.  It gets pretty warm up there at times (hot air rises!) but is otherwise quite cool.  Mind you, compared to some parts of the globe, the range of temperatures in my house is probably not that great.   I can only imagine that such limited changes in temperature, perhaps aided by changes in humidity, had caused the glue to flow slightly over a long period.


It's a bit of a puzzle because any time that I've investigated, the (remaining) parts of each affected model have been held very firmly in place at whatever angle they've come to rest.  At no point have I detected any stickiness or softening of the glue!

So, what next?

I gave up using the UHU office pens several years ago, once I started to notice this effect on my first card models.  I'm sure that they are a very fine product for some applications, but they don't suit my needs at all.  Now I use exclusively white glue (PVA, "Elmer's glue") for paper kits.  I use a sculpting tool to spread a very thin layer on one part only; the join is relatively quick and absolutely permanent!

For the older models that suffered such fatigue, I've mostly had to bin them.  The UHU glue has encrusted itself onto parts of the joints, leaving other previously-glued parts almost bare.  It is possible to cut or scrape such hard conglomerations away and re-glue the models with PVA, but it's just not worth the effort in the worst cases.  For the less badly affected kits (mostly vehicles), I have indeed made some such repairs.

At least with paper models, I can always build replacements.  Of course, finding the time to do this might be a problem...

Sunday, 23 August 2015

More card:FAB1 and M969OJB

Introduction

Last week, I published pictures of some card models that I built whilst on holiday: here.  These were all downloads from Dave's "Cut and Fold" Card Creations site and a wonderful resource it is!  I also mentioned in passing that I had started (but not finished) a 6-wheeled, pink Rolls Royce.  Well, I've now completed FAB1 and here it is!  There's also a nice, simple bonus model that only took me a short while to make.

FAB1

As all fans will know, FAB1 is the name of Lady Penelope's vehicle from the Thunderbirds TV series by Gerry Anderson.  She was described as International Rescue's "London Agent" and was a cross between a super-spy, a diplomat and a high society debutante.
In keeping with her extremely glamourous position, Lady Penelope was driven about in this flamboyant and brightly-coloured Rolls Royce by her dour butler/chauffeur, Parker.  Parker was a reformed criminal whose underworld contacts and burglary skills often came in useful, but his driving of FAB1 was near-legendary as well.
The limousine was not just a luxury transport, though.  FAB1 had more gadgets than one of James Bond's rides, including multiple weapons, defensive and anti-pursuit measures.  Heck, it could even drive on water at up to 50 mph!  Mind you, I don't like to think too much about the fuel consumption it must have required...

  • Size: this paper model measures about 10.5cm .  That works out at 1:60 scale, which is a tad small for 28mm figures such as the Crooked Dice "Daredevil sister" shown in the picture.  A purist might want to scale it up by 6% or so, but it's close enough for me.
  • Issues: Like many of Dave's paper car kits, the wheels are just single-thickness disks.  For gaming purposes I prefer to make them a bit more robust and so I've added treads to them.
    The clear, domed hood looks like a real pain to build from card.  Actually, it was much simpler than I had expected and went together quite easily.  It still shows a few rough edges, though.
    The "flying lady" hood ornament was described in the kit as "optional".  No kidding - it was far too small for my level of skill - and it would have been very vulnerable as well.
  • Overall: 4/5.  Another fine model of an iconic TV vehicle.  The canopy is slightly odd, but given the limitations of paper as a modelling material it is surprisingly effective.

M969OJB

At the other end of the price & luxury scale, we have another car from Dave's Cut and Fold site.  This is the much-rubbished Reliant Robin and unlike FAB1, it was a real vehicle which sold in considerable numbers!
It was often criticised for not being much of a car (to put it mildly!), but that's really missing the point.  The Robin was designed to fit with the lesser requirements of British license and tax regulations that more usually applied to motorcycles.  I'm simplifying a bit here, but the result was that it was much cheaper and simpler to run than a 4-wheel vehicle.
This particular Reliant Robin was made famous after it appeared in an episode of the BBC's Top Gear motoring programme.  In that, I believe M969OJB was driven by (and lambasted by) Jeremy Clarkson.  This kit has a small image of Mr Clarkson in the driver's window.

Oh, look - he's rolled it...
  • Size: I calculate this Reliant Robin model as 1:52 scale.  Like FAB1, that's about 5 or 6% wrong for 28mm models, though in this case it's too large.  Still, it's not enough of a difference for me to care.
  • Issues: none, really (other than the picture of Jeremy Clarkson - I'd have preferred not to see him in the window!)  There were a number of very small optional extras in this kit, such as more detailed wing mirrors and "anti-roll" bars (a Top Gear addition and not part of the manufacturer's specification for this vehicle, I suspect); I left these off.
    The wheels for this model are necessarily small; that may give trouble to some model-makers (indeed, I nearly lost the rear wheel treads several times!)
    Note that I have adapted my build of this kit somewhat.  Dave's original has a separate underbody, but I've just taken the printed "chassis" and attached it directly to the outer shell.  I think it works pretty well that way!
  • Overall: 4.5/5 .  This was easy to build and is very suitable for my gaming needs.  I think I'd have given it 5/5 if it didn't have the separate underbody and the picture of a grinning idiot in the window!

Conclusion

What can I say?  These are both fine models in their own ways.  FAB1 is the epitome of 1960s glamour, chic and hope for the future, whilst the Reliant Robin was a very easy build.  I hope to use both of these in my games, in due course.  Probably not in the same game, mind.

Saturday, 15 August 2015

Captain Scarlet Vehicles - in card!

Introduction

Any long-term followers of this blog may remember that I like to take a card modelling kit with me when I go on my summer holidays.  It's light and self-contained, requires only a few tools and no paints at all - and I can afford to bin the results if anything goes wrong!

This year, I added several sheets printed out from Dave's "Cut and Fold" Card Creations site.  These are all free-to-download kits and there are a great many interesting subjects; I'd encourage anyone with even a passing interest in paper modelling to browse this site!  Anyway, I chose to build several of the iconic Spectrum vehicles from the Captain Scarlet TV show, to go along with my 28mm figures from Crooked Dice.

The SPC

The Spectrum Patrol Car is a basic light transport automobile.  It's fast (insanely so, compared to the roads and motorways that we know now!) and can carry 4 people.  A simple sports saloon from the future, as envisaged in the 1960s!


  • Size: This paper model is 10.2cm long.  By my reckoning, that works out at 1:53 scale (the TV original was nominally 5.4m long), which is a touch oversize for 28mm figures.  Still, it's pretty close to my preferred 1:56.
  • Issues: most of this kit is fairly straightforward and fitted well, though the central spine and fin is made from 3 very narrow parts that have to be laminated together.  That's definitely the most tricky part!
    The separate underbody does allow the wheels to be recessed, but makes it difficult to get them at the correct height.  My model looks as if the suspension has broken and the body has sunken down!
    Also note that as designed, the wheels in this kit are just a card disk,  I've added treads to them from another model, thus making the construction greatly more robust and able to withstand handling.
  • Overall: 4/5.  An excellent model, with a few minor quibbles that can be worked around by an experienced modeller.


The MSV

 In the Captain Scarlet show, the Spectrum organisation occasionally calls on the services of a Maximum Security Vehicle.  These are typically used as ultra-safe VIP transports; an MSV is supposedly proof against most weapons (up to and including a small nuclear bomb!)  Again, the vehicle can carry 4 people and travel at up to 200mph.


  • Size: In the TV show, an MSV is supposedly 7.3m long.  My model is 11.3cm, thus making it 1:64th scale.  That's really a touch small for 28mm figures.  If I make another of these then I would scale it up by 15% or so.
  • Issues: The central "cabin" has straight sides and a curved front: this proved quite tricky to glue flat to the lower bodywork.  In addition, the other parts of the superstructure then needed some slight adjustment to make them fit correctly.
    Again, the wheels were just card disks; I've added treads to them from another model.
    Finally, the front "bumpers" were rather small and fiddly.
  • Overall: 3.5/5.  The subject matter is excellent, but the kit didn't go together quite as smoothly as I had hoped.  It's still a pretty good kit, for all that!


The SPV

Every schoolboy's favourite was the Spectrum Pursuit Vehicle!  These large armoured cars were stored in hideouts all over the world for use whenever a Spectrum agent required; they could be magicked out of a disused mine entrance, an old barn or similar location on demand.

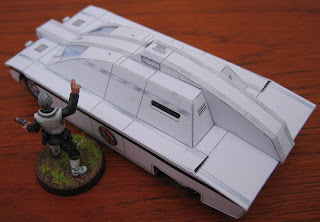
The SPV had 10 wheels, alternating between large and small along each side.  It also had an auxiliary track unit at the read which could be deployed on rough ground.  It was armed, armoured - and the crew faced backwards and drove it via a TV screen.  It's a SciFi geek dream!


  • Size: this model is 11.5cm long.  The original measures 7.6m, so the model's scale is 1:66th.  Like the MSV, this is really a bit small for 28mm figures and I would recommend that it is scaled up by around 15%.
  • Issues: for the most part, this kit fitted together really well.  The white nose bumper was slightly awkward, though not as difficult as I had feared it might be.  The only other parts worthy of comment are the side skirts, which have an awkward curve along the length of them.  I think that if I make another of these models then I might add formers of balsa wood or similar to help the side skirts to keep their shape
  • Overall: 4/5.  Another iconic vehicle, most of which is a very easy build with just a couple of tricky areas.

Conclusion


It is possible to buy plastic or metal versions of all of these vehicles; there have been a number of versions over the years.  However, you are then limited to the sizes produced by the manufacturers and I suspect that the collector's market has pushed the prices way beyond all but the most dedicated wargamers.

Card models aren't to everyone's taste, but if you have the time and the ability then you can build as many of these excellent vehicles as you like, to any reasonable scale, for very little cost.  If only Dave produced some Spectrum aircraft as well!

Now please excuse me: I have to go and finish building a 6-wheeled pink Rolls Royce...

Thursday, 21 August 2014

The Hospital (it's a part-work)

Once again, I've missed my self-imposed Wednesday deadline for a new article.  I'm annoyed with myself that this keeps happening recently; maybe I've got too many things going on simultaneously?

That being so, here's a quick description and a couple of pictures of my part-built Grekwood hospital.  I really need to complete this before I can continue with my ATZ campaign, as the last couple of episodes have clearly been leading up to a scenario set in a place of healing.  Please be patient; it may take me some time yet and I'm also finding this quite frustrating...

As you can see, I have made a start on the hospital!  So far I've completed 1 ward & day room, 1 corridor section and the entrance hall (less the steps and sign).  Also you can see the floor for a second hallway.

My vision is for a 2-storey affair with 4 "wards", though I'll probably only outfit 2 of them as real wards.  The remaining 2 should contain other hospital services, though I'm not sure what.  Perhaps a cafeteria and out-patient clinics?  Or an operating theatre?  Or administrative offices, a pharmacy, a laboratory or even an industrial laundry?  Ah, so many ideas; I know that I cannot realistically do them all.

At least the build is very modular, so this does leave open the possibility of expansion later.  It should also make the pieces a bit easier to store, I hope.

So far I've really only got the shells for these rooms.  I've done a little work on the roofs, but almost none on the furniture and fittings.  Hmm, perhaps this is all too ambitious and I should settle for a much smaller establishment?  Ah, but I have such dreams...

Sunday, 17 August 2014

Traffic Jam!

Introduction

I've written a few posts on paper models recently, so I think it's only fair that I photograph my entire collection.  As well as being a visual treat for your eyes (I hope!), getting the entire collection together in one place also allows me to take stock, find any notable omissions, spot any damage that may have occurred and so on.

Everything together in one big picture

So, let's break this down...

Military Vehicles

My army trucks and APCs are all from Genet Models, which used to be known as Ebbles Models, I think.  These all come from the Patrol and Convoy kits - at least, that's what they were called when I bought them.  I think that the site may have been rearranged since then.

One note about the Genet kits: they're huge!  If I remember correctly then I printed these out at 84% or so of the original size - and they're still very large vehicles, if not quite so overwhelming as before.  At least you can resize paper models easily!

Emergency Services

My collection of emergency response vehicles are almost entirely police machines and almost entirely from WorldWorks Games. There is a single ambulance but no fire engines (a distinct gap in the market, I think.  I've not seen a fire engine yet that I would wish to build).

The other outsider is a solitary white "No Go Zone" police car in British colours.  It's a nice idea, but the car body has a very complex shape and the texturing is bland.  I wouldn't recommend this to anyone unless you are an experienced card modeller and have a particular need for UK-branded cop cars.

"Regular" Cars

Here is my collection of compact and sedan cars.  All of the ones at the back are from WorldWorks, but the four at the front are from Stoelzel's Structures, if I remember right.

Note the convertible at the front: I'm very pleased to have it, but it did take a lot more effort to build than any of the other vehicles here.  Obviously, it has an interior and that complicates the design quite a bit.

Also note that the convertible is a little larger than the other "civilian" automobiles.  This inconsistency of scale is something that afflicts most manufacturers to some extent.  Mind you, I think that WorldWorks is probably a far worse offender than Stoelzel in this respect.

Trucks and Buses

I have a relatively small collection of large commercial vehicles: 2 buses and 2 articulated trucks (with 1 extra trailer).  Also there's a garbage truck.  This latter is an early WorldWorks model and although it has all the right components, it just doesn't look quite right to me.  The cab is too narrow, the body too wide and tall.  Additionally, the double tyres at the back are badly aligned with the single tyres at the front.  It's an odd model.

On another note, buses are some of the easiest card models to make, so I would recommend them strongly to anyone who wished to begin making this type of kit.

Pick-ups, Estates and Vans

I have considerably more light commercial vehicles than I do of the large ones.  Most of these are from WorldWorks, though 2 in the front row are Stoelzel's and the white box van at the rear is a No Go Zone kit (one of my least favourite models.  It was a little awkward to build and I don't think that the result is very impressive)

Note that this picture clearly shows one of the worst discrepancies in scale between the WorldWorks vans and their pick-ups.  I'm not an expert on cars and trucks in real life, but surely the vans should be rather bigger than the pick-ups?  If anything, it's the other way round for these models.  As before, I could resize the printouts, but it's somewhat annoying to have to do so when the kits are all from the same publisher.

Oddments

These are the remaining vehicles that didn't seem to fit into any other category.  There are 2 "Lamborgharri"s, 2 burnt out compacts, 3 motorcycles, a classic roadster and a hearse.  The latter is from Mega Miniatures; the rest are again from WorldWorks.

Most of these models (apart from the hearse) are significantly more complex than average to build.  You should be able to tell this just by looking at them!

Conclusion

This may look like a lot of models, but remember that each one is very cheap to make.  Once the kit has been purchased, each new car is typically just half a sheet of cardboard and a little printer ink and glue.  They're also relatively quick to build, which is partly why I have so many: card vehicles are very good filler models between other projects or when you only have small amounts of time for the hobby.  I've never sat down to build more than 2 or 3 vehicles at any one time, yet over the years the collection has grown steadily!

So, what do I think is missing from this collection?  Well, I could use more estate cars (station wagons).  The Stoelzel's car set has a number of these in it so I'm certain to build some in due course.  There are no good fire engines on the market, at least ones that I know about.  And I've never come across any kits for construction or agricultural vehicles, apart from a single excavator (?) in one of the WorldWorks kits.  I'd really like a cement mixer; imagine what you could do in a game with that!

Sunday, 10 August 2014

28mm Big Rigs

Introduction

A little while ago, I mentioned that I was building some WorldWorks trucks for my 28mm modern wargames such as All Things Zombie: here.  Note that this was an impulse decision and not based on a need for trucks in any upcoming scenario.  Still, here we are!

So far, I have built 3 semi-trailers and 2 tractors.  That's probably enough for now; much as I enjoy building these vehicles I do need some time for all the other model-making projects which have been on hold for the past 2 weeks or so!

The Container Semi-Trailer

Both the red and the blue tractors have been built straight from the WorldWorks Mayhem Industrial kit and so I won't spend a lot of time describing them - the only modification is the addition of a socket to take the trailer's coupling, as described in my previous article.  Mayhem Industrial gives 3 choices of colour scheme for each of the long-nose and cab-over variants (blue, yellow & green for the long-nose and red, white & black for the cab-over), but sadly there's no black long-nose.  Maybe I'll kitbash one some day, with a little rubber duck mascot on top of the bonnet/hood?

The container semi-trailer is also built straight from the kit and is also one of the 3 possible variants that are supplied.

The Flatbed Semi-Trailer

As well as the container semi-trailer, I thought that a flatbed would be useful.  I can put any kind of loads I like on this: logs, concrete pipe sections or large pieces of machinery.

For the most part, this is also built straight from the WorldWorks kit; it's basically just the container semi-trailer but without the container on top.  There are a few minor modifications to my version, though:

  • I've added a "headboard" at the front, to stop loads from sliding forwards into the tractor.  This was cut from a spare piece of the trailer bed, so it matches the colouring and style perfectly.
  • The card for the upper and lower sides of the trailer bed were separated and then used to sandwich a piece of mounting board.  This makes the model much thicker and rather stronger than it would have been otherwise.
  • As with all of my semi-trailers, I've glued a Hama bead on the underside to act as a pivot.  This fits into the tractor's socket and thus holds the rig together.

The Tanker Semi-Trailer

Articulated tankers are such an important part of many movies and other sources of inspiration that I just had to have one.  However there was no such model in the Mayhem Industrial set.  What was I to do?

So, there are essentially 2 parts to this model: the undercarriage and the tank itself.  The undercarriage is all from the WorldWorks kit, but very heavily modified.  The tank is entirely my own design.

I'm not a graphic designer of any kind, but I'm reasonably good with 3d shapes and how they can be built up from 2d designs (nets).  The tank itself is just an oval prism, though I swept back the front end a bit.  I have added some texture to the model, but sadly it doesn't look very evident in any of these pictures.

Rolling a card tube of this length is very difficult, so I added an old block of balsa along the centreline.  Even with this support, I'm not entirely happy with the way that the tank turned out.  The front was particularly troublesome and I couldn't get the curve even from top to bottom - I don't know why.  Perhaps I should have added more formers along the length of the tank?

Compared with the tube, the top block (with the hatches) was very easy to build.  Note that this tanker is about 4 or 5cm shorter than it would be if the model were true to scale.  That matches the length of the WorldWorks semi-trailers.  I haven't measured them but I suspect that this is a compromise in the name of playability.

As mentioned before, the undercarriage of this model has been adapted from the WorldWorks components.  Here are the main differences:
  • The "underbody" has been narrowed considerably, so that it just peeks out from underneath the tank.
  • I've changed the wheel arrangement from 2 axles with double tyres on each side (i.e. 8 wheels) to a 3 axle, single type arrangement (i.e. 6 wheels).  This involved both widening and lengthening the axle unit, as well as sourcing some single wheels from the tractor unit.
  • A mudguard was taken from the "long-nose" tractor and lengthened (a lot) and narrowed (a little).  I also changed the colour to a neutral grey, before fitting the mudguards around a specially-designed black half-oval.

Conclusion

These are nice models to have and will no doubt find a use in my ATZ games or anything with a similar (modern) setting.  For the most part, they're straightforward to build (but oh, I'm tired of making wheels!).  The tanker semi-trailer took far longer than all the others put together; this was entirely due to the design work needed.  Every time I undertake such a task, I come out of it wondering where all the hours went!

10-10, Good buddy!

Sunday, 27 July 2014

More Card Models

Introduction

After my last post about card vehicles, UrbanWolf and others offered suggestions to address some of the issues that I was having with the models - thanks, guys.  I investigated these ideas and found myself going rather further than I had intended.  The remainder of this post describes all this new activity, at least so far.

Mega Miniatures Hearse

Whilst browsing over the WargamesVault site, I discovered that Mega Miniatures had made some paper models.  Even though Mega Miniatures is now all but defunct, these models are still available to purchase, typically for 50 cents (USD) each.  Many of them are a bit too cartoon-like for my taste, but some are very nice.

This is the hearse from the "Hearse and Mausoleum" set.  As paper vehicles go, it's pretty basic, but it fits together well and is quick and easy to make.

The original kit is really just a hollow shell, so I've filled in the underside with some black mounting board.  As well as stiffening the model, this adds a little substance to an otherwise lightweight model.

I've also built up some wheels using components from other kits; the original just had the outer wheel silhouette and that would have had very little strength on its own.  Mind you, the added wheels alone probably took as much build time as the rest of the model.

The back window has some sort of "ghoul" peering out; I'm not sure that I like this.  I might eventually build this model again, but edit the source to remove the creature!

Note that this hearse has wing mirrors!  I've never seen another paper vehicle kit that had such a feature; it shows the different emphasis that the kit designer has used: wing mirrors, but no underbody or wheels. That's just an observation on my part and shouldn't be taken as a criticism, mind you.

Warm Acre: White Van

Here's a model from another publisher of paper vehicles who is probably better known for their metal miniature range.  This time it's a white van from Warm Acre's catchy-named "Vehicles for Modern 28mm Wargaming" set.  As well as this box van, the set also includes another type of white van and red and blue versions of a small car.

This time, the designer has gone for a complex body shape on the cab, with curves in 3 dimensions (most paper vehicles have slab sides/flat faces, for simplicity).  The truck also has a complex way of positioning the wheels; again I felt it necessary to build these up considerably with components from other kits.  Between the cab and the wheels, this has to be one of the most complex paper/card kits that I have undertaken in a long while, so I wouldn't recommend it for beginners.

You might expect that the more realistic shape of the cab and wheel positioning would lead to a much better end result.  In this case, I think that the publisher has pretty much ignored any attempt at texturing the surfaces, so the vehicle shows no signs of rust, splashes of dirt, reflections or anything like that.  Additionally, the dashed fold marks are very obvious; these could have been disguised better.   In my view this lack of detail drags the Warm Acre models down a long way, especially compared with texturing experts such as WorldWorks Games.

Note that Warm Acre also make a British police car, police van and ambulance, as well as a number of buildings.  These are subjects that are difficult to find elsewhere, so if you want them as paper models then this may be the way to go.

WorldWorks Trucks

For a long time, I've regretted not buying the Mayhem Industrial set from WorldWorks Games whilst it was still in their catalogue.  However, after my last post I was informed that it was still available from paizo.com .  Although it was rather more expensive than the other kits described above, I wanted some big rigs for my games and this was the best way to get them, I thought.

With my newly-purchased download, I set to work.  So far I've completed a single tractor unit: the red "cab over".  Note that most of the shapes in this model are simple cuboids or cylinders; from that point of view its an easy kit to build.  Of course, the truck is composed from quite a lot of different such pieces, so it may be straightforward but it takes longer than some other paper kits!

The truck models from Mayhem Industrial don't have a coupling between the tractor and trailer.  I suppose that the model-maker is expected to either glue them together or to just rest one piece on the other.  That wasn't good enough for me, so I've built a socket into the back of the tractor - the insert I used came from the end of a cheap felt-tip pen that had recently expired.  When I finish a trailer unit, I'll add a spigot in the right location on the underside (probably made from a Hama bead, as we have thousands of those around the house and my kids aren't likely to miss a few).  The trailer will then just plug loosely into the tractor and allow the 2 parts to be positioned at any angle whilst not falling apart easily.

As you can see, I haven't got as far with my first trailer.  Most of the sub-assemblies have been completed, but there is still a little way to go before this container body is finished.

I plan to make at least one more tractor (probably a "long nose") and several trailers.  In particular, I'd like a flatbed trailer and a tanker, though the latter will require some kitbashing as this WorldWorks kit doesn't include such an option.

Light Bar for "Echo 1"

One of the things that I mentioned in my last post was a desire to add a light bar to Stoelzel's Structures "Echo 1", to see if the vehicle might resemble more closely that used by the Ghostbusters in the film of that name.  I've taken the police car light bar from Mayhem Police and used GIMP to change it from red-white-blue to blue-white-blue.  Note that for now, the light bar is just placed roughly in the right position - it's not glued on yet.  This is really because I want to know what my readers think: does it improve the vehicle?  The original "Ecto 1" had a whole lot of other clutter on the roof as well, but I don't feel up to emulating that.  What do you think?