Showing posts with label 6mm. Show all posts

Sunday, 14 November 2021

6mm: Irregular vs Heroics & Ros

Introduction

I have a fair-sized collection of 6mm Napoleonic figures.  However, there are never quite enough to form the truly grand armies I'd like for a large game.  In particular, I don't have too many French.

Virtually all of my 6mm forces are made up of models from Heroics & Ros.  However, I don't believe that H&R Napoleonics are currently available, though hopefully they will be re-issued sometime soon.

So if I wish to extend my army, what are the options?  There are other "6mm" manufacturers such as Bacchus and Adler, but I've always understood that these were rather larger (perhaps more like 8mm tall?) and stylistically rather different.  Please note that this last opinion is based on hearsay and rumour rather than personal experience; if it is in any way incorrect then I apologise profusely!

The other maker of "true" 6mm figures of which I am aware is Irregular Miniatures.  They've been around forever and have a reputation for cheap, but possibly less well-detailed models.  But at least their 6mm Napoleonics are still in production!

I thought it worth buying a battalion of infantry from Irregular to find out whether or not they are compatible with my H&R.  Here we go...

Irregular Miniatures

My standard Napoleonic line infantry "battalions" are 4 bases, each with 3 ranks of 10 figures.  Models from Irregular Miniatures are available in a number of different form factors - including blocks of 3 ranks of infantry.  However, I went for the standard 6-man strips for my unit.

This battalion is therefore composed of 19 x French Line infantry strips, plus 1 x French Line infantry command.  Because I only wanted 10 figures per rank on each base, I needed to cut apart some of the 6-figure strips into 2-man and 4-man parts.  This wasn't too hard, though it was a minor nuisance.


From the rear, it is clear that these French are not wearing backpacks.  That's slightly odd, but probably not too important.

Painting the Irregular figures was a little more difficult than I remember being the case for H&R.  Maybe I'm just older, more tired or have less good eyesight than before? Or maybe these models haven't got the fairly-obvious detail of the H&R ones.  Still, I think they turned out all right.

Heroics & Ros

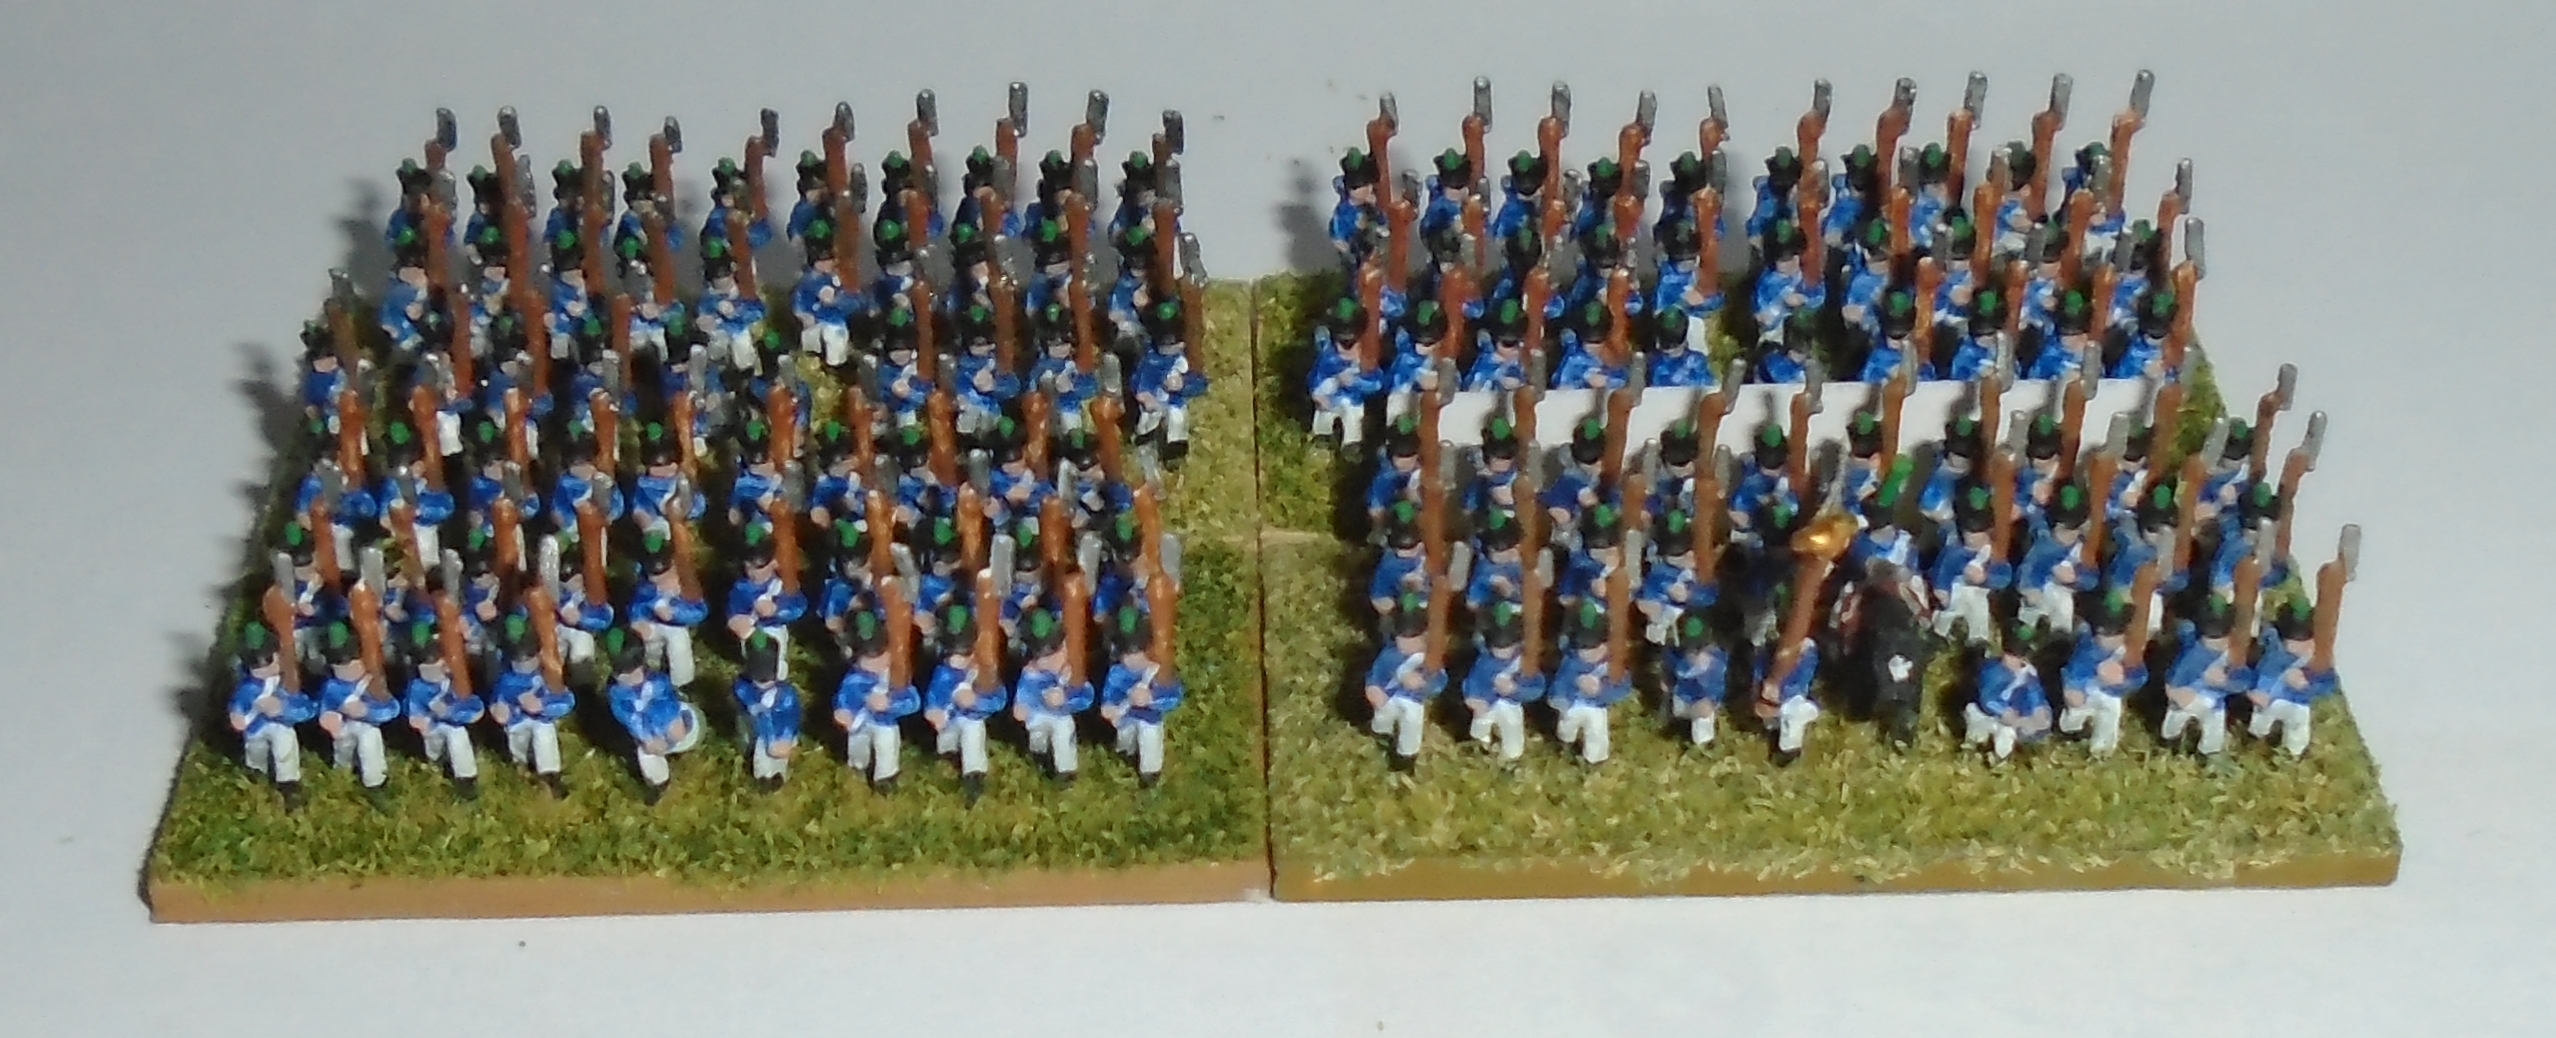
As this is a comparison article, here are some of my existing Heroics & Ros figures.  The only real differences I can spot are that the H&R have shouldered their muskets on the left, whereas the Irregular are using their right shoulders for this and that the Irregular command figures have a moulded, semi-furled standard; the H&R just have a small square of flat metal.  Also, as mentioned above, the H&R are wearing backpacks; the Irregular are not.


From the back, you can also see that I've changed the style of the unit's nameplate for my newest models.  The 93rd Line have my older, all-white nameplates, without any specific battalion identifier.


Conclusion

OK, can you guess which unit is Irregular and which is H&R in this picture?  At first glance, without peering too closely at the image?

If you thought that the Irregular were on the right and the H&R on the left then you were correct.  But my view is that there isn't a lot of difference between them and I'll be very happy to mix units from these two manufacturers together in the same army.  In the end it comes down to which models are easier to obtain.

Of course, I've only tested infantry here.  The cavalry models might well vary rather more between the two producers.


Wednesday, 30 May 2018

Black Powder: the Bridge at Ebelsberg

Introduction

It's been a very long time since I've played Black Powder.  It might even be as much as 2.5 years ago - that's when I last reported on such a battle: Grochow, 1809.  But despite all this, we haven't forgotten about the game and how much we enjoyed it.  Indeed, last Christmas I got the "Clash of Eagles" supplement.  Although this officially covers the 1812 invasion of Russia, it does have a wealth of stuff that is suitable for my 1809-ish Austrians, French, Confederation of the Rhine &c.

The Scenario


So, armed with this new inspiration it was time for a game.  We pitted my relatively small French & Allies force against Steve's much larger Russian army.  We couldn't really put these numbers head-to-head; the Russians would have a considerable advantage in numbers.  Instead, I took a scenario from the "Blunders on the Danube" Piquet supplement and adapted it.


The Battle of Ebelsberg


In the original battle of Ebelsberg in 1809, a large French army tried to catch a smaller Austrian group as it retreated towards the single bridge over the large & impassable river Traun and into the town of Ebelsberg.  There's a catch, though: the Austrians were waiting for one last, straggling brigade before they could retire.

Historically, most of the Austrians were extracted with a mixture of skill and luck, but the French managed to seize the bridge before the Austrians could demolish it.  This led to some vicious fighting within the town on the next day.  We'll be gaming the approach on the first day.

Our Version

Firstly, the forces are all shifted around to suit the armies available to us.  The Russians would be attacking (instead of the French) and the French would be defending (instead of the Austrians).

French Forces (General LeBeaux):

  • 1 relatively strong French brigade is deployed across the road to Ebelsberg, in the middle of the table (Brigadier Gerard).
  • A weak brigade of mixed units from France and Hesse-Darmstadt holds the village of Klein Munchen (Brigadier Meier).
  • A weak Bavarian brigade enters from the south, starting on turn 1 (Brigadier Shultz).

Russian Forces:

  • 2 small brigades of cavalry are already on the end of the table.
  • An entire division of infantry (plus their artillery, of course) is approaching from the west.  Their light brigade is already on table; the two line brigades will enter from the left, starting respectively on turn 1 and turn 2.
So, the Russians outnumber the allies by somewhere between 3:2 and 2:1 (I didn't bother to count).  As per the Clash of Eagles supplement, they have a weak command structure and aren't good at musketry, but are stoic against casualties and well motivated to get stuck in to melee.

We decided that we'd randomise command values for officers.  Each of the commanders-in-chief would have a base rating of 9 and would add the roll of a fudge die (i.e. '+', ' ' or '-'), whilst each of the brigadiers would have a command rating of 8 plus a fudge die.  The result:
  • The Russian C-in-C was a brilliant general with a rating of 10.
  • The 2 Russian cavalry brigadiers were (from memory) a respectable 8 and 9.
  • Every other commander rolled a '-', thus leading to a command value of 8 for the French C-in-C and a 7 for all the French brigadiers and all the Russian infantry leaders. It looks as if this is the dregs of the French army; either that or they are under-supplied, tired, hungry and dispirited.  Ooh, err...

Our Game


On turn 1, the wayward Bavarians started to arrive.  Their somewhat plodding general assumed that they were too far from the enemy to need to deploy for action, but he was wrong.  A dashing Russian cavalry leader led a wild charge which saw one infantry column caught in the flank whilst still in column-of-march [for anyone who doesn't know about horse & musket warfare, this is an extraordinarily bad thing for the defenders.  Indeed, for the cavalry involved in such an attack it's possibly the highlight of their entire careers].


Amazingly, the Bavarian 13th Line infantry didn't disintegrate immediately.  They took enormous casualties and were driven back a long way, but they passed break test after break test and just hung on.

As more elements of the Bavarian column arrived, their own cavalry charged the approaching Russian cossacks.  For a few moments, it looked as if the situation might be stabilised...


...but the Russian cavalry, having pursued the 13th Line almost to Klein Munchen, finally dispersed them.


At the same time, the Bavarian cavalry, having seen off the cossacks with some enthusiasm, encountered a fresh unit of Russian dragoons.  The clash between these squadrons was brutal: the lighter Bavarian Cheveaux Leger were swept away - but the dragoons were hit hard as well.  Indeed, that loss caused the demoralisation of the Russian heavy cavalry brigade; they played no further part in the game.

The damage had been done, however.  The Bavarian brigade was also demoralised; it retreated off the table (and presumably found somewhere a bit quieter to huddle until they could surrender and be taken prisoner).

[In reviewing this now, I realise that the Bavarian brigade should not have broken at this point, though they were indeed perilously close.  I had miscounted the number of units in the formation; they had lost 50%, excluding artillery, but not over 50%, as we require for a brigade to become demoralised.  Oh, well - it probably wouldn't have made much difference in the long run anyway...]


Elsewhere, large columns of Russian infantry plodded forwards, although their commanders didn't seem to be in any great hurry.  The more advanced units started to engage the nearest French, though 
true to form their shooting didn't achieve much other than to make a noise and a lot of smoke.

Since there were no survivors from the Bavarian contingent and therefore no need for them to stay where they were, many of the French units started to move back towards the bridge.  There was still a long way to go, mind.


The Russian advance was most active on the far right of the table.  Their leading infantry came off rather worse in an exchange of volleys with the French 4th Line, but there were plenty more attackers nearby to fill the gap.

A single unit of French heavy cavalry tried to fend off a Russian hussar brigade.  Both sides were wary, but in the initial clash both the French and one of the Russian squadrons were devastated.


With the French cavalry out of the running, the other Hussar squadron fell upon the flank of the exposed French infantry and sent them routing in all directions.

About this time, the Russian C-in-C all but gave up trying to get his subordinates to move their forces.  Instead, he took over command of all the units that were near his position and formed them into an ad hoc task force, which then proceeded to steamroller forwards.


The French continued their retiral, hoping to put some distance between themselves and their pursuers so that they would have time to negotiate the bottleneck of the bridge.  However, at least some of the Russian units kept up with them and stayed within musket range.


For a brief moment, it looked as if the bulk of the French infantry had indeed outdistanced the enemy.  The leading Russian battalions were pinned in square by the threat of a lone unit of French light cavalry, whilst the intermittently-rallied Carabiniers again slowed the Russian cavalry brigade, though at some cost to themselves.


The Russian commander was wary of the garrisoned village of Klein Munchen; past experience suggested that this type of position would be tough to crack with just infantry.  However, the Hesse-Darmstadt artillery was in the field outside the village.  A battalion of Jaegers assaulted the small battery and overran it; despite being lashed with canister and shot they simply ignored the casualties and came on regardless [by rolling a double '6' to save hits and thus managing to avoid the need for a break test]!


So, did the French escape?  For (I think) 3 turns in a row, Brigadier Gerard failed to give a coherent order to any of his units!  The French C-in-C ("LeBeaux") was too busy trying to shore up the right flank to intervene, so nothing moved.  Maybe a wagon was stuck on the bridge?  Or perhaps there were arguments over which unit should go first, or engineers were busily trying to prepare the bridge for demolition?  Whatever the reason, the delay was costly.

Russian infantry poured around the village, keeping carefully out of musket range, whilst (some of) their artillery pounded the buildings and their occupying Hessians.  The only good news for the French at this point was that a blunder sent a second Russian battery retreating at full speed back to where they had just come from.


Finally, a few French units formed into column of march and hightailed it along the road and across the bridge, whilst the French cavalry tried to slow down the Russian advance.  But there were simply too many attackers and the retreat had been delayed for too long; most of the remaining French units were caught in a pocket; we called the game rather than play it out to the inevitable end.

Conclusion


4 French units made it to the bridge (in column of march) and escaped; this was definitely not as many as I'd hoped.  It's just as well that Brigadier Gerard was captured, else I'd have had him court-martialed and shot!  I also note that not a single Russian unit was routed, though a number of them were shaken and only just survived break tests.

It sounds like a very one-sided massacre, doesn't it?  The early (and incorrect!) loss of the Bavarian brigade didn't help, yet the game felt remarkably even.  Right up to the very end it was possible that another 4 or 5 French units might have escaped, possibly even more.  Both sides had their chances and their frustrations, so it was engaging all the way through.

The bottom line: both players enjoyed this battle immensely, it was refreshingly different from the traditional "encounter" game and the way events unfolded with surges and pauses in the action felt like a real Napoleonic battle (as we understand it).  I don't think we could ask for more, really 😄.

Monday, 25 September 2017

6mm Napoleonics: Bavarians

Introduction

I'm on something of a 6mm roll at the moment, so it seems fitting to document some of my French allies.  This time it's the turn of the Bavarians.

During the Napoleonic Wars there was no Germany as we know it now.  Instead the land was split up into many different states, some larger and some smaller.  The best-known of these are probably the relatively large kingdoms of Prussia, Saxony, Westphalia and Bavaria.  Prussia was usually an enemy to the French, but many of the other states were organised by Napoleon into a grouping of client states called the Confederation of the Rhine, thus supplying his armies with a good source of fresh manpower  Indeed, I've heard it said of Napoleon's 1812 invasion of Russia that he planned to fight "to the last drop of German blood"!


The Bavarians

Artillery.  Either 1 large battery or 3 smaller ones...


A small unit of light infantry in line formation, with skirmishers deployed to the front

2 units of line infantry.  Bavarian line infantry are known for their pale blue uniforms and tall helmets.  One of these units has black facings, the other has red facings.

Chevaux Légère: light cavalry.  Note the French name for the troop type, even though these are ethnic Germans.

Conclusion

All the Bavarians.
As with my other 6mm Napoleonics, the figures in this force are entirely Heroics & Ros 6mm models.  I've got enough for a good division under the Black Powder rules, though the mixture of line infantry and cavalry in the same formation would be a little unusual, I think.

The Bavarians (and many other Confederation of the Rhine nationalities) fought with the French against the Austrians at Wagram in 1809.  With them and my French force (here), I can easily field enough for a decent afternoon's game - though I'm maybe a little short of being able to portray the entire battle!

Sunday, 17 September 2017

Showcase: 6mm Napoleonic French

Introduction

Recently, there was someone asking on The Miniatures Page for pictures of painted Heroics & Ros 6mm Napoleonic figures.  There was very little response to the question and it occurred to me that there are indeed very few such images around.  It's a pity, as 6mm models work very well for the type of massed battles which occurred throughout the "Horse and Musket"/"Black Powder" period.

With that in mind, I thought it would be worth while documenting my relatively small 1809-ish French force.  Here goes...


The Infantry

"Vive L'Empereur!"  3 Line regiments, each in attack column formation and with skirmishers deployed forwards
 My forces are based for use with the Black Powder rules.  A standard infantry or cavalry unit has 4 bases; each base has a 40mm frontage, but the depth varies for different troop types.  Infantry depth is 20mm, cavalry is 30mm and artillery is 40mm.

Closeup of a Line regiment
Line infantry have 30 figures per base, in 3 ranks of 10, whereas light infantry (Légère) are in 2 ranks of 10.

The Heroics & Ros packs come with a goodly proportion of command figures.  I'm not particularly expert on the Napoleonic period, so I allow 1 flag per regiment.  However, many of the other, non-flag bases have an extra officer and/or drummer in the front rank.  Some bases have the colonel (on horseback) alongside the standard; to fit the horse I need to remove 1 figure from the 2nd rank.

A Légère unit in line formation, also with a skirmish screen deployed.
 I use extra bases with rounded ends to denote skirmishers, rather than trying to use bases from the main body of the regiment.  These skirmish markers have a small number of figures dispersed over a relatively large area.  Typically the skirmisher models are positioned in pairs rather than being completely random, as I have a vague memory of being told that at least one Napoleonic army's doctrine was for each skirmisher to operate with a buddy so that one man could fire whilst his mate reloaded.


The Cavalry

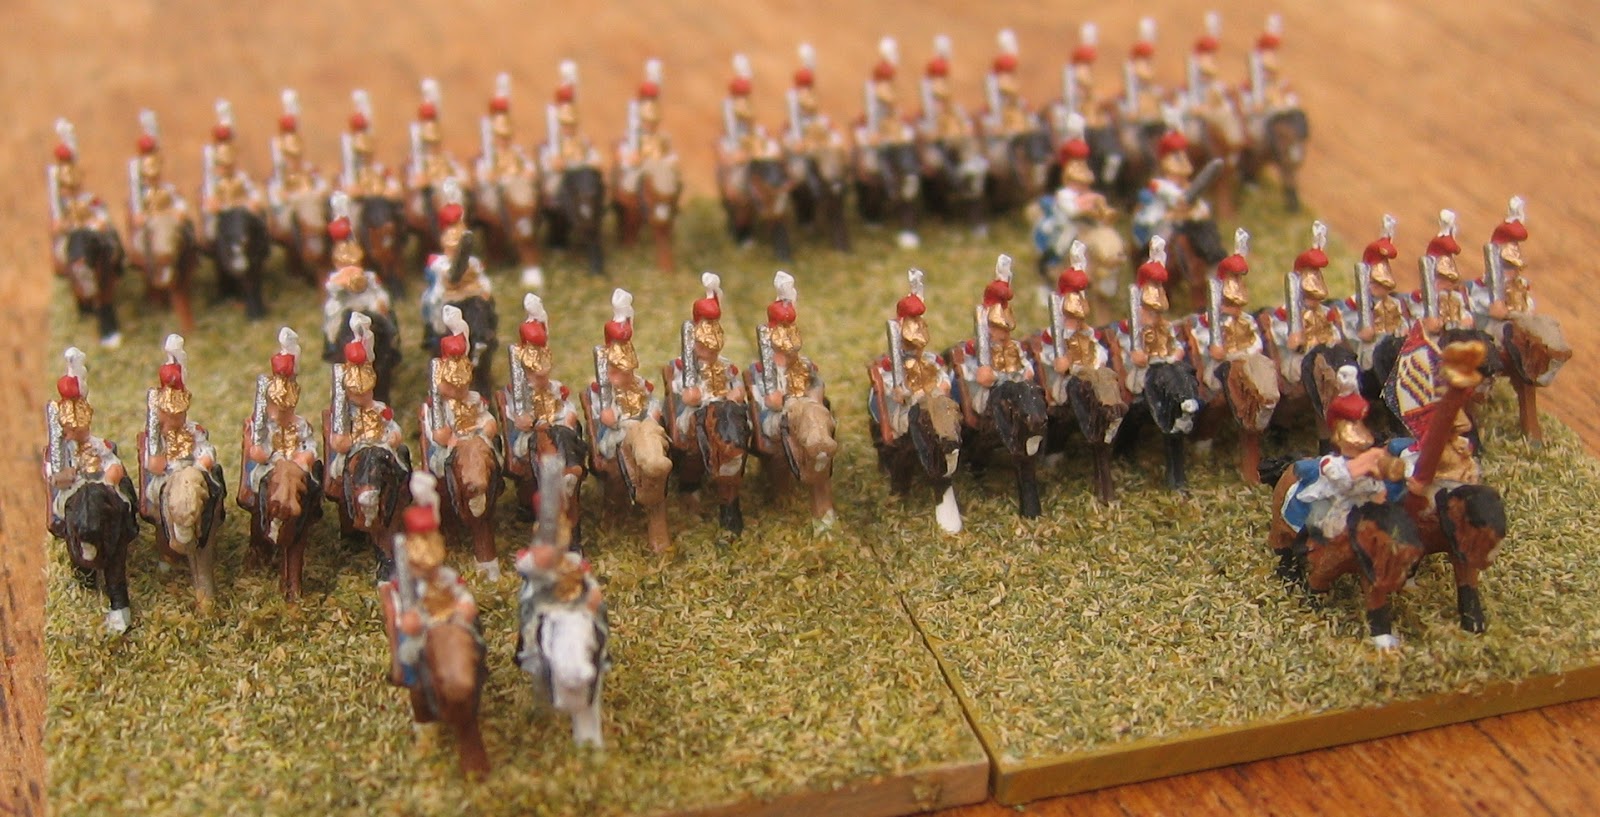
French Carabiniers: heavy cavalry knee-to-knee in a single line on each base, but with a few officers & standards out front.
Unlike the infantry, my French cavalry is composed of the less common types.  Rather than the ubiquitous Cuirassiers and Chevaux-léger, I have a single regiment each of Carabiniers and Hussars.  Oh, well - it gives me expansion possibilities, doesn't it?

French Hussars: light cavalry in a slightly more dispersed line, but still with officers, buglers and standards in advance.


The Artillery


I mount my guns 2 to a base; this gives plenty of room for the various crew and officers to be positioned.  For Black Powder, we would normally use a single base to represent a battery, though I suppose there is no reason why we couldn't be more generous and use 2 or even 3 bases.


Commanders


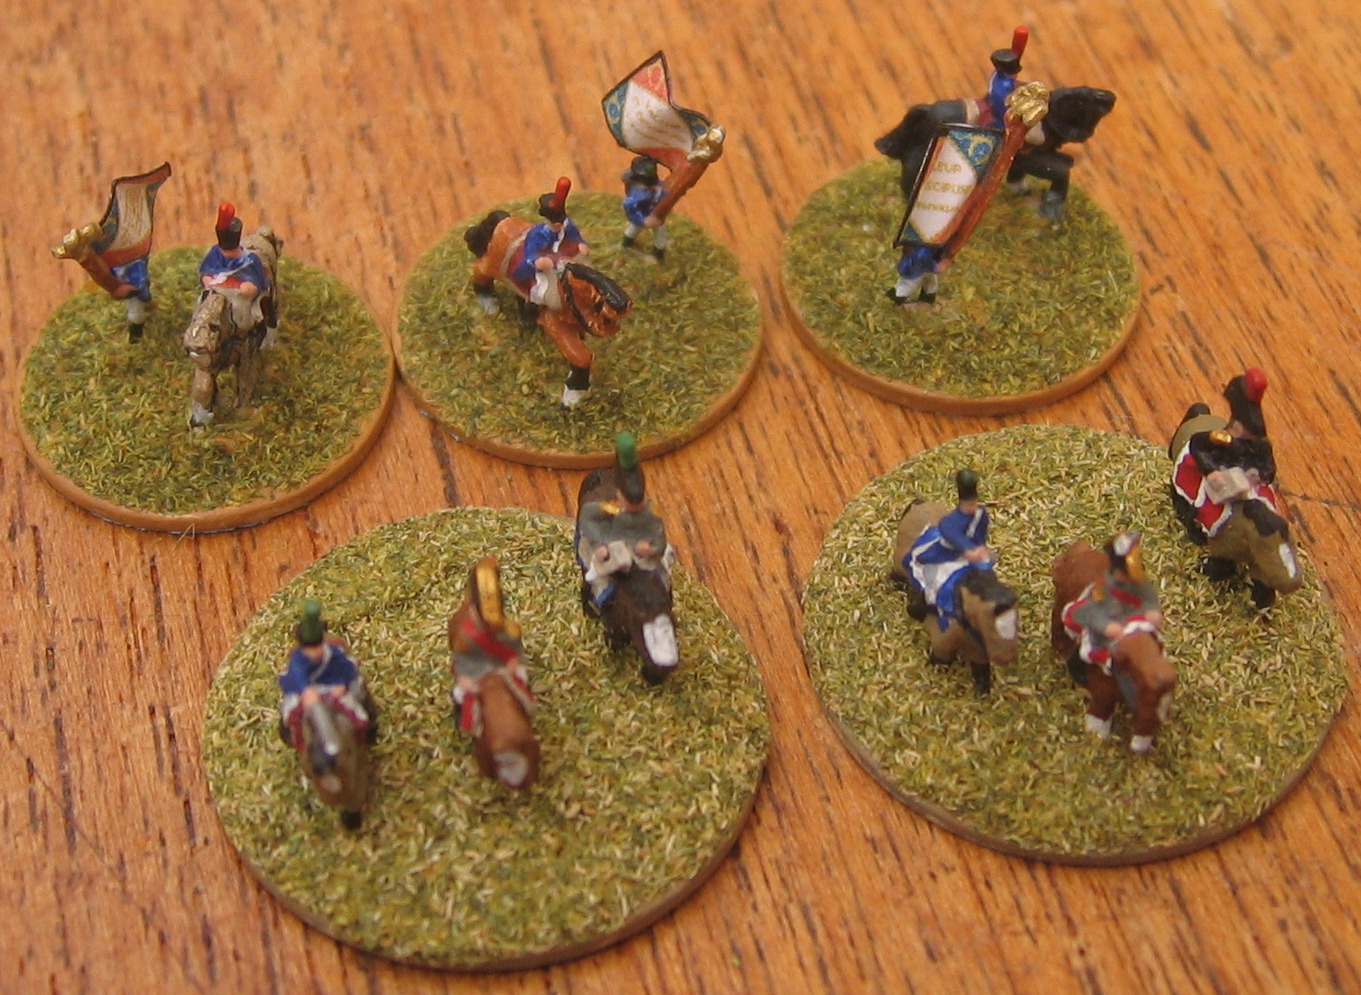
Many games require commanders to be based separately; Black Powder certainly does.  With 6mm there is plenty of room for several figures, even on a 20mm base.  I typically use 2 models for a 20mm diameter brigade command stand and 3 models on a 25mm base for the division commander.

As well as the general himself and any aides, I often include a standard bearer.  This may not be entirely historical, but it serves 2 useful purposes:

  1. It allows the identification of nationality more easily in the heat of battle.  After all, one 6mm guy riding a horse and wearing a bicorne hat looks much the same as another - and I wouldn't wish to confuse my generals with the enemy's, would I?
  2. It makes use of some of the excess standard bearer models from the H&R infantry packs!


Conclusion

I've got a fair number of other bases for my French army, from the days when I had it set up for DBN.  That game used far fewer models than Black Powder and so these miscellaneous bases aren't enough of any one type to form a regiment.  Still, they would provide a useful foundation when expanding this force.  One day, one day...


Lots of 6mm H&R Napoleonic French!

Thursday, 8 October 2015

Black Powder: Grochow, 1809

Introduction

The battle of Grochow was fought on April 25th, 1809 between the Polish and Austrian armies (at least, according to my "Blunders on the Danube" scenario book).  An Austrian division under Von Mohr had been ferried across the river Vistula to threaten a Polish garrison, but Prince Poniatowski led 3 columns of Poles to contest this bridgehead.

Since I failed to find any corroborating data about this battle in any online source, the scenario book is the only detailed reference I have for the battle.  Indeed, one Wikipedia article mentions the correct date and place for the battle, but claims that it was fought between a different Polish leader and a Russian force!  Were the Russians invading Poland in 1809?  I'm sorry to say that my education has failed to provide much detail on wars in eastern Europe...

Either way, the scenario can be gamed as written even if there is some doubt (in my mind) about its authenticity.  So, what have we got?

The Scenario


In the game, 1 large and 2 smaller columns will attack Grochow.  We didn't have any Polish figures, so we substituted Steve's Russians instead.  This shouldn't make any material difference, as the number and classes of the units were given in "Blunders on the Danube" and we kept to those forces.  The attackers have 6 turns to take the town of Grochow; if they can do this then they win the game.

It'll be a difficult task, though.  The town is heavily garrisoned by Austrian infantry and can only be reached by passing through gaps in impenetrable forest.  There's also a small Austrian detachment in the village of Radzymin; will they be able to threaten the Russians' flanks or rear as the attackers pass by?


We decided to use my "Black Powder Personality Cards" once again.  The cards for the fairly poor quality Austrian commanders gave 2 of them a high level of decisiveness, though with their otherwise under-average abilities, this might be better termed "arrogance".


On the other hand, we had some personal difficulties in reconciling the highly skilled Russian leadership with the portraits on the cards!  It did cause a few hesitant laughs, for sure.

So, the numbers of units are about equal, but the Russians are mostly light cavalry with only a few infantry units.  The Austrians are the other way around: mostly infantry with only 2 units of cavalry.  The Russian leadership is much better, but even so, how is a mostly cavalry force going to assault a town?  It's going to be tough...

The Game


Near the town of Grochow, the Russians advanced rapidly and, with their skilled commanders, deployed easily into an attack formation.  Their plan was (I believe) to knock out the supporting Austrian infantry from both flanks of the town before turning inwards and assaulting the built-up area from 3 sides at once.  In past games of Black Powder, we've found that units in buildings are exceptionally hard to dislodge, so this plan was probably their best hope.  Still, it looked like a pretty tall order...


Straight away, one of the Russian attack columns came under heavy fire and was halted, disordered.  Even at this early stage, the assault looked unlikely to achieve its objectives.


In the sideshow near Radzymin village, a lone Austrian Hussar regiment saw off successive, but uncoordinated, charges from 2 Russian light cavalry units.  Indeed, in the first fight, every hit was saved and so neither regiment took any damage (I guess they just rode past each other, shouting insults).


This couldn't go on forever, though.  In the end, the irritated Russians brought up 2 fresh regiments of light dragoons and obliterated the tiring Austrian hussars.  Still, they'd tied up 4 times their own numbers for several turns...


Still trying to prove their worth, the Russian light cavalry regiment who had failed to damage their Austrian counterparts before now saw an opportunity to charge an enemy battery in the flank.  The artillery should have been toast, but once again neither side inflicted any casualties.  We had to look up the rulebook for this one, as it was a situation that none of the players ever imagined would happen.  Our reading was that the cavalry retired and the artillery held their position; no doubt the gunners jeered mercilessly at the backs of the retreating cavalrymen!

Sadly, but not unexpectedly, in the next turn this battery was caught in the other flank by the Russian light dragoons and annihilated.


Back at Grochow, the fighting was furious now.  On the defender's left flank, the attack had stalled, but a Russian column managed to charge the militia on the right.  Astonishingly, the raw Austrian troops wiped out their attackers.

In this they may have been helped by a blunder by the Austrian subordinate Oberst Anon.  He had tried to rally the damaged front line of militia, but instead caused them to fall back.  Miraculously, CinC Von Mohr roused himself from his normal inefficiency to order the fresh, reserve unit into position just before the Russians made contact.


With time running out, the increasingly desperate Russian commanders threw in their other flank attack.  This infantry unit was savaged by musketry as it charged, then fought to destruction by the large unit of Austrian regulars who were facing it.

The next volley from the Austrians also routed the one and only Russian artillery battery.  With no cannons and with only 2 infantry units left, the Russians decided that their chance of taking Grochow was negligible and so they conceded the game.

Conclusion

This is the first time that we've played a historical scenario, even if there is some doubt about who actually fought in the real life battle.  OK, we substituted one of the sides and used Russians instead of Poles, but that wouldn't have made any substantial difference.

As written, I cannot see how the Poles/Russians can possibly take Grochow in this game.  Sure, they have large numbers of light cavalry, but those aren't much use in an urban assault.  The attackers also have very good leadership and the defenders are poor in that respect, but all the Austrians have to do is stand there and get in the way  Their sub-standard generals don't really interfere with that!  

"Blunders on the Danube" is a scenario book written for "Field of Battle", but unless those rules operate very differently from Black Powder then it's hard to see what the attackers could do differently.  I commend Steve and A. for trying (and at least they did manage to savage the Austrian detachment at Radzymin), but really I don't think they were going to win this one!

Tuesday, 26 August 2014

Black Powder: The Three Villages!

Introduction

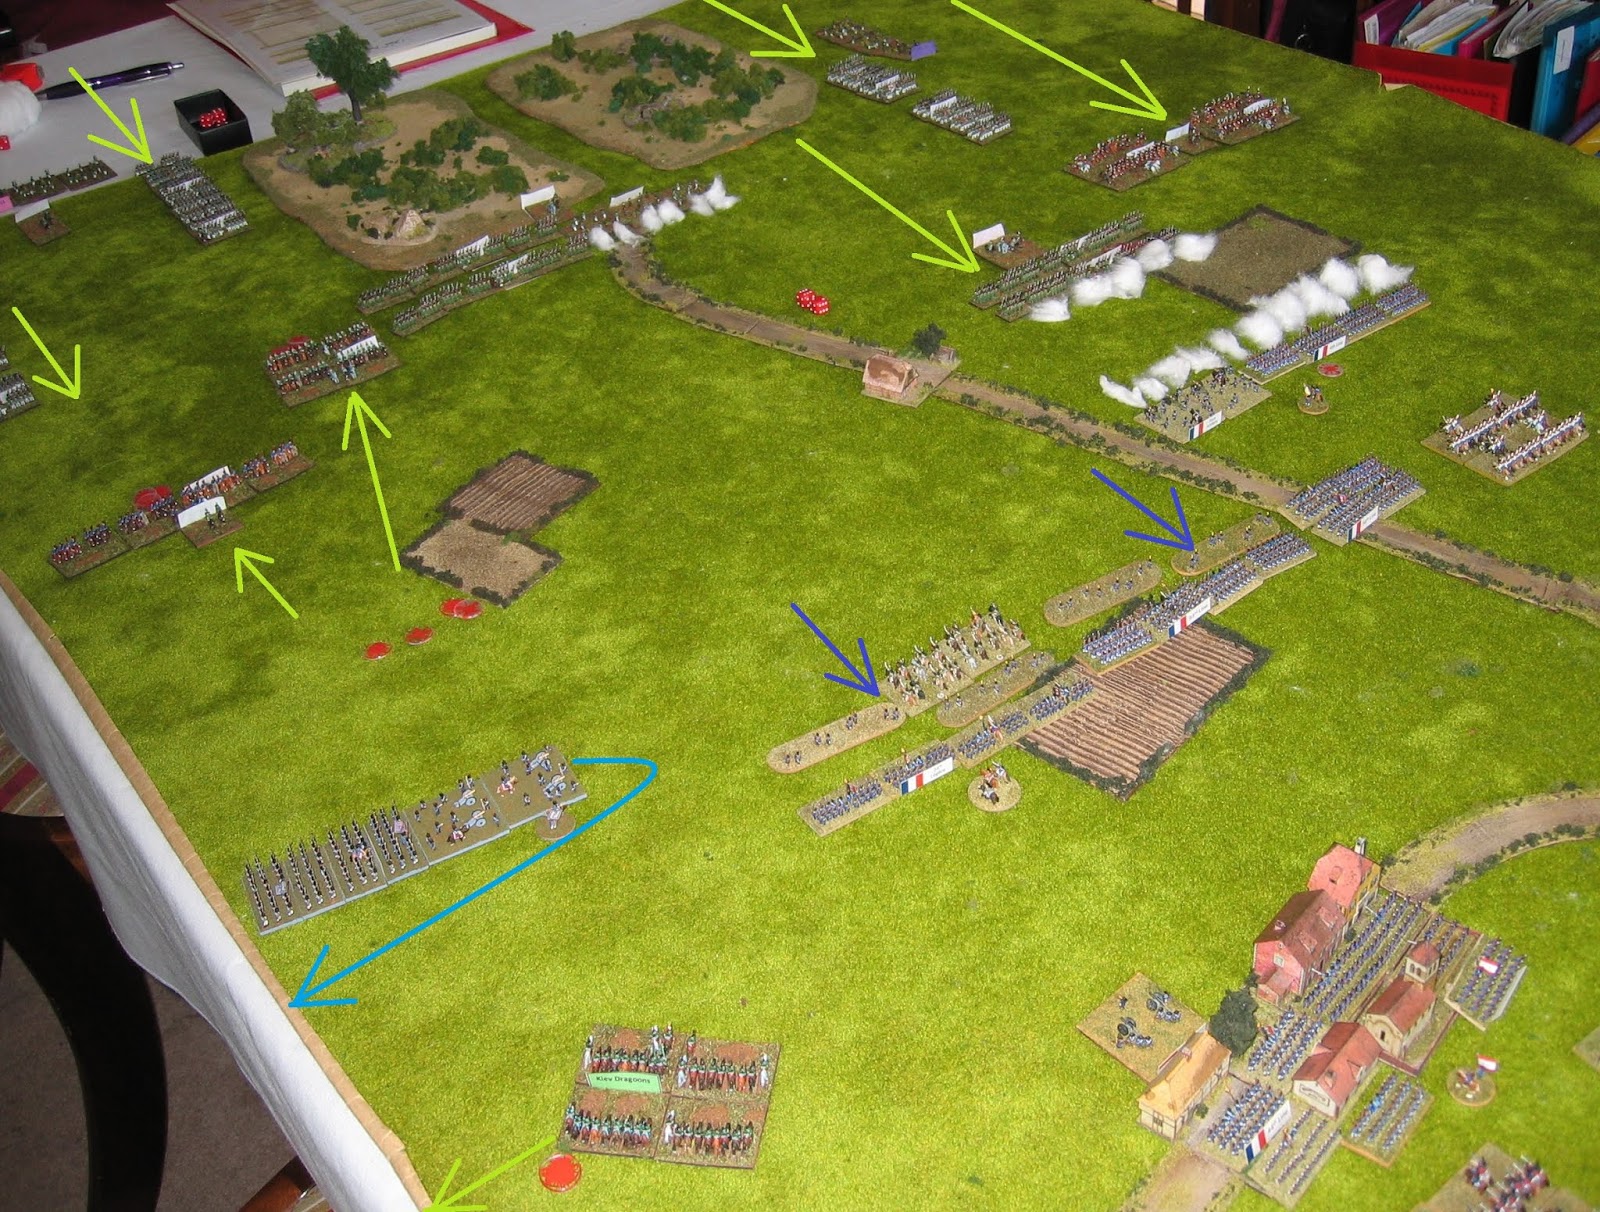
The battlefield after 1 move.  Mouse-over the image to see who is who...
So, last weekend Steve came round for a day's gaming.  This is something we're fortunate enough to be able to do every few months and since it's quite a long journey for poor Steve, we try at least to make it an activity-packed visit.  This time we managed to fit in 2 games.

As is customary, we started with a big game of Black Powder using our 6mm Napoleonic forces.  We also managed a game of Song of Blades and Heroes, using my Robin Hood-themed warbands.  More on that another time.

On with the show: here's a description of the Black Powder game...

The Scenario

In 1809, a large Russian force is approaching a plain which contains the 3 fictional, central European villages of Großrinderheim, Württemfeld and Tauberbischofsberg.  Help (?) is on its way to repel the invaders, in the shape of a mixed force of French and Confederation of the Rhine troops.  The Confederation troops are outnumbered but have a more flexible command structure.  Would that be enough to make a difference?  Oh, the allies also have a lot more artillery than the Russians...

Victory would be determined very simply: each of the 3 villages is an objective.  Whoever holds more villages at the end of the game would be declared the winner.  The game would end either when 1 side were all dead or ran away, or when we ran out of time or energy to continue!

In the past, we have found troops in buildings to be nearly invulnerable under the Black Powder rules.  Since we didn't want this game to stagnate, it had to be at least plausible to assault an occupied village.  To achieve this, we reduced the morale save modifier for troops in houses from +2 to +1 and the combat result bonus from 3 to 2.  Maybe these buildings are wooden rather than stone?  Or maybe our troops haven't read the manuals on the best way to defend such a position?  Who knows?

The Forces

Most of the troops we used in this battle were fairly standard, with few special rules employed.  However, we wanted to test out the optional rules for Personal Characteristics of Commanders.  We could just have rolled dice for the results and written them down on paper, but I like things to be a bit easier than that.  I've made a deck of cards with a reasonable distribution of these characteristics on them, so all we needed to do was draw one card for each general and brigadier.

Russians

The Russian force was made up of 3 identical brigades, each consisting of 4 infantry units, 1 battery of artillery and a unit of (unreliable) Cossacks.
When we assigned characteristics to the Russian commanders, we discovered that the corps commander, Generallieutenant Raevskii, was average but that his subordinates were anything but!  Generalmajor Rylieff was timid and hesitant (!), Generalmajor Pantzerbeiter was decisive (probably an emigre with something to prove, I think...) and Generalmajor Palitsyn was also timid.  OK, this could be interesting...
Totals: 12 infantry, 3 cavalry, 3 artillery units.

Confederation

The Confederation had 5 small brigades (1 Bavarian, 2 French, 1 Hesse-Darmstadt and 1 mixed light cavalry).  Each of these typically had 2 units of infantry or cavalry and 1 battery of artillery.
The commander (French general Saint Cyr) was decisive, but all 5 of his brigadiers (Cossons and Dalesme for the French infantry, the Hessian Schiner, Bavarian von Minucci and cavalry commander des Essarts) were all completely bland.  A bit disappointing, perhaps, but I suppose it simplified things.
Totals: 9 infantry (7 normal, 2 small), 2 cavalry, 5 artillery units.

The Game

The Russians moved first and immediately force-marched regiments of infantry into all 3 of the villages.  Some of their support forces were a bit slower off the mark, but they were well entrenched in the objectives before the Confederation forces got close.  As the armies approached each other there was an outbreak of firing all along the line, though most was relatively ineffective due to the use of skirmish screens.

The exceptions to this were in the centre, where the French General Cossons steadfastly kept his infantry in attack columns (without a screen!) and the otherwise professional Dalesme advanced the "Lucky 56th" Ligne into a storm of cannon and musket fire without any support.

The Musketry Exchanges

For most of the game, fire was given and taken all along the front line, with the Russian line anchored in the 3 villages and the Confederation just beyond them.  Rather than bore you with a turn by turn account, here are the highlights:
  • French Hussars tried to outflank in the north, but were met by Cossacks.  In an inconclusive skirmish, both sides withdrew behind their infantry supports.
  • In the south, a probe by Bavarian cavalry and light infantry was met by a Russian square.  Without any nearby artillery, the Bavarians were unable to advance any further and a stand-off developed.
  • First blood went to the concentrated French and Hessian artillery on the northern ridge.  One unlucky Russian regiment was decimated and then fled in rout.  There were still plenty more like them, though...
  • At the near end of the line, the Russians found themselves unable to make use of their superior numbers.  A combination of hesitant command and the occasional blunder led to a bunching of units with no room to deploy.
  • Meanwhile, the Russian front line took a pounding, especially from the Confederation artillery that was mostly placed along the ridges in their rear.  In particular, the Russian centre fell into disarray and had trouble reacting.

The Assault

Seeing the Russian centre apparently in disorder, General Cossons ordered his columns to attack.  With banners waving and shouts of "Vive L'Empereur!", the 24th Légère and 44th Ligne regiments marched in double time towards their enemies.  At the last moment, the columns broke into a run and crashed into the confused Russians.  At the same time, General Dalesme's 4th Ligne made a diversionary attack on the village of Württemfeld, fully expecting to withdraw after distracting the defenders from the fight to their flanks.

Disoriented the Russians may have been, but they were going nowhere!  2 of the attacks stalled and halted in stalemates, whilst the 44th Ligne was repulsed in disorder.  Oh, crumbs!

Near Tauberbischofsberg in the north, a single Russian regiment attempted to close with some of the artillery that had been galling them all through the game.  This was a small but bad mistake; the nearby French cavalry made several fake charges to force the attacking infantry into a square.  As soon as this happened, the Hessian artillery and skirmishers set about the poor Russians with a vengeance.
All the square could do was hold on and pray for deliverance; if they moved then the hussars would have been on them in a flash and if they didn't then they would be pummelled with cannister from the cannons.  A unit of Cossacks attempted to charge the guns to relieve their infantry, but these light cavalry refused to charge home and withdrew after taking a few losses.

The Turning Point

In a completely unexpected turn of events, the next round of the 4th Ligne's diversionary attack on the central village succeeded in eliminating the defenders with no real loss to the attacking regiment.  The French soldiers quickly occupied the objective and then poured a thunderous enfilading volley on the unsuspecting Russian regiment at the far side.

Seeing this, the nearby "Lucky 56th" Ligne charged at the wavering Russian unit.  In a tremendous crash, both regiments just disintegrated, leaving whoever was left alive streaming from the field.

Suddenly, it was all over.  The Russians had lost 3 regiments completely, but enough of their other units were shaken for 2 of the 3 brigades to now count as broken.  Since most of the brigades in the army were broken, the entire army was broken.  This came as a complete shock to both players, I think!

Rather than play out the rest of the game, we decided to allow the defeated Russian army to retire in (relatively) good order.  No doubt the small numbers of Confederation cavalry and the ever present Cossacks would have prevented a close pursuit and a total rout.

Conclusion

Well, that was unexpected!  Most of the Confederation units had taken some hits, but were still in good shape.  The Russian infantry never really got going; their superior numbers (especially in the south!) couldn't be brought to bear because of a mixture of hesitant leadership from General Rylieff and frequent disorder in the front lines.

Heroes of the hour were the Confederation artillery: the guns lined the ridges and pounded away on the masses of infantry below.  Some counter-battery fire from the few Russian cannons to get into action had done a lot of damage, but not enough to silence their enemies.

The cards for leaders' characteristics seemed to work well.  We found that most of the time the characteristics didn't have much influence on play, though just occasionally they made a critical moment more ... interesting!  That's as it should be.  Having the cards laid out made it easier to remember which commanders had these special rules.  It also brought a more personal touch to the game: the officers had both names and portraits (even if the pictures are technically all in Russian uniforms!)

Finally, next time I think the Confederation should take fewer brigades, but with more regiments in each one.  5 sub-commanders is really a bit too many!